space saving makeup organization

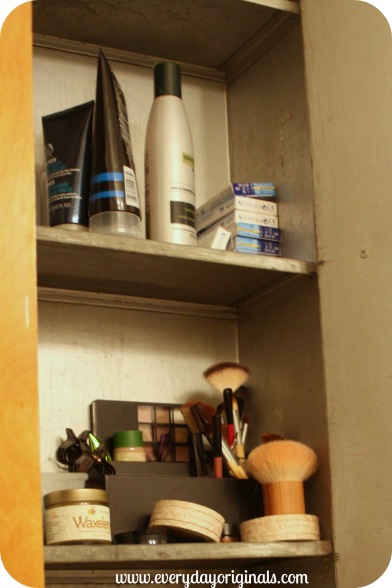
We have this built in cabinet thing in our bathroom. I’ve never seen anything like it and wouldn’t even know what to call it. But it’s fabulous with lots of storage so I’m not complaining. We each have a shelf and then there are two shared shelves with cotton balls, q-tips, etc. It’s incredibly challenging to photograph because of the angle so I couldn’t capture the whole cabinet!

makeup before

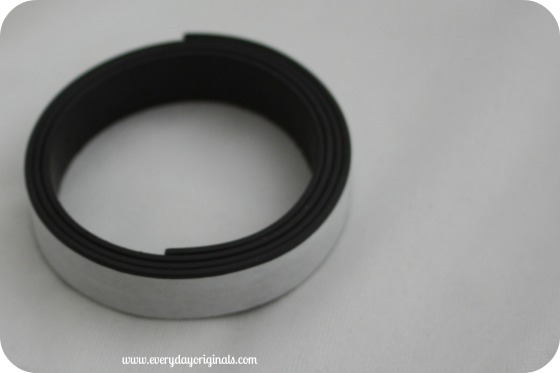
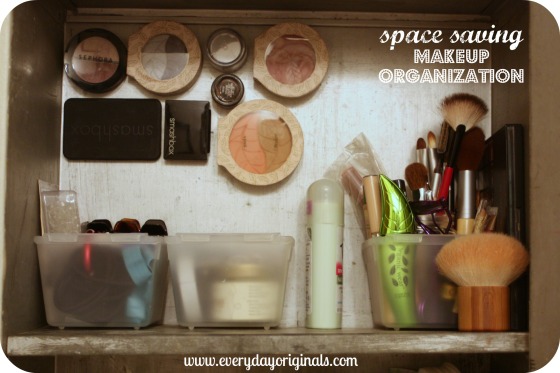
My shelf houses mostly my makeup but there was no organization to it. The simplest thing I could think of was adding magnets to the makeup and sticking them on the walls of the cabinet. So I did. I grabbed a roll of magnets at the craft store for a couple of bucks and cut them to size to fit each pieces of makeup.

magnet roll

I had a pack of three small containers from the dollar store that organized other items such as hair ties, bobby pins and other miscellaneous things. The makeup brushes are in a tiny glass jar that I had. It was the perfect size for the brushes.

final magnets

I gained so much more space and organization just by adding magnets to the pieces I could. So simple, inexpensive and beneficial!

september pinterest project {3 days late!}: travel toothbrush case

This was a project I’ve been meaning to do for a while and I just hadn’t gotten around to it. Which is funny because it took all of probably 10 minutes. My sewing machine is packed up so my mom helped by sewing it for me. Which was probably for the best because if I had sewn it, it probably would have been an hour-long project. Are you on Pinterest? Head on over and follow me!

And as per usual there are no before or during photos. I’m trying so hard to get better at that! These photos are pretty bad. I was at my parents’ house and forgot my camera. These are photos from my cell which are terrible. I just got a new phone and the camera is worse than my old phone!

You start with your supplies: 1 wash cloth and ribbon. I picked up the wash cloths for $2.99 and my mom had ribbon remnants so I used what she had. I laid out each item I’d be rolling – toothpaste, toothbrush, floss tool, extra flossers. Then I folded up the bottom of the wash cloth to make a pocket and pinned lines depending on how wide each slot needed to be.

My mom sewed the lines so that I then had a little pocket for each item. To finish it off she sewed the ribbon on one end. I made one for me and one for Al. If we used regular toothbrushes it would all fit in one, but since we use electric they’re much bulkier so I made us each one.

Then you just roll it up and tie together. The best part? No slime from tossing your toothbrush in a Ziploc bag when traveling and its completely machine washable! I wash them in one of those mesh bags so that the ribbons don’t get all caught up in the washer.

Have you been working on any Pinterest project’s lately??

organizing travel sized toiletries

Organizing travel-sized toiletries can be tricky sometimes if you don’t have the right space. They’re tiny and can get mixed in with other things and I feel like they always leak so I never want to just throw them into a container with other items.

When I found this $1 thingy at a yard sale I was psyched. I think it might be for jewelry? But it was the perfect thing for toiletries.

We have a ton of travel-sized items because I can get them for free with coupons. I’m also totally that girl who takes them from the hotel if we didn’t use them all. I mean hey, why not, they’re just going to get thrown out; at least we can use them!

So with my new organizer thing I got to work sorting them by product. Teeth items in one, shampoo, conditioner, lotion, etc.

On the backside were two huge pockets.

I used those to store some extra toothbrushes and paste and then some other miscellaneous extras that I had.

It’s so much easier to find things and the whole thing hangs neatly in a closet! I was also thinking about other uses for this particular hanging thing.

It would be great for: make up organization in the smaller pockets and hair brushes, dryer, straightener in the larger pockets; arts and crafts organization; belts or scarves; medicines and bathroom products. I could keep going, but you get the point. It’s a great way to organize just about anything!

placemat art

Have you ever thought to create some inexpensive art with a placemat? I was perusing Bed, Bath & Beyond one day and stumbled upon this placemat that I just loved. I loved the colors and the detail but I really had no need for more placemats.

I thought a little more creatively and knew the colors would match perfectly in our bedroom. I already had the correct sized frame at home so I grabbed one placemat, on clearance for $1.50 and set off to make some cheap art.

I framed it and hung it above one of the antique wall lamps in our bedroom. I love the look of it and it adds a different touch of art from the wedding photos on one of the other walls.

Problem now is that we just got a new comforter. And while we’re trying to decide if we love the comforter I’m trying to find another place for my placemat art because it does nothing but clash with the new bedding. If I do have to move it I know it’ll be perfect in our bathroom as well, so I have options!

Also, random side note. Every time I went to type placemat art it came out placemart. I couldn’t control it, my fingers just automatically typed placemart…!

my nemesis, the claw foot tub

Remember when I expressed my bitterness towards our claw foot tub here in this post?

Well, have you ever lived with a claw foot tub? And thought, “Oh, how charming?” Yeah, that’s what I thought too. So cute, so charming. Four months later, “not practical, at all” are my exact thoughts. You know it’s not practical when at 5 feet tall you can barely fit in the darn thing.

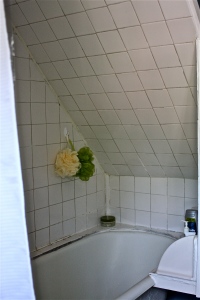
Our clawfoot tub/shower is built into the wall underneath the staircase so there’s not a lot of open space in it. Not to mention that claw foot tubs are raised quite a bit off the ground, and when you have low ceilings that makes for a problem. I think Al bumps his head every morning.

As of now it’s a hate, hate relationship between me and the tub. I’d love for it to be a love, hate relationship but there’s really just nothing about it that I’m loving. Have you had one? Do you want one? Convince me to accept the thing!

so fresh and so clean

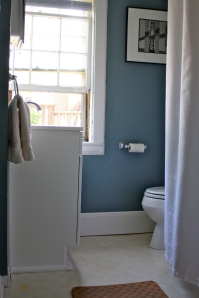
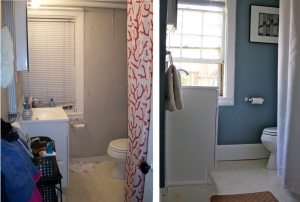
We were completely satisfied with how the bathroom turned out. The blue paint color, which was Oops Paint from Home Depot, worked out really well.

I love how it gives the room a cool, relaxing feel to it. Especially paired with the white trim and accents. Much better than those nasty, green vertical stripes.

Here’s the final cost breakdown:

1 quart of Oops Paint: $1 (Home Depot)

Light fixture above sink: $9 on sale (Home Depot)

Medicine cabinet: $9.99 (Home Depot)

Shower curtain: $9.99 (Home Goods)

Shower head: $9.99 (Home Goods)

Towel and toilet paper fixtures: $7.99 (Target)

Baskets on shelf: Owned

Cork bath mat: Owned

Bin on top of toilet: Owned

Art work: Owned

Total: $47.96 + some tax

Not bad for a complete bathroom update! We chose not to buy the best of the best since we rent and most of the things we can’t take with us when we move. The light fixture and medicine cabinet are nothing special, both are very basic. But they are mold free which makes me happy.

I have to admit, I had such a need for a clean bathroom to feel comfortable that I didn’t shop around too much for better deals of Craigslist steals. Sometimes I wish I did, but at the time I was just happy to have a clean bathroom. And we had originally budgeted $100 for the entire project so coming in at half that felt good.

Here’s one last before and after comparison:

We love knowing that it’s mold free, clean, fresh and comfortable!