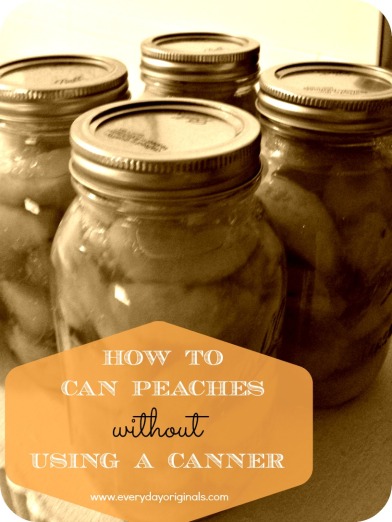
canning peaches without using a canner

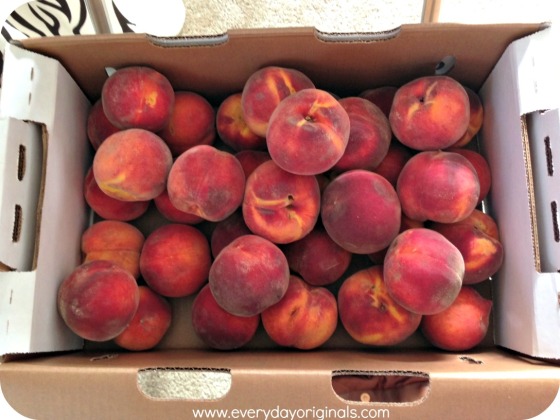
Out here in CO they don’t have u-pick farms easily accessible. Normally I enjoy a nice day of picking fruit and then canning it or making jams. I had to make do this year since there’s no u-pick, which is how I ended up with 20 pounds of peaches from the farmers market. Al’s face was hilarious when I walked up to him with my massive box of peaches.

A local (and by local I mean many hours away from the city because no, there are not peach trees IN Denver) farmer was selling imperfect peaches for half the price of perfect ones. So I scored 20 pounds of peaches for $22. Which is amazing. And the truth is many of them had absolutely nothing wrong, and the ones that did were either bruised or misshapen. Nothing that was going to poison us.

box of peaches

I don’t own a canner, but I needed to get canning right away because they were ripe and I didn’t want them to go bad.  So instead I used a huge stock pot and it actually worked out perfectly with a few small adjustments. I do own this canning kit that my sister gave me as a gift, and I will say if you plan to do a lot of canning it makes the process a whole lot easier.

final

Here’s the process I used and I’m happy to report that it was successful. Happy canning!

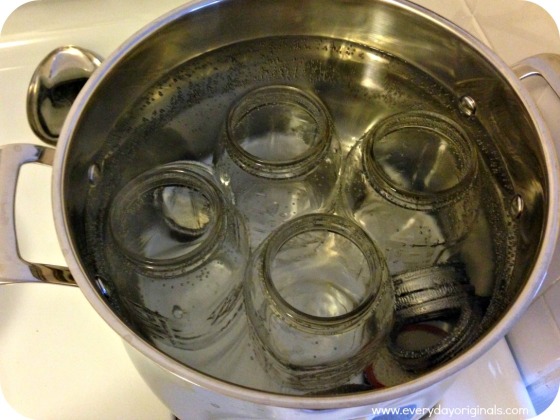
1. Wash all jars and lids with hot soapy water. Once clean, submerge in the large stock pot and boil for 10 minutes to sanitize. I’ve heard you can also do this in a dishwasher on the sanitize setting. #iwish #whatdishwasher

boiling jars

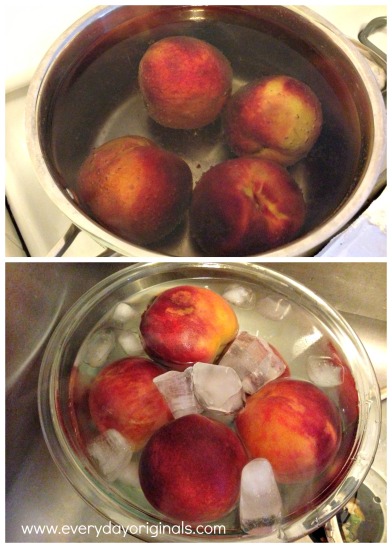
2. In a separate pot while those are boiling submerge the peaches in boiling water and let sit for 60 seconds. Remove with a slotted spoon and place peaches in a bowl of ice water to stop the cooking process. Once cooled remove the peaches and the skins will peel right off. It’s messy, but worth it.

PicMonkey Collage

3. Remove the pits and dice or slice up the peaches however you like them. I slice ours. Fill each jar with the peaches. Don’t overfill the jars but do shake them a little to fill in any open spaces. Fill the jars to about 3/4″ below the top of the jar.

skinned peaches

4. Bring 6 cups of water to a boil in a sauce pan. Add 2-3 cups of sugar (I used 2, but we don’t love super sweet fruit) to the water and stir. Lower heat to medium and continue stirring until a syrup has formed.

5. At this point you can add 1/2 tsp. of ascorbic acid to each jar to prevent browning. You could also soak the peaches (before placing in jars) in a lemon juice mixture. I can’t speak to either method as I had neither of those on hand, but I really didn’t want brown peaches. I only had lime juice. So, well, I added that. I didn’t measure, just a big squirt into the syrup. I did taste it and it was quite delicious.

6. Pour the syrup into each jar up to the bottom of the threads. With a cloth dry off the threads to ensure there’s no moisture. Secure each lid onto the jars.

7. Fill half of the large stock pot with water. When the water reaches 180 degrees carefully add the jars. Now, this is where I had to make some changes since I didn’t have a canner. I never let the water get to a vigorous boil because I didn’t want the jars to clunk around. So instead of heating the water on high I heated it on medium, which obviously took longer. I carefully lowered each jar into the pot making sure none touched each other. Once they were in there they fit quite snugly and I continued to cook the water. Make sure the water level is 2″ above the top of the jars.

8. Continue cooking over medium heat until the water comes to a boil. Again, not a vigorous one, my boil was very soft and sweet. Continue boiling for 25 minutes for quart sized jars. If you’re at high altitudes like we are add 2 minutes for every additional 1,000 feet of altitude. I boiled ours for 33 minutes.

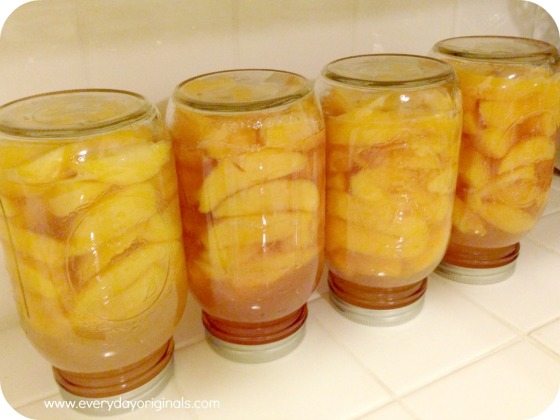
9. Carefully remove each jar and let cool for at least an hour until the jars reach room temperature. Once cooled, push down on the lid. If it pops back at you then it didn’t seal properly and you should refrigerate and eat those peaches. You can always try to re-process them but I just eat them if it doesn’t seal. If it doesn’t pop back at you then it has sealed correctly. You should go ahead and stand each jar on its lid to make sure no leaking occurs. Again if leaking occurs, eat them. If no leaking occurs they have been properly sealed and are safe for storing!

upside down peaches

10. Canned peaches will last up to 12 months; be sure to label and date each jar. Upon opening if there’s any mold or any other unidentifiable substance on the peaches, toss them.

I’ve done 4 jars already and plan to do another 8 between tonight and tomorrow. Working in such a tiny kitchen makes it challenging to do large loads at one time. I also plan to make peach jam and will share that with you guys as well. Feel free to ask me any questions. I’m no expert but I’m getting better with each time I process!

one happy island…

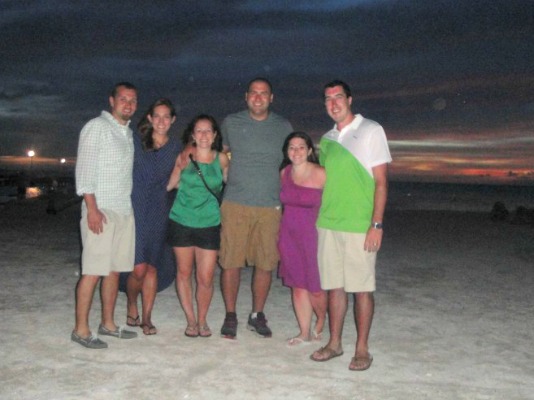
So last week we went to Aruba. And it was the most amazingly awesome vacation we’ve ever taken. We took the red-eye out of Denver to Boston where we met my sister and brother-in-law. It took everything in me not to attack them when we met at the gate. I haven’t seen them since April, Al since December.

From there we boarded our flight where us and them both had an open seat in our exit rows. So we had LOADS of space to spread out between the extra leg room and the open seat. It was awesome and a great way to kick off vacation.

The next day friends flew in and met us at the resort. For the next six glorious days we disconnected and our days went like this: beach, lazy river, dinner, casino. With a lot of drinks and food in between. It was amazing and I wouldn’t have traded that time with all those guys for anything. I wanted to share some photos to make you guys totally jealous, if you’d like to see.

Enjoy!

beach

Sometimes we’re major dorks. More like all the time…

PicMonkey Collage11

Peaceful times…

PicMonkey Collage6PicMonkey Collage4

PicMonkey Collage5

PicMonkey Collage3

Sometimes things got a little wild…

PicMonkey Collage

PicMonkey Collage7

Most of all, it was just plain awesome…

PicMonkey Collage1PicMonkey Collage10PicMonkey Collage8

tips for a successful yard sale

Yard sale’s are a LOT of work. The prep time, planning time, day of time and clean up adds up. There are a lot of ways to make it easier on you though. Most importantly are planning and organization. If you plan well and organize as you go it’ll be a lot easier on you on the day of.

A few weeks ago we had a huge yard sale at our house. It was up to just the two of us to plan, sort, advertise, prepare and organize. On the day of my dear friend Kaitlin kindly helped us. And it’s a good thing she did because there are some characters out there! Here are some of my tips for helping you to plan a successful yard sale.

PREPARATION

1. Start With Your Supplies: I started by re-using a take out food container to house all my supplies. In there I kept scissors, string, labels, tape and price stickers that I picked up for $1. I used larger labels when I need to write on them or explain the item.

2. Purge Room by Room: We started in the basement and slowly went room by room. Went through every box, bin, closet, cabinet, etc. This way everything stayed a bit more organized when contained to its own room. In the end we did a final walk through of every room again and pulled out a few more things.

{we ran out of boxes, doesn’t look it but it’s still organized. I could tell you where everything is!}

3. Price as You Go & Reasonably: As we purged room by room we stuck price stickers on everything. This way we knew everything was getting priced. It was much easier than going back, digging through boxes and trying to price each item. I hate going to a yard sale when things aren’t priced. I really believe people who price things do better overall. Mostly because customers don’t want to have to ask you a million times how much something costs. And price reasonably. I got a lot of grief about this from family (ahem, Hayley, Al, my Father in Law!!!). I probably priced things lower than needed but in my mind I just want the stuff gone. It worked in my favor, the stuff was gone!

4. Categorize & Box as You Go: We made sure to have empty boxes and bins in each room as we filtered through things. Each box had a category too. For example: sporting goods, office supplies, home decor, crafting, etc. This way when it was time to put everything out on the driveway we could easily keep like items together to make it easier for the buyer.

5. Advertise Appropriately: Signage is very important. When you make signs be sure the writing is large enough and clear so drivers can see it from across an intersection. Check with your town to make sure there are no permits needed to host a yard sale or post signs. Always, always take the signs down immediately after the sale. Craigslist is one of your best bets for advertising. It’s free and so many people scour it and plan out their yard sale route. Also check your local newspaper for ads. They might be inexpensive and another added touch for exposure.

6. Get Change: The day before make sure to go to the bank and get a bunch of small bills. I went a little overboard with the change. You probably need 1-2 rolls of quarters, $50 in singles and $50 in 5’s and 10’s. Even that is probably a lot. You’ll need other change too depending on how you priced things. We made sure to only price in quarter increments so we only had quarters to give back. It made the change situation a lot easier. People paid in dimes and nickles too so we had smaller change if needed.

7. Know Where You’ll Donate Everything: Know ahead of time where you’ll be donating all the yard sale leftovers. This way you can pack up the car and head right there.

DAY OF THE SALE

1. Tag Team: Have one person carting all the stuff out to the driveway, yard or garage and have the other unpacking boxes and setting things up. It takes a while to pull everything out and people often start showing up about 30 minutes before your start time. This is where categorizing things ahead of time works in your favor. You can quickly unload the boxes on to the tables and have all like items already together.

2. Enlist Help: We were so thankful that my friend Kaitlin came to help us. Just having another body there was huge even just for bathroom breaks, food runs, etc. My sister and brother-in-law came half way through too which was great.

3. Have One Money Person: I wore an apron and was the official money person. It was much easier having one of us in charge of the money rather than all of us. Not to say that Al and Kaitlin did sell and take money but it all filtered through my apron to make it easier. Don’t be jealous of my apron, outfit, or Al’s bathing suit that he wears even when he’s not swimming or intending to swim or our totally tired faces. We’d been up since 5am!

4. Have Paper & Bags: You should have these available for those who are purchasing breakables or many items. Makes it easier for them to take them home.

4. Be Happy: It’s overwhelming hosting a yard sale. Be happy though. People will show up early, people will be a little nutty…

{like this lady who made my sister try a bra on so she could see it…}

people will try to buy everything you have for $2. Take it all with a grain of salt. Hold your ground where needed and give in where you can. Remember, it’s stuff you were planning to get rid of anyway.

AFTER THE SALE

1. Count Your Cash! This is the most exciting part. Count up that cash and see how much you made. Hopefully you did well!

2. Pack Up Everything: Have the boxes ready to be filled. We never took anything back in the house, and you shouldn’t! We filled the boxes and loaded up the cars and drove right to the thrift store to donate them. Even the few boxes that didn’t fit, I left outside and brought the next day. Nothing comes back in!

3. Take the Signs Down: Go around and take down the signs you put up. Also delete any Craigslist postings you have up.

4. Have a BEER: Yes. You just worked your ass off. Kudos to you, now kick back and have a drink!

Hopefully this was helpful to you and will help you host a successful next yard sale. Ours was a huge success. We ended up making more than double what we had hoped to make. It was organized, ran smoothly and clean up was a cinch. The rain first thing in the morning freaked me out but it cleared up. Good luck!!

fabric painting a “free gift” overnight bag

Earlier this spring I had ordered a bunch of swim suits from Victoria’s Secret. With purchase I received this great duffel bag that was free. Well, when none of the suits fit I called up VS to see if I should also send back the free gift. They said nope, mine to keep. I won’t lie, I was a tad psyched because it was the perfect size bag for 1-2 overnights.

But, I hate advertising brands so I couldn’t stand that in giant capital letters it said “Victoria’s Secret” straight across it. Then I got to thinking about this library book bag I made with the three-year old I nanny for (the middle says her name). We used some fabric paint that we picked up at the craft store.

There was still leftover paint from it so using painters tape I taped off the words on my free bag and started painting.

I think it took three coats of paint and you can still see the silhouette a tad of the letters. For a quick fix though, it was perfectly fine. I could have stuffed the bag to prevent the wrinkles, but let’s keep it real here. You know this bag is shoved in a closet when not in use.

This project was totally free (well, except for the 5 bucks in return shipping I paid to VS to return the suits). If I have time in the next few weeks I’m might grab a darker color fabric paint and paint it again to see if it covers a little better. Not bad for a free overnight bag!

summer reading update

Back in June I shared my reading list for this summer.   So far, I’ve made it through four that were in that original post and one that I found along the way. Here are a few quick reviews. Once I finish the book I’m reading now I’ll be switching over to my brand new Kindle that Al got me for my birthday!

Socialnomics – I had noted that I’d read it a few summers ago. Still good as ever. A great read for those interested in the ins and outs of social media. How it works, how businesses use it and how it has really changed how we do business, connect with each other and live our lives.

Fed Up With Lunch – This was a great summer, beach read. It was incredibly fast reading and the content was very interesting, if you’re interested in this type of topic. The book did a wonderful job of outlining food guidelines in schools, ingredients in school lunches and raised the question of WHY the government allows our precious growing children to be served this horrific quality of “food.” It was actually quite repulsive, but how are we going to fix the problem if we aren’t educated about it?

Stiltsville – I really loved this. It was a sweet story, a love story (but not a mushy one) that spanned over about 30 years. It’s main focus was how this couple made it through the ups and downs of life, how they leaned on each other in hard times and easy and how they managed until the end. It was a great portrayal of how life isn’t always easy, especially with a soul mate by your side. But, if you truly love that person than you work together through thick and thin. I accidentally checked out the large print version. I hope that never happens again. Holy LARGE PRINT.

Half Broke Horses – My friend who recommended this one was right on about it. Such a great, fun, and even educational read with bits of humor too. I couldn’t put it down. It chronicles the life of a young girl all the way through adulthood and her journeys in between.

Have you guys been reading anything good this summer?? I’m always taking recommendations!

a broken computer, a birthday, and an amazing story

Well. Hello, 9 days later. My computer had a minor meltdown and Apple had to hold it to get it fixed up. Back up and running now! We’ve been quite busy this summer with weekends booked up back to back to back to back basically for 4 months. So I’m playing a little bit of catch up now.

Last week I turned 27. No clue when that happened, last time I checked I was like 19. I was totally spoiled with fun gifts including a Kindle, Breville Kettle, cute camera strap for my DSLR, gift cards, a new wallet and more.

I’m excited for this next year, life is good and it’s going to be a great one. If you recall I posted this post last year on my birthday in 2011. At the end of the post I talk about when the time is right I’ll share where I had been the weekend of my birthday.

We’ll, I’m so excited to share this remarkable story with you all. I ended the post from last year with this: “It’s an amazing story of courage, commitment, dedication and love. But most of all, of friendship. And that when a friend needs you, you’re there for them, without thinking twice, without thinking of yourself, without hesitation.”

Stay tuned, I have another post in the works to share today!

color running

This past weekend Hayley, Seth, Al and I took part in New England’s Color Run. It’s a fun 5K (3.1 miles) where you get this colored cornstarch substance thrown on you at every kilometer. Each stop was a different color so by the end you’re a giant rainbow. Not everyone’s idea of a good time but we had a blast!

The Color Run is taking place all over the country and each one supports a different local charity. The New England run supported Homes for Our Troops. At the end was a big party with a whole lot of colorful people. There was music, food, drinks, beer and color.

I knew one day I’d turn them three into runners!

Before…

After!

sangria popsicles

Last week at my sister’s bridal shower we served white peach sangria and a champagne punch. Both were absolutely delicious in my opinion. After the party though there was SO much fruit left over from the sangria. Being the cheap frugal brilliant person I am I scooped out all the fruit and brought it home.

That night…wait, no. I had too much to drink that night. The next morning in a few batches I poured the fruit mixture into the blender. Blended until it was smooth.

I then poured it into different popsicle molds and an ice cube tray. I stuck the sticks in and popped them in the freezer. Even after all these pops there was still a lot left.

So for the next few days we drank evening smoothies that had a kick to them. The popsicles are so refreshing at the end of the day. And I can assure you we aren’t getting drunk on sangria pops. It’s a great solution to the leftover fruit though. Fruit’s expensive and pops are delicious. BAM, problem solved.

a trip to the windy city…

…that actually wasn’t windy at all! I spent four full days with my dear friend Emily in Chicago. She moved there about a year ago and I couldn’t wait to come visit. It was also nice to get away for a few days, relax, unwind, disconnect and catch up together. While there I got to see my niece too, such a nice treat! Here are a few photos from my trip. Enjoy..

our watering can rain barrel

This project is hilarious to me. This is what happens when you leave Al alone for a few hours! We’ve been needing a watering can (we usually use the blender container to water plants) and I’ve been wanting a rain barrel. I’ve been too cheap to purchase the rain barrel or to make one and frankly, I’ve been lazy and haven’t gotten around to getting a watering can.

On a recent weekend trip we had bought one of these jugs of water. There was about a quarter left of it so we took it home with us. Once we drank the water Al went to town. Using some screen that he found in the basement he created a watering can rain barrel.

It’s super simple. He cut out a few holes on the top and then cut the screen pieces to fit. He hot glued the screen pieces on and let them dry.

Now we just place it amongst our garden. When it rains it collects water, if it hasn’t rained we easily fill it up in the kitchen sink (we don’t have a spigot outside the house) and use the spout to go around and water the plants.

Is it the eyesore of the garden? Potentially. Was it free and serves the purpose it needs? Certainly does. That Al, I’ll tell ya, he solves all the problems around here!