simple drawer lining

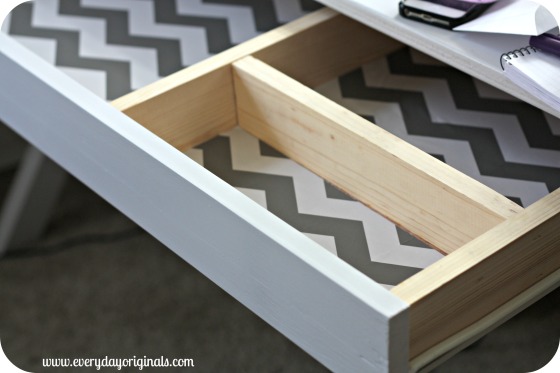
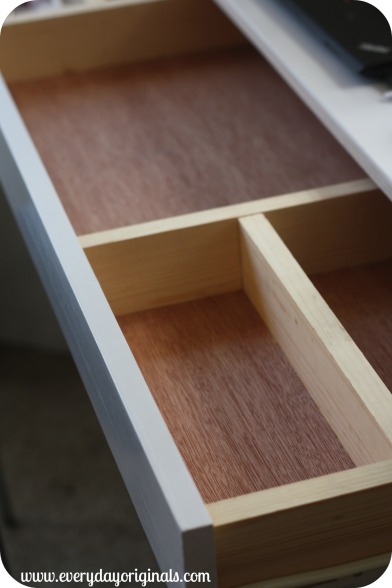
I know I haven’t shared our full desk with you guys yet, that’s to come, but I wanted to show you how simple it is to line a draw and how much of a difference it makes. Our friend custom-made this desk for us and it has this huge, awesome, drawer that he even added dividers to. The wood on the bottom of the drawer was just raw wood (we didn’t bother to paint IN the drawer as you can tell by the raw dividers).

raw drawers

I had leftover contact paper from this project – and you just wait, it shows up again in another project down the line (can’t. ever. waste.) – so I used it to line the drawers. I simply measured, cut and stuck them in the drawers. The original two rolls of contact paper cost me $5.99 and I’ve certainly used all if it so I’d say it was a good purchase.

final

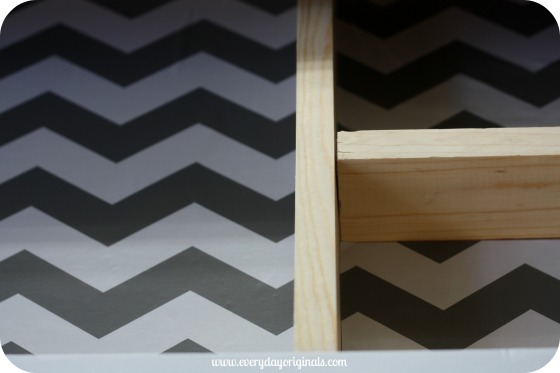
Now I’ll admit, I’m not usually one to bother painting or lining drawers, but we open and close this one a million times a day and it lives in our living room so I like the added touch to it. That’s it, 5 minutes and I was done!

close up

Do you guys line drawers? I guess it really depends on the use for me. I did line these drawers way back when…

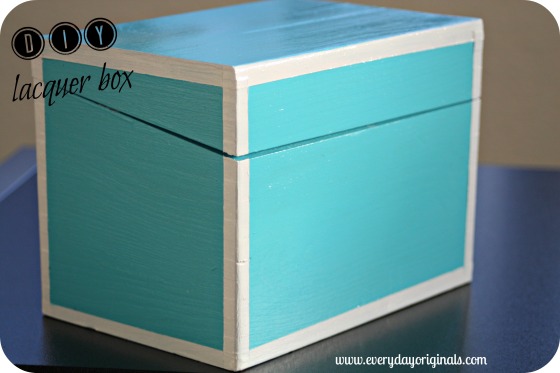
diy lacquer box

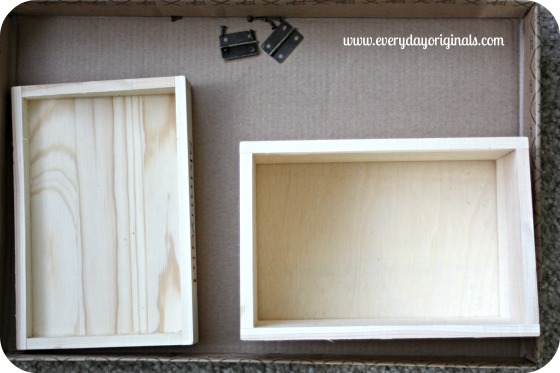
Wow it’s been one heck of a week. Between traveling, the events in Boston, work life and regular life I was beat last week. Back at it though! I had found this box way back when at a thrift store for a few bucks.

wood box

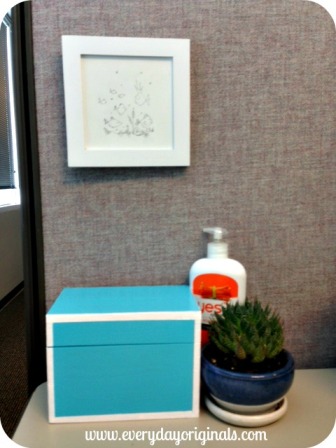
Originally I had plans for it to live on the desk in our apartment, but then I decided since I live in a grey box at work it would be nice to add a little color. So, I ditched the black plastic office supply holder thing and I use this now instead.

I started with two colors of high gloss Martha Stewart acrylic paint. I also picked up a bottle of the high gloss clear to give it a final coat. I removed the hardware and painted the entire box the teal color. It took three coats to get it fully and evenly covered.

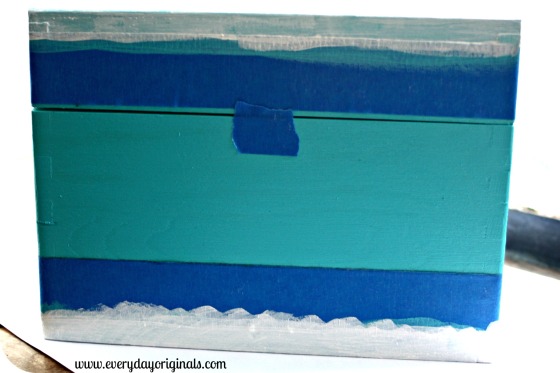
Then using my blue painters tape I taped off where I wanted the white lines to be. The trick to preventing the white paint from bleeding is to tape off the lines, and then paint over the edges with the main color. In my case that was the teal color. I let that dry fully and then with a fine tipped brush I painted on the white. I don’t remember exactly but it took me somewhere around 4-5 coats of the white to fully cover the teal.

tape lines

I let dry fully in between every coat of paint. Because of that this project actually took a good part of two days. But it was so easy to do and simple to paint a coat and do something else. Some of the coats of paint dried for 20 minutes, some dried for 2 hours. I would just add another coat when I thought of it.

diy lacquer box

After the entire thing was dry, I carefully peeled back the tape. There were definitely a few spots I needed to touch up. I did so with a very fine tip brush so I could be very precise. After that I added three coasts of the high gloss clear paint.

desk

And that was it! It now houses my post it notes, pens, etc. and keeps my desk area clutter free.

reader project: paint chip calendar

I love this idea for a calendar. It’s great because you can choose whatever colors you’d like, match any decor you want, and it’s super easy because you just wipe off each month and start fresh the next. I love that.

I saw a friend post this on Facebook and I loved it. She said I could share it with you guys. Maybe you’ll get some inspiration to make one yourselves. I’m definitely going to make one once I figure out the decor and colors of our kitchen area. It’s really simple.

You choose the paint chips you want and a picture frame large enough to hold them all. I would look for a thrifted frame and paint it or use a craft store coupon (you can find them on all of their websites…never shop at a craft store without one!) to get a good deal on a new one, or maybe you have one lying around already.

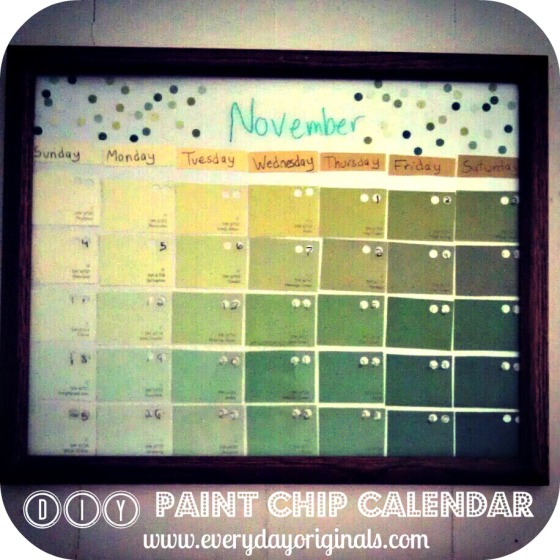
paint chip calendar

You can simply tape or glue the paint chips in whatever order you’d like. In this particular one Katie also hole punched each paint chip and then used the punched out hole pieces to look like confetti at the top. So cute!

You can design it however you’d like to personalize it to your taste. Then, using a dry erase marker you simply write in the days of the week at the top and the dates on each square. At the end of the month, wipe it clean and start over!

I can’t wait to make one for our apartment. Have any of you guys made paint chip calendars? Maybe thought about it? Still like your flip-the-page-calendar-with-random-cats-or-dogs-or-landscape? Whatever you fancy!

reusing shoe boxes

I love to organize. That’s nothing new and nothing you didn’t already know. What I don’t like is spending money on pricey bins, baskets and containers. If I’m going to spend money on them I try to only buy them if they’re going to be seen or they have some functionality that is convenient to us.

Pretty much though, behind closed doors, I try to reuse shoe boxes for most organizing. They’re the perfect size and are typically pretty sturdy cardboard.

I use them in the freezer to organize foods. Vegetables in one, fruits in the other. I use them in the bathroom cabinet.

First aid supplies in one, medicines and miscellaneous items in the other.

I use them in closets to corral extra toiletries and travel sizes items.

Shoe boxes are also great sized boxes to wrap gifts in. Of course, take out the paper and that stay fresh packet thing first. I’ve also found a great Pinterest Project, that involves shoe boxes, that I hope to work on soon.

Overall they’re great for a lot of things other than storing shoes. I’d love to know if you use shoe boxes for anything. Storage? Organizing? Wrapping?

completed corner office space

I finalllllly have a completed office corner! Though, nothing is ever really complete around here because I’m always changing things. I’m psyched that it’s functional and organized and all mine.

We have two bedrooms, we sleep in one, obviously, and the other we’ve made into an office and workout room. Al has one corner with a desk and I have one corner and the rest is the workout space. I’ve been slowly putting my space together with the cork board, lamp makeover, clock and wall baskets.

Here it is!

Yes, I do sit on a ball chair so I left it in the photos. I know the whole thing would look so much cuter with a nice chair but the ball is comfy and helps my posture and core strength!

There are a lot of different colors going on, but I love the mix of colors with the loads of whites and neutrals. I used a bookshelf that we already owned and filled it with photo storage boxes. They’re filled with office supplies, paints, manuals, ribbon, etc., not photos.

My wall bins are perfect for my file folders and notebooks that I use on a regular basis.

Under the desk I used two small hooks to corral the wires. I screwed them into the wall up near the edge of the desk so you can’t see them at all, unless of course you’re under the desk photographing them.

I had everything in the photo below except the light teal colored trays. Those are from the Martha Stewart line for Avery from Staples. I love everything in her Avery line. The trays were the perfect things to collect the odds and ends on the desk.

The desk is two Ikea tables that we cornered together. I had one for the longest time, bought on Craigslist, and it just wasn’t enough space. So for Christmas Al trekked down to Ikea to get me another table. He lucked out big time and got one in the AS IS section for super cheap. It allows me a lot more space to work, write, do projects or crafts. I can easily slide the table against the window out further to provide more space too.

I’m completely pleased with the space. It’s simple, organized, clean lines, no clutter, neutral and colorful. The only things purchased new were the wall baskets, picture frame, photos boxes, one table and teal trays. I bought used, the other table, lamp, clock and bulletin board. Everything else I already had. I love coming up here to work now because it’s a cozy place where I can be productive. Have you guys been working on any office spaces lately?

recent finds and projects…

I’ve been in the middle of working on a few random, small projects here and there. Many of them involve paint though, so my operation was halted this weekend when it was 20 degrees and way too cold to paint outside. When it’s too cold or too hot outside you risk the paint not drying properly and evenly. So, I’m hoping today or tomorrow is a little warmer so I can get some painting done.

In the meantime though, thought I’d share what I’m working on. First, my favorite is this $6 lamp I picked up at the thrift store.

I’ve been hunting for a lamp for my desk for a while now and this one was perfect. I loved the detail and the curves of the base. Though, I think it was most definitely straight out of an 8-year-old boys room and it had a baseball themed lampshade or something. So I’ll be making that over with a nice coat of paint. It came shadeless so I set out to find one. I eye spied this one in Target and it was on clearance for just $5.08. (Forgot to take the plastic off the shade. It won’t normally reflect/shine like that!)

I think it was on clearance because the base was missing from it. It was the exact shape and size I was looking for. I haven’t decided yet if I’m going to keep it navy blue or jazz it up.

I’ve also been back working on this chair. We went back and forth on fabric and colors for the longest time and finally found something that works great with the rest of the living room. Here’s a sneak peek of what we chose…

Not my typical choice of fabric but I’m loving how it’s looking on the chair.

And in other fun find news, we scored this amazing antique side table at Goodwill for $6.99!

Al spotted it and it was perfect for right next to our new couch…!

We decided to sell the other couch we had (for more money than we bought it for!) because it just fell too large in the room. We picked this one up at the Jordan’s Clearance center. It’s so much more comfortable, fits better in the space and allows room for a side table, which we couldn’t fit with the other couch.

So, that’s my weekend update. Hopefully I can get some painting in soon!

office accessories

As I continue to work (very slowly) on getting my office space together I thought I’d share a few accessories I recently added. My office space is definitely the project on the back burner. It’s not getting much attention because there are other, more important things to do first!

I’d been on the hunt for some wall bins that could hold loose papers and folders for a while. I knew I didn’t want something from the office store that looked like it was straight out of a cubicle. But, the cuter versions were pricey. I stumbled upon these bins at TJ Maxx and I loved them.

They were still more than I wanted to spend, but for $9.99 each I figured I’d get over it.

I love how they don’t look like bins to hold folders. And I love how you can see through them enough to see the colorful folders.

The other small project was this clock that I found over the summer at the Brimfield Fair.

I taped it up really well and gave it some color. Excuse the ridiculous, blurry photo…on the stove?

I sprayed it the same color I painted my burlap bulletin board, Pimento.

I love the way it turned out and it gives a great pop to the bright white desk I work on.

Hopefully I’ll have this entire office space done by Christmas. I can hope, right?!

burlap bulletin board

I was off from work last week so I took some time to relax, see friends, do projects around the house and relax. I’m back with my burlap bulletin board that I’ve been wanting to make for quite some time.

Back in June I visited a friend in Barrington, RI and she took me to this fabulous consignment shop. I found this wooden frame for about $2 and I knew it’d be perfect for my bulletin board project. I already had burlap and found a cork board for $2 at a thrift store. Trimmed in such a lovely lace ribbon.

I decided on a Krylon spray paint called “Pimento” to accent my office space with. I gave the wood frame three even coats of spray paint and allowed it proper time to dry.

While it was drying I cut out the cork board from the metal frame.

I wrapped the cork board in burlap and then secured it into the wood frame.

Using both my hot glue gun and staple gun I got the whole thing rigged together.

I hung it on the wall above my desk and I love it. It’s the perfect size for my small desk and I LOVE the color of it. It’s pretty boring to just photograph a bulletin board on a bare wall, so there’s a close up of the color and detail below.

I’m slowly making progress on my office space so stay tuned for more small space organizing tips. Do you have any great office organizing tips to share? Something that works for you? Something that doesn’t?

dual bedroom makeovers

As a Christmas gift to my parents this past holiday, Al and I decided to organize and give purpose to two bedrooms in their house. One was once mine and one was my sisters. Since we’ve both moved out, the two rooms have attempted to have purposes, but have both ended up being more of storage rooms with a bed that you can kind of see and a pathway to the computer desk. They were traveling the weekend before Christmas so it was the perfect time to get the rooms re-done right before the holidays.

We had decided that since we only had two days to complete the project we wouldn’t paint the walls, we had to just work with what was already there. Here are the before pictures.

Hayley’s room before:

My room before:

SO, we had some work to do and truthfully, most of the work was just finding a place for everything. Hayley’s room was still decorated from when she was living there and half of her belongings were still there too. We went through and categorized her things as toss, donate and sell (with her permission, of course). Once we did that her room was a lot easier to work with. We cleared everything out and had a clean slate. We turned her room into a true guest bedroom (not just a room with a bed!).

This was the outcome:

A neat, orderly place for guests to stay. There are also a few storage cubes in the closet, as well as board game and clothing storage.

As for my room, the biggest problem was that there were crafting and scrapbooking supplies everywhere. They just needed a home that was easily accessible. Well, there were other problems too but we got them all figured out! This room needed to serve a bunch of purposes: office area, craft storage, golf storage, workout room and sitting room (Dad sometimes likes to watch TV in here when he’s not in a Dancing with the Stars kinda mood). Here’s how we made it happen:

I’d say we did a halfway decent job of allowing this room to have numerous purposes. In the closet (which I forgot to take a photo of and am very annoyed at myself) lives the craft storage and golf storage. It’s very organized and easy to access. You can also see the treadmill in the corner of the first photo. It fits well in the room and isn’t smack in the middle.

Here are the cost breakdowns of each room:

Guest bedroom:

Day bed frame and trundle (we already had the mattresses): $100 (Craigslist)

Pillow cases and 2 toss pillows: $13.99 (outlet store)

Closet curtain: $4.99 (thrift store)

Wall hangings: $9.99 (some from thrift store, some from craft store)

Guest towels: $12.99 (Kohl’s)

Everything else: FREE. It was either already in the room or in my parents’ house somewhere.

Total: $141.96

Office/workout/sitting room:

Closet curtains: $7.98 (thrift store)

Calendar: $6.00 (office store)

Coat rack: $9.99 (Christmas Tree Shop)

Everything else: FREE

Total: $23.97

For a grand total of $165.93. So we we’re able to convert both rooms for under $200 which was my original goal. Al and I were totally pleased with the outcomes and so were my Mom and Dad. There were some things we would have done differently, if we had more time or money, but for what we were working with we love it.

Do you have any tips/advice? Any things you would have done differently if you were us? Definitely share, we’re always looking for new ideas!
window frame cork board

I’ve been wanting to try out a project using an old window and wine corks for awhile now. I just didn’t know I’d use them together. I found this window at an antique store in Onset, MA for $3. It was terribly filthy so I gave it a nice wash and sanded some spots that needed it.

I used leftover fabric I had and stapled it onto the back so that the yellow shows through.


Using wine corks that I’ve collected and that my sister and parents have, I started playing around with some layouts. Once I found the one I liked best I got to work hot gluing them into place.

This was a really easy project and is perfect for our kitchen. We use the glass panes as a white board for notes and shopping lists. I didn’t have enough corks to complete the middle glass pane at the top but I’ve heard mixed reviews from people. Some say they like it glass, some say cover it with corks. Thoughts?

In due time, when I finish decorating the bare wall it’s hanging on, I’ll share photos of the complete display. For now though, it’s successfully serving it’s purpose!