diy home state t-shirt

I had been seeing these home state tee shirts all over the place. Online, Pinterest, in stores, etc. I took one look and thought that there must be a way to DIY one. So I did. I decided to outline the steps below to make it easier to follow. It was actually quite simple, took a lot of focus, but overall was simple.

Supplies: cotton t-shirt (mine was one I already had, it was one of the vintage tees from Old Navy), fabric paint, small paintbrush, Ziploc bag, iron, ironing surface

1. Find an outline of the state you which to use. I forget how I found mine, I think I either googled it or used clip art.

2. Open the image in a word doc and using a text box add the word home using whatever font you’d like. I then printed mine in three different sizes to see which I liked best against the shirt.

3. Turn your iron to medium heat, no steam. Cut your Ziploc bag on both sides but do not cut the bottom of the bag. You should have a long rectangle once the sides are cut. On your ironing surface place the Ziploc bag down flat and place the state print out directly on top. If the plastic bag is larger than the print out I suggest trimming the sides of it so they’re both the same size. Otherwise you risk burning some of the bag to your iron and that’s a pain to clean.

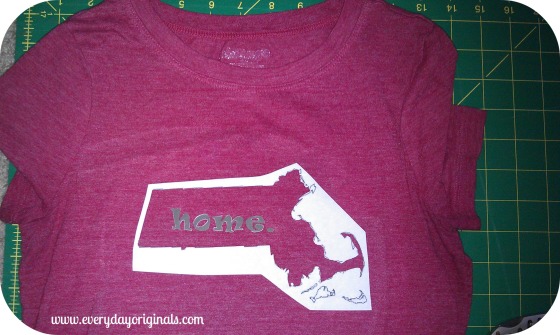
iron

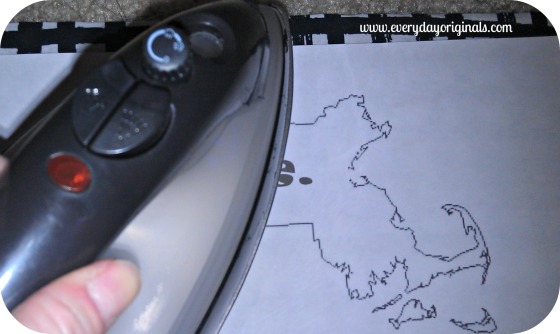
4. Gently iron over the paper, back and forth, until the plastic bag has melted entirely to the sheet of paper. Shouldn’t take more than a minute but he sure to never hold the iron in place. Ya know, kind of the same deal when you iron your clothes.

5. The sheet of paper should gently pull off of the ironing surface (I used a piece of scrap fabric because we don’t have an ironing board). Using very fine tip scissors or a razor blade, well, actually I should re-phrase. If your state is Massachusetts and there are nine thousand nooks and crannies to cut around you’ll want some fine tip scissors. If your home state happens to be Colorado cut away with anything, four nearly even sides is a piece of cake. Okay, back to the cutting. Gently cut out the inside of the state so that you end up with the outline of it. I didn’t cut out the Vineyard and Nantucket. Sorry if that offends anyone.

ironed on shirt

6. Once you’ve cut the inside out you can now cut out each of your letters. Once all are cut out select the placement on the t-shirt for where you’d like the state outline to be. With your iron still on medium heat iron over it so that it’ll adhere to the t-shirt. Do the same with the letters, one letter at a time. I found that there was more control over the placement of the letters when I did them one at a time.

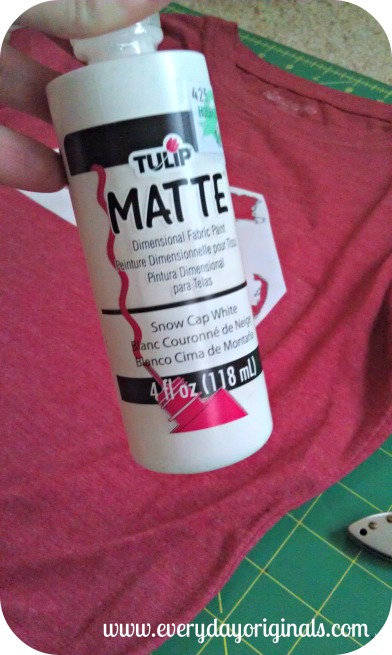
paint

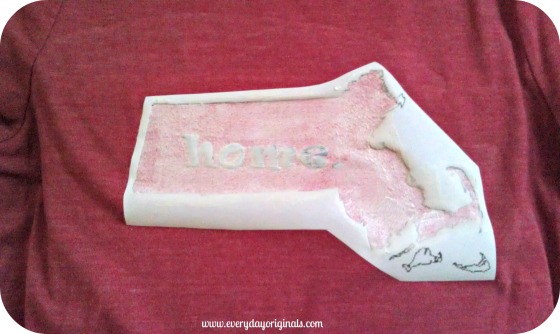
7. Paint! First be sure to put either a paper bag or piece of cardboard inside the shirt so the paint doesn’t run through. Using your fabric paint being to gently fill in the outline being careful around the edges as you don’t want the paint to bleed under the template. Around the edges of both the letters and the state outline I tried to only paint with the edge, not against it. Follow the instructions on the fabric paint bottle as far as dry time and additional coats. You can do as many coats as you’d like, mine ended up being three. I like that some of the red is still visible through the paint.

painted shirt

8. My fabric paint said to wait three days to wash it. I actually waited five because I didn’t have enough laundry to do on day three! It washes and dries just like any ordinary t-shirt.

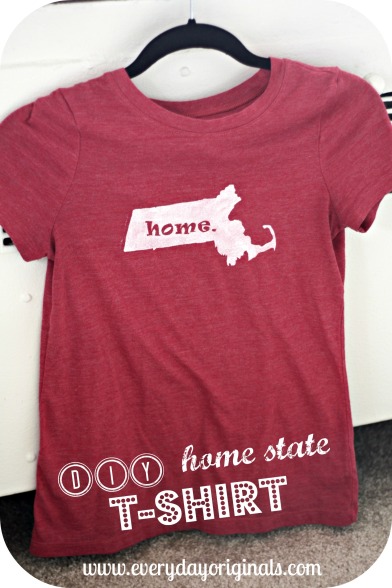
final

I love the way it came out. This was one of those projects that I didn’t get too excited for because I wasn’t sure how hard it would be and if the results would be great or not. It’s a hit or miss project and in the end I was psyched about it! It’s my favorite weekend tee and I wear my home state proud!

july pinterest project: diy colored jeans

I know, I know, July Pinterest project is 17 days late. Better late than never though, right? Colored jeans are all the rage these days and there’s been a lot of pinning of DIY colored jeans so I decided to try it out.

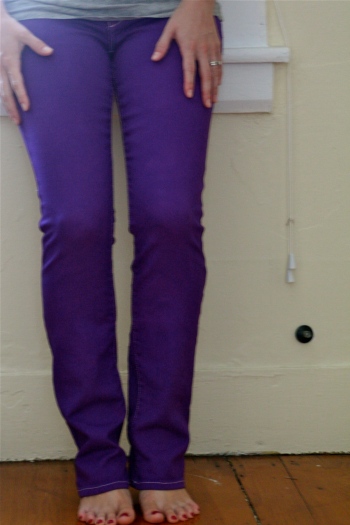
I had one pair of jeans that I was thisclose to donating. They were about 5 years old and the knees were so worn out that they were white (the picture makes them look better than they actually did!). It’s just really hard to find good jeans that fit when your short. So, I decided not to thrown them out and to bleach them and dye them.

But, I also had found a perfectly fitting pair of white jeans at a thrift store that I was gonna try it out on too. That was a once in a lifetime experience, finding a perfect fitting pair of jeans at a thrift store. Does. Not. Happen.

I got to work. Now, I hate bleach. This was the first time I had ever used it and it will probably be my last. I simply bleached the jeans in a 3:1 ratio of water and bleach. I think mine was 12 cups water and 4 cups bleach. After two hours nothing happened. So I poured about 3 more cups of bleach into the bucket and instantly started seeing results. This part is totally a trial and error depending on the darkness of the pants you’re bleaching.

Occasionally I stirred the whole mixture with a wooden spoon that I threw away (don’t use your stirring utensil again, trash it!) once I was done. Just to make sure it was bleaching nice and even.

Now, from here is where I started with the white jeans, because those didn’t need to be bleached. I tried out a few different brands/types of dye.

First, I tried dying the purple jeans with powdered Tulip Dye in a bucket and letting them soak. It came out totally uneven though. So the second time around, I used iDye (a new product on the market) in the washing machine. This worked perfectly. It was SO easy and they came out perfectly even and vibrant.

The wine colored ones I used liquid Rit Dye in the washing machine. The color came out very well but the process was too tedious for me. You had to boil water, soak the dye, add salt, let it sit and strategically pour it into the detergent drawer. Also, the color looks nothing like the sample below, it came out more pink.

For all dye jobs I simply followed the instructions on the packages.

I attempted a teal color with the jeans I bleached. Well, after I bleached them I guess I was a little excited.

I didn’t inspect them and just went ahead and dyed them. Turns out, there were dark magenta marks all over the back of the jeans. As if I marker went through the wash with them. You couldn’t see them when the jeans were dark blue but they were totally noticeable in the teal color. So that’s when I re-dyed them the wine color.

The end result was a nice rich purple color and a kind of blah pinkish color. And, as you’ll see in the photo, the pink ones totally lost their elasticity and the button burnt right off of them from the bleach.

So, in the end I donated the pink pair. Maybe they’ll fit someone else who knows how to replace the button? The purple though, I love them!

Maybe if I luck out and find another pair of white jeans I’ll dye them the teal color!

Here was the cost break down:

Jeans: $0 (had them)

White Jeans: $7.99 (thrift store)

Bleach: $2.49

Total cost of 4 packs of dye: $9.56 (I used coupons)

Total = $20.04/ $10.02 per pair of jeans. But I only really got one pair out of it, 20 bucks though, still a bargain. And if I had to do it again I’m a pro now so I wouldn’t bust through four packs of dye!

Good luck if you try it out. The best part (obviously) was the outcome, a little tedious playing the waiting game. I’ve never watched the washing machine so much in my life before!

march pinterest project: hemming your own pants

I made it, just in the nick of time with my March Pinterest project. There’s no reason why I didn’t do this sooner, I’ve known since March 1 that this was going to be my project and my pants have been piled up since then too.

I decided to attack hemming my own pants. I mean at 5 feet tall it’s no surprise that pretty much all of my pants since I was like 14 have needed hemming. My mom used to hem them for me, she’s a pro with the sewing machine. I’ve also had seamstresses hem them at $10-15 a pop.

I figured why not give it a shot. I found this tutorial through Pinterest and followed it exactly. Except for that they make it seem really easy and when you’re sewing machine challenged like myself, it wasn’t that easy.

I have three pairs of pants that need hemming. As of writing this post I’ve completed one hem, on one pant leg, on one pair. Not bad! I mean yes, I thought I would have been further along, but I’ve got time. Why rush? My attention to detail is pretty extreme so I’m probably the slowest sewer in the world. The faster I push that pedal the more out of control things get.

I started by trying on the pants with the pair of shoes I’d most likely be wearing them with (heels, flats, etc.). I pinned them up and got to sewing. It was incredibly easy to follow along the line of the original hem. I actually thought it was going to be tougher and that I’d keep bumping into the hem, but it instead worked more as a guide.

After I completed the whole circle I folded them back down, inspected it and celebrated. They were straight, with no mess ups and actually still looked like jeans!

I’ve yet to pull the iron out, I’ll do that when I’m done with them all. I threw on a pair of shoes, which these are clearly heels jeans, but the flats were the closest thing to me. No need to exert too much energy looking for the right shoes.

Not too bad! Have you guys hemmed your own jeans? Oh, what’s that? You’re strikingly perfect at 5′ 7″? Well, I’d kick your butt doing the limbo. Okay I’m done now. Have a great weekend!

pinterest project: diy infinity scarf

Are you guys on Pinterest? I know some of you are because we follow each other. Quick recap for those who don’t know about it – it’s a massive online bulletin board where each user has their own pin boards. Anything you see or find on the web can be “pinned” to your board. There are bajillions of ideas and inspiration for pretty much everything on Pinterest. You can find recipes, crafts, workouts, fashion, etc., etc. I’m a little obsessed to say the least.

I thought I’d jump on the blog bandwagon of starting to implement my pins. Lots of others in the blogosphere have been posting about things they’ve made, inspired by Pinterest. So, here’s my first one.

The simplest DIY infinity scarf ever. Basically you take any scarf you already have that has tassels on the ends. If you don’t have one already, scarves are on super sale pretty much everywhere this time of year.

Fold the scarf in half so that the tassels on both ends line up perfectly. I did this on a long table so that I could make sure they were lined up correctly.

Then go ahead and tie the tassels together that match up with each other. I tied them in double knots. You’d probably be fine with one knot, but I’m this crazy, must have double knots always, type of person. Al teases me because I still double knot my sneakers. Like a kindergartener, who doesn’t want her shoes to come untied at school because she doesn’t know how to re-tie them. Yes, that’s me. Anyway, back to the scarf.

Once you have all of the tassels tied together you should have one large circle of a scarf.

Go ahead and cut the long tassels very close to the knots. Not so close that they come undone though.

When you put it around your neck put the knots in the back; they’ll be covered when you wrap it around. Wrap it around once or twice depending on how long it is. I hung mine on my neck and then twisted it a few times before looping it over my head again. It helped it to stay a little tighter.

Voila! An easy, inexpensive infinity scarf! Are you guys making any Pinterest projects these days??

one perfectly functional camera bag

These and these are both really cute, really expensive camera bags. Tons of different styles on both sites and they’re all great. But, it’s not in the budget right now for me to get a new camera bag just for the heck of it. I have two perfectly good ones, but I love the idea of being able to use this as my camera and my purse.

For weeks I had been scouring through consignment and thrift stores. And then I found this:

And it cost me:

It was the perfect size and the straps were long enough that they would be comfortable on my shoulder with all the weight in it.

The first thing I needed to do was figure out a way to cushion the inside so that my camera had a nice soft surrounding. After I chose the fabric that I wanted it lined with I started looking around for what else I could use as cushion before resorting to buying something. Turns out we had about two extra yards of orange fabric from Al’s 2009 Halloween costume that I have been dying to either use or get rid of.

The orange fabric was a heavy-duty, soft lined cotton, and clearly, was just what I needed.

Inside the bag I measured the height, width and depth of each side and cut pieces to size of the pretty fabric and the solid orange.

I had 4 layers of the orange fabric and one of the decorative. I sewed all of the pieces together to make a cushion that fit perfectly into the bag. I also sewed two strips of velcro onto the decorative fabric on each of the long sides of the bag.

I then hand sewed the insert to the lining of the bag. You can see how the zipper pocket that was already in the bag is still usable.

I removed the camera dividers from one of my other camera bags. Since they already had the velcro on them I simply had to place them into the bag and arrange them how I wanted against the velcro I sewed in on the sides. Final product: a functional, camera bag that holds all of my regular purse items too. Items that are in the bag: wallet, cell phone, small makeup bag, camera with lens, telephoto lens, battery charger, lens cleaner, small notebook, pen, small point and shoot camera and USB cord.

Here it is all closed up and ready to go:

All for a grand total of $5.49. I love it. Love, love, love it. I used it last weekend for my brother-in-laws graduation celebration in Boston and it was perfect. Not too big, not too small. You can also see in the photo that I have an extra divider in there, just in case I ever need to rearrange. It’s perfect, and for the time being makes me feel great about not spending a whole lot more on it!

simple storage for purses and handbags

Lately I’ve been struggling with storage for my purses and they’re just taking up way too much space shoved on the shelf in my closet. Since we moved in there has been an unfinished, boring and plain set of hooks in our hall closet (basically hanging from the ceiling they were so high, so not real practical). I’ve looked at it for the past 15 months and continue to think how I should really do something with it. Well, this weekend I did.

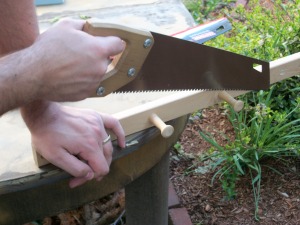
The pegs wouldn’t come out by hand so Al sawed them off. I covered it with two coats of paint and while waiting for it to dry a bird pooped on it. No joke, it really happened. I screamed in disgust, then had to wash it off and start over. So after that small set back, I let it dry and added some great $1.00 pegs from Job Lot.

I hung it back up in the same closet, just much lower and in a more accessible place (please pardon the nasty unfinished walls).

I decided to hang it diagonally because it allowed the bags to hang a little smoother and lay a little flatter.

It works great for the space, everything is flat against the wall and it’s still hidden away behind a closed door, my favorite type of organizing! If you have any other storing/organizing tips for purses please do share. I’m always looking for new, creative ways to store things, especially purses and bags because I think they’re the most challenging accessory to keep orderly!

kaitlin’s trendy flower pins

Kaitlin is our guest blogger today, and not only is she a fabulous writer she’s bringing us an awesome project while still being frugal and re-purposing a few items. Check out her post below:


As a trendy girl of twenty-five, I find that most of my paycheck regrettably still goes to fashion. I love clothes, especially expensive clothes, but because of today’s recession, I’ve had to cut back…A LOT! That’s why it was so unfortunate when I discovered a spring jacket at my all-time favorite store, Anthropologie, for $118. I almost found the justification to buy the thing, when I realized that the only reason I liked the jacket was for the cute fabric flower pin that came attached. Needless to say, $118 for a jacket that I might wear for two or three months out of the year is ludicrous. I decided to seek a cheaper alternative for my need to be fashion forward.

A few weeks later, I stumbled upon a jacket at Forever 21 in a different color, but a similar style for, wait for it, $22.50! What a steal! I was so proud of myself for finding such a bargain! The only downside to the jacket was the missing flower pin. That’s when I thought of making one. It couldn’t be that hard, right? Turns out, it was the easiest craft I have ever tried to make (and I don’t even know how to sew!)

Using these directions I created the flowers, but I encourage you to use any template or even create your own! I used scrap fabric and felt that I had from other projects for the flowers. For the center, I used old beads that and antique buttons I bought on eBay for $1. Another great idea is to use the extra buttons you get from new clothing and coats. I always save them, but never end up needing them. The pin backs I had to buy at a local craft store for $.29, but you could easily take them off of an old pin you didn’t wear anymore. Also, instead of sewing the felt backing, I just used a hot glue gun. Since I don’t really know how to sew, the glue has a better chance of holding everything together. It sure beats spending $118, and now it’s even better because I created it myself!

I just love, love, love these fabric flowers. Kaitlin made me three flowers and each one is unique and beautiful.

Not only can they be used on all kinds of jackets, but they are also great on tank tops, t-shirts, bags, scarfs, etc. So many things to do with them and you can easily change them up often. Thanks Kaitlin!