paint “dipped” birdhouse

I’m loving the paint dipped look these days. It’s all over Pinterest and the blogosphere – paint dipped wooden spoons, chair legs, table legs and more. I’ve also been really drawn to birdhouses lately and I thought a cute paint dipped one would be a great addition to my desk at home.

final

I do find that the actual dipping process can be quite wasteful of paint so instead I hand painted my birdhouse to give it the same dipped look. I used paint that I already had and grabbed the birdhouse for a few bucks at Michael’s, with a coupon.

unfinished

I taped off about where I wanted my color line to meet my white line. I painted the teal color underneath the tape in three, thin coats of paint, allowing each coat to dry for at least 30 minutes. Number of coats would depend on the type and color of paint you’re using.

painted line

Once I let the final coat of teal dry for about an hour I carefully peeled off the tape. I then painted the rest of the birdhouse white. I have a pretty steady painting hand so I was able to paint along the teal line without slipping. If you don’t have as steady of a hand I would suggest painting the whole thing your base color and then adding your dipped part second.

painted

After two coats of the white paint I had a cute little birdhouse to sit on my desk! You can see on the white part that I did fewer coats of paint. I liked the look of the raw wood showing through a little. Have you guys been up to any simple, inexpensive projects lately?! This would also be a great project for kids, with the help of an adult!

product review: sally hansen manicure gel kit

I’ve mentioned before that my Mom is a nail tech. So really for about the last seven years I’ve only paid to have my nails done if it was a girl’s night out or wedding party thing or something like that. And now, while I would have to say I’m less girly that a lot of people, I do still like my nails to look nice. Probably because my Mom’s a nail tech…

When we moved to Denver I was thinking that it’s going to get real expensive to be getting my nails done often. And since I’m one of the cheapest people on earth that wasn’t going to work. So I’ve actually been painting them myself and trying really hard to get better at it.

sally hansen

But when the nice people at Sally Hansen sent me their new gel manicure set to try out I was all for it. I LOVE gel manicures but they’re expensive (unless you have a Mom like mine. Thanks Mom!). So I was psyched to try this out. And I have to say, coming from someone who is so bad at painting nails; I did a really good job, because it was so easy to use.

supplies

The kit includes all the things you need: base, color and top coat polishes, file, buffer, cuticle pusher (technical term there), heat lamp, remover and nail pads. The instructions were incredibly easy to follow. I’ve tried it out twice now and both times I was really impressed.

instructions

There’s something about the gel polishes brushes that make them so much more manageable than regular polish brushes. The bristles are a little shorter so you don’t get the darn polish all over the place from rowdy bristles. I did have to place my nails in the lamp a few times more than it says, but I’m pretty sure it was because I was putting the polish on too thick. It wasn’t an issue, I just would push the button twice.

nails

I’m a fan for sure. I can’t wait to grab a few other gel colors. For around $30 for the kit, it’s well worth the investment if you like gel manicures. That’s how much it is for one at a salon, so if you’re looking to pinch a few pennies this is the option for you. If you decide to try it out I’d love to hear your experience!

Fine print: Sally Hansen provided this kit to me to review, however all opinions are my own and you know that I’m brutally honest. I genuinely think this is a great product for the price and I have already recommended it to many friends!

product review: celadon road

Back in May an EO reader, and childhood friend(!), reached out to me about this product line she recently became a part of. It’s called Celadon Road, and the company prides itself on promoting green living through the use of socially responsible, eco-friendly products for your everyday needs.

Emily kindly sent me a few products to sample and I’m psyched to share with you my experience!

IMG_4505

First was the Clearly Lemon Cream Cleanser. This cleanser was so light and un-harsh, is that a word? It doesn’t suds up like the soap that you might be used to. That took me a while to get familiar with because we are so trained to think the more bubbles the cleaner, the stronger the scent the fresher, which is not true in most cases. Once I got used to that I started to really love the cleanser. My face never felt dry after washing, but also never felt too oily from added lotions and creams in conventional washes.

I do have to say, and this is not gloating or bragging at all, just honesty, that I was blessed with incredibly clear, normal skin. Never too dry, never too oily, very rarely any blemishes. Digressing a little here on skin – I also take VERY good care of my skin. I wear SPF 30 all the time and I’m white as a ghost pretty much year round, but I’m cool with that. Okay, back to the products. There’s a wide variety of different washes for all skin types and I’d love to hear how the others work out on skin that might be oily or dry.

The other products were a Stain Remover spray and Odor Eliminator, similar to a Febreeze type product. Literally the day Em sent them to me Al nearly bled to death of a shaving incident. Okay not really but kind of. In the middle of the night when we were both half asleep the cut on his face bust open again and was bleeding bad. All I could mutter out of my half asleep face was that he just dripped blood on my crisp white bath mat. True love right there. The next morning I grabbed the Stain Remover, followed the instructions, washed the mat and just like that it was back to it’s crisp white state. To be kind I left out the bloody photos, but trust me. I was pretty impressed!

IMG_4504

The Odor Eliminator is perfect for just a room spray or for certain uses too. I’ve used it on the couch, our hiking back packs, shoes and more. Couple sprays and the smells are eliminated.

I’m always on the hunt for better products that are environmentally friendly with safe ingredients. I think it’s incredibly important for our bodies, our earth and our lives and I truly enjoyed these products.

Using this link you can order directly from Emily. But if you message your order directly to her through her Facebook page you’ll receive 10% off your entire order. You’ll also be the first to learn of updates on products and upcoming sales if you’re a Facebook follower. Enjoy and I look forward to hearing how you like the products if you chose to try some out!

a visit to highlands, nc

As I mentioned yesterday, we went to the most beautiful wedding in this adorable town way out in the mountains of North Carolina. Everything was so charming about it. The walkable downtown, the shops, the quaintness of it all. I loved how peaceful it was and there was something so different about the mountains there compared to Colorado. The greenery was so beautiful. I wanted to share some photos from our trip there, if you’d like to see. We both wish we had more time to explore, but even the limited time we had we were able to capture the feel for such a sweet town. Enjoy!

highlands collage 1

Above: when you ask for a map at your hotel in the middle of nowhere in the mountains they give you a hand drawn map. Not what I was expecting. More beautiful fire places, some shots from around town.

highlands collage 2

Above: the shops were phenomenal. I loved these hot air balloons, the giant mason jar hanging lamps, the charming touches of the shops and that cool wine bottle rack made from pipes!

highlands collage 3

Above: how unique is that lamp?! There was a cafe smack in the middle of an old pharmacy and I loved the look of the Ace Hardware!
highlands collage 4

Above: an entire store with homemade, farm fresh jams, preserves, relishes and more. The display in the window was adorable; all jars we sitting in popcorn kernels. This faux kitchen area was a dream. The iphone photo doesn’t do it justice. The clean lines and the perfectly lined jars were amazing. Lastly, loved this vintage window used as a divider. The store had used it to separate the shopping area from the check out line. The vases on top were perfect!

a sad day in boston

Yesterday I was in flight prepared to write-up all my posts for this week. Spent an awesome weekend with family, saw friends and had a great time. I finished off my weekend as a spectator at the 117th Boston Marathon with my sister and parents. I have a special place in my heart for the Boston Marathon, and I always will. We watched from Natick at mile 10, before heading into the airport to catch my flight to Denver. Spoke with Al before getting on the plane, I was a tad delayed, but not enough to be annoyed by it. We reached 10,000 feet and I turned on my laptop to get some work done.

Within seconds I had 7 people gchatting me, multiple emails – all with terrible, frightening subject lines and 50+ Facebook related messages and emails from co-workers. I turned my phone on and I had 14 text messages all from different people.

It took everything I had to mask the tears that wanted to stream down my face. I felt pain for all of those affected by the horrific actions of a sick person. And for the loved ones that were unsure where their runners or spectators were. And I felt so much sadness for those runners. The excitement, the anticipation and the accomplishment was harshly stripped from so many of them.

It’s sad to think that after 117 years of running this beautiful route, breaking world records, making history, and having the best spectators in the world, the Boston Marathon will never be the same.

marathon
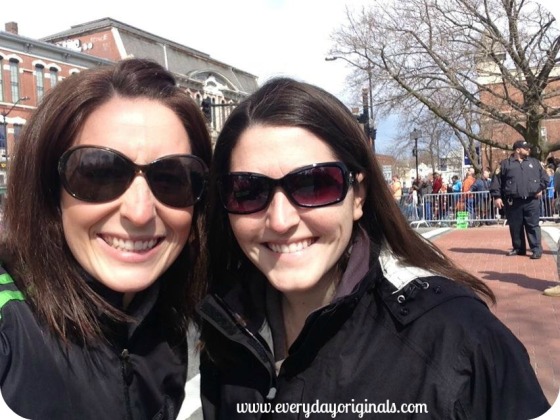
My sister and I, happy times at the Boston Marathon

I’m so tired of the hatred, but I know it will never end. We can wish and hope and pray, but realistically it will always be there. It makes me more and more angry with each occurrence of events, such as this, that takes place. Stripping everyone of the joy, the history and the tradition of the Boston Marathon this time around.

I have to constantly remind myself how there are more good people than bad, and I’ll forever hold the first image I saw of yesterday’s sad event. A photo of a runner knocked to the ground from the blast, loads of runners still coming behind and three cops in action, guns pulled, ready to protect. It warmed my heart and I hope that some, in that moment felt a sense of safety and security. Because one thing is certain, I’m drained and sad of feeling frightened and on alert everywhere I go. I know we can’t live in fear, but I’m finding it harder and harder to talk myself out of it.

start of runners
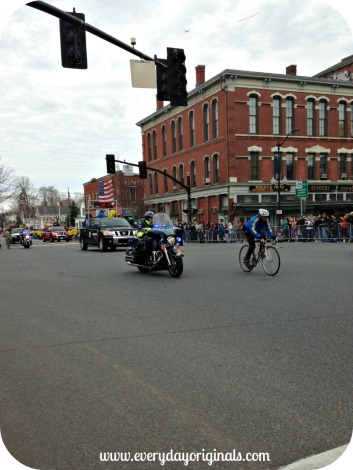
Start of the first runners coming through Natick

I let out a big sigh as we began to descend to DIA.  I found myself incredibly thankful for technology yesterday as I could communicate with everyone in flight. I was able to update folks around me on the plane, all of which had no clue what was occurring in Beantown and were instantly panicked upon finding out. I was able to email and confirm safety of loved ones for a flight attended on board and a passenger behind me. In that moment there were a handful of folks, myself included, who were thankful for community and the act of helping, not hurting one another. And I’m so thankful for all of you, friends and family from near and far, who reached out immediately to see if my family was safe. I love the sense of community whether it’s your best friend or someone you haven’t seen in 10 years. That’s what we need to hold in our hearts.

hoyts
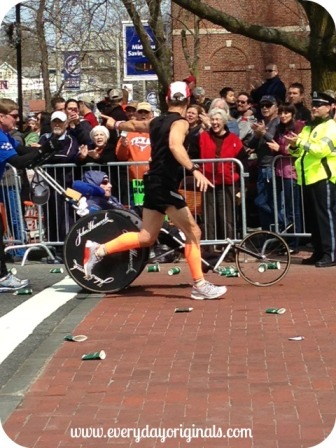
The Hoyt’s, father and son duo

So today, I proudly wear my home state t-shirt as I settle back in to the routine in CO. I wear it because I’m proud, I wear it because I’m sad, I wear it for the victims, the runners, the loved ones affected and for Bostonian’s everywhere. I wear it to represent the city that I’m so proud to be from and to show that we folk from Beantown, we stick together.

getting the most out of Etsy

I love Etsy. If you’ve never heard of it, it’s an online shop of all things handmade and vintage. I love supporting all artists and, well, it’s no surprise that I love handmade things. I try to do a lot of my shopping on Etsy for both our home and also as gifts for others. Over the years of shopping on Etsy I’ve learned a few different ways to shop, search and buy, all while getting the most for my money.

My aunt gave me a $25 gift card to Etsy for Christmas and I knew I wanted to get the most out of it. I followed the steps below to make sure I found what I needed/wanted.

etsy

1. Type the word SALE before your search item. I was looking for reusable paper towels so I searched for ‘SALE Reusable Paper Towels.’ It limits the options that populate but it also makes it a lot easier to navigate through. All the items that came up were on sale for a few dollars off the regular price.

makeup bag

2. Search by price point. You have the option to search based on price. I always add price points because it eliminates all items that I’m not willing to spend on. It limits the results again and makes it easier to navigate through.

3. Look for free/combined shipping. Many sellers post if they offer free shipping or if they offer shipping discounts for purchasing more than one item from their specific store. I also will search FREE SHIPPING in the search bar followed by the item I’m looking for. This will populate items with free shipping.

paper towels

4. Search by location to save on shipping. When I’m shopping I’ll search by my zip code first. It’s going to cost a whole heck of a lot less to ship something within Denver than from the East Coast.

5. Use the left hand side bar. There are so many different ways to search and organize your search. I recommend utilizing them. I’d rather have 200 items to scroll through based on my wants/needs rather than 5,000 when majority of them aren’t what I want.

headband

So in the end with my $25 gift card I purchased: a set of 6 reusable paper towels, a workout head band and a makeup bag. The headband seller also sent along a free kids headband too so I sent that to the little girl I used to nanny for. I was able to get all three items using the above tips. For $25 I think I did pretty good!

What tips/advice do you have for shopping on Etsy?

diy home state t-shirt

I had been seeing these home state tee shirts all over the place. Online, Pinterest, in stores, etc. I took one look and thought that there must be a way to DIY one. So I did. I decided to outline the steps below to make it easier to follow. It was actually quite simple, took a lot of focus, but overall was simple.

Supplies: cotton t-shirt (mine was one I already had, it was one of the vintage tees from Old Navy), fabric paint, small paintbrush, Ziploc bag, iron, ironing surface

1. Find an outline of the state you which to use. I forget how I found mine, I think I either googled it or used clip art.

2. Open the image in a word doc and using a text box add the word home using whatever font you’d like. I then printed mine in three different sizes to see which I liked best against the shirt.

3. Turn your iron to medium heat, no steam. Cut your Ziploc bag on both sides but do not cut the bottom of the bag. You should have a long rectangle once the sides are cut. On your ironing surface place the Ziploc bag down flat and place the state print out directly on top. If the plastic bag is larger than the print out I suggest trimming the sides of it so they’re both the same size. Otherwise you risk burning some of the bag to your iron and that’s a pain to clean.

iron

4. Gently iron over the paper, back and forth, until the plastic bag has melted entirely to the sheet of paper. Shouldn’t take more than a minute but he sure to never hold the iron in place. Ya know, kind of the same deal when you iron your clothes.

5. The sheet of paper should gently pull off of the ironing surface (I used a piece of scrap fabric because we don’t have an ironing board). Using very fine tip scissors or a razor blade, well, actually I should re-phrase. If your state is Massachusetts and there are nine thousand nooks and crannies to cut around you’ll want some fine tip scissors. If your home state happens to be Colorado cut away with anything, four nearly even sides is a piece of cake. Okay, back to the cutting. Gently cut out the inside of the state so that you end up with the outline of it. I didn’t cut out the Vineyard and Nantucket. Sorry if that offends anyone.

ironed on shirt

6. Once you’ve cut the inside out you can now cut out each of your letters. Once all are cut out select the placement on the t-shirt for where you’d like the state outline to be. With your iron still on medium heat iron over it so that it’ll adhere to the t-shirt. Do the same with the letters, one letter at a time. I found that there was more control over the placement of the letters when I did them one at a time.

paint

7. Paint! First be sure to put either a paper bag or piece of cardboard inside the shirt so the paint doesn’t run through. Using your fabric paint being to gently fill in the outline being careful around the edges as you don’t want the paint to bleed under the template. Around the edges of both the letters and the state outline I tried to only paint with the edge, not against it. Follow the instructions on the fabric paint bottle as far as dry time and additional coats. You can do as many coats as you’d like, mine ended up being three. I like that some of the red is still visible through the paint.

painted shirt

8. My fabric paint said to wait three days to wash it. I actually waited five because I didn’t have enough laundry to do on day three! It washes and dries just like any ordinary t-shirt.

final

I love the way it came out. This was one of those projects that I didn’t get too excited for because I wasn’t sure how hard it would be and if the results would be great or not. It’s a hit or miss project and in the end I was psyched about it! It’s my favorite weekend tee and I wear my home state proud!

my guilty pleasure, err, addiction?

Last week I realized I might have a problem. Problem being that I’m a magazine addict. No joke in one week I received nine magazines in the mail (more came after I took the photo below!). But I’ll tell ya, every time I opened that tiny mailbox in the lobby and saw another, I was jump for joy happy.

You would think with my whole being green and the cheapest person on earth super frugal I wouldn’t spend money on such things. But, a few of them were gift subscriptions from the holidays or my birthday and the others, well, I never pay the full price for a subscription.

I’ve never paid more than $4 for a one year subscriptions which is totally how I justify that this addiction is okay. I usually find discount codes online or on other blogs I read. I also get emails from discountmags.com sharing when there’s a good deal going on. But I don’t go looking for the deals, if they’re right in front of me or they come to my inbox I take a quick peek, and say yea or nay.

magazines

And usually when I do find a steal on a subscription it’s one of those whole you have to order within the next day to get the discount type deals. I’m totally fine with that because if it’s one that I like or want I already have my wallet out and those numbers entered.

As for the green aspect of it, I know it’s not the best green habit but I do always either donate them, give them to a friend to read or recycle them. It’s totally my guilty pleasure and since I’m known to never ever find a reason to sit down and relax, magazines make me want to.  And I mean hey, there could totally be worse addictions, like the amount of wine I consume while reading them. Just joking.

What’s your guilty pleasure? Magazines? Books? Wine? Chocolate? I’d love to know, then maybe I could add another to my lineup!

february spending freeze: weekend one

This past weekend was the first weekend of our spending freeze. It’s easy for us to realize that the weekends are going to be the trickiest part of this for us. During the week it’s rare if we go out so that’s not an issue.

I did a little research to see what was going on in the area and I learned that every weekend of every month there are free days at different places in and around the city. So we took advantage!

target sign

On Saturday we headed to the Denver Art Museum, free day sponsored by Target, where there were lots of great exhibits. Here are a few of our favorites that we saw:

dots

perception

broom

On Sunday we decided to take a half day trip up to Boulder, which was amazing. We explored the Flat Irons a bit, drove up the mountain and got excited for my foot to heal so we can start hiking again.

boulder museum

It was free day at the Boulder History Museum so we headed there for a bit. I’m a sucker for history museums so I was in my glory. And they had a great exhibit on Girl Scouts since this past year was their 100th anniversary. Al enjoyed the history of the buffalo that used to be in Colorado. They’ve all been killed off now. Amazing how our interests differ.

girl scouts

We had a great weekend though and it was fun finding things to do that didn’t cost money. And I’m actually pretty psyched to find out that there’s different things throughout the city each month that are free. It’s a great way for us to explore our new city!

better than a box: e-book recommendation

I had something different to post today, but instead I wanted to share this with you. I purchased this e-book yesterday and it’s at a discounted price of $1.99 until early Friday morning!

This woman’s blog, Kitchen Stewardship, has changed the way I cook and have looked at food in the past few years. I’ve taken a lot of tips and advice from her and have learned a ton. It’s been especially helpful to me because I’m able to easily see where I need to make substitutions in my cooking so that it fits my dietary needs as well as Al’s.

BTAB book 3d best

source

I’ve always considered myself a healthy, organic, whole foods type of cook. But there’s some recipes that I still turn to cans or boxes or store-bought dressings and she takes all of those foods and products and makes them right in the kitchen. A lot of store-bought products, even if organic, still have so much junk in them, which isn’t healthy for a normal person, but really can mess with me internally and the gastro issues I already have.

I’m psyched to get started with this book and learn more and start cooking and making even more things homemade. It’s making me excited to cook again (I really don’t cook that much any more, Al does most of it!) and explore new things.

If you love homemade cooking I recommend you grab this e-book. You can purchase it as a PDF and download to your computer or to your Kindle or Nook.

I’m an affiliate for KS and get a small portion of the proceeds if you buy the e-book. I only recommend things that I truly believe in here on the blog. And I highly recommend this one!