diy wrapped storage boxes

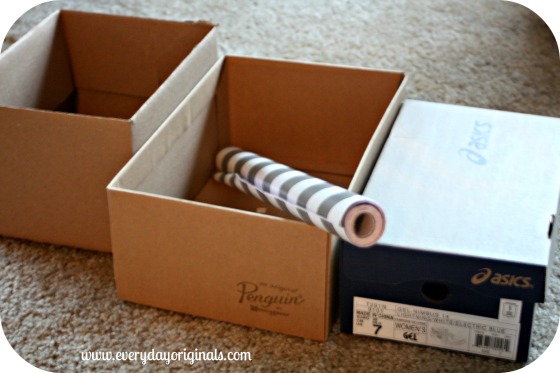
This project was so easy and was incredibly close to free. Win, win. We needed some storage bins for our bedroom furniture and as much as I would have liked to buy all new, matching baskets or wire bins it wasn’t in the budget. So I decided to use some boxes that I already had and picked up some contact paper at TJ Maxx. The boxes were free and the contact paper was $5.99 for a pack of two rolls which I’ve used in about three other places in our apartment. I’d say I got my money’s worth!

supplies

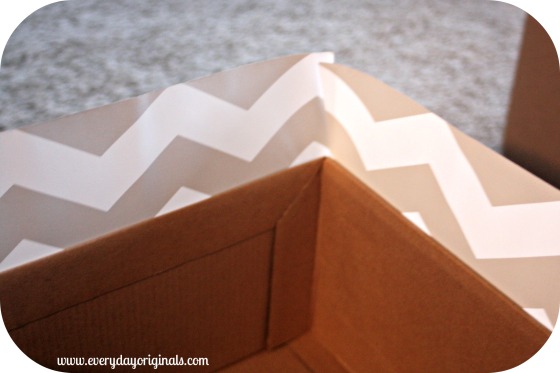
I gathered up my boxes and paper and then I very simply just wrapped the boxes with the contact paper. Kind of like I did way back when I used wrapping paper to make some storage boxes. Often times I think people are intimidated by contact paper because of the whole stick factor and not wanting to mess up. But, it’s actually quite easy to peel of and readjust as needed.

wrapping

The contact paper I purchased had a graph on the back so it made it much easier to measure and wrap. However, if you find a cute pattern that doesn’t have the graph on the back it’s no biggie, because like I said this was super easy. If you know how to wrap a present you can wrap a few boxes.

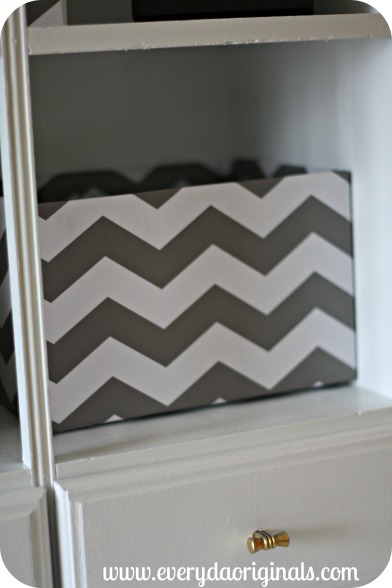
wrapped

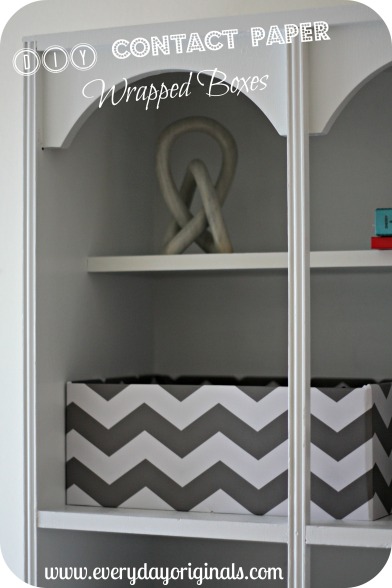
And even if you’re the worst present wrapper in the whole world you can still do this, I swear, because the contact paper will smooth right out. My favorite part about the whole project is how the chevron contact paper gives an added pop to boring storage.

final

You guys been up to any projects lately? Any great, inexpensive storage ideas?

a peek into the archives: maximizing vertical closet space

To celebrate EO’s 3rd Blogiversary we’re taking a peek back into the archives. There are lots of great posts and information in the archives so I thought I’d re-visit some this week. Enjoy!

We are definitely lacking closet space these days. I’m actually not too sure it’s that we’re lacking, it’s more that our last place had about four too many closets and I found the need to fill them. In efforts to maximize every inch of space in our living room closet I put Al to work.

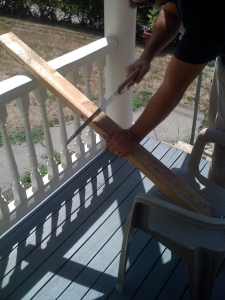
After we were robbed in our last apartment my dad cut these wood slats to secure the windows. I’m going to digress here for a minute. If you cut slats to the size of your windows and insert them right along the edges there’s no way to get the window open. Very helpful for a little extra security in your home.

Back to the closet. We don’t have nearly as many windows in this place so we had a bunch left over. Al got to work cutting them in half and securing them to the inside of the closet.

In a search through the basement we then found some 2×4′s that he also cut to fit in the closet. Three pieces of wood were what made up each shelf. It now houses mostly office supplies and crafting things that we didn’t have another space for.

You’ll notice the last shelf is a bit shorter. We had this one Rubbermaid bin that didn’t have a top with it so we spaced the shelves so that topless bin could fit under the bottom one. Al then made that shelf a little shorter so we can see what’s in the bin and easily toss things into it when needed, with out having to pull it out every time.

Truly a great use of space because we would have otherwise just stacked everything up and it would not have been accessible at all. Building up and using vertical space can make such a difference. Do you have any great closet storage tips and techniques? Definitely share them here, I’m always looking for more!
organizing travel sized toiletries

Organizing travel-sized toiletries can be tricky sometimes if you don’t have the right space. They’re tiny and can get mixed in with other things and I feel like they always leak so I never want to just throw them into a container with other items.

When I found this $1 thingy at a yard sale I was psyched. I think it might be for jewelry? But it was the perfect thing for toiletries.

We have a ton of travel-sized items because I can get them for free with coupons. I’m also totally that girl who takes them from the hotel if we didn’t use them all. I mean hey, why not, they’re just going to get thrown out; at least we can use them!

So with my new organizer thing I got to work sorting them by product. Teeth items in one, shampoo, conditioner, lotion, etc.

On the backside were two huge pockets.

I used those to store some extra toothbrushes and paste and then some other miscellaneous extras that I had.

It’s so much easier to find things and the whole thing hangs neatly in a closet! I was also thinking about other uses for this particular hanging thing.

It would be great for: make up organization in the smaller pockets and hair brushes, dryer, straightener in the larger pockets; arts and crafts organization; belts or scarves; medicines and bathroom products. I could keep going, but you get the point. It’s a great way to organize just about anything!

yard sale steals and deals

Yard Sale season is in full swing and I couldn’t be more excited. While my foot is just now starting to feel a bit better, I’m not doing any long distance walking, but I can hop out of the car for a quick scan over when needed!

This was my sister’s car packed FULL with finds all from just a few different yard sales. You can’t see the backseat, but let’s just say my mom barely had room to sit!

Here are some things I’ve stumbled upon…

A ceramic pot for our garden: $2

Silverware basket that I’ll be re-purposing: $1

Finally, a legit recycling bin: $1

Yes, I did buy this fan. The fan in our bedroom died like two days earlier: $3

Syrup dispenser and other dispenser for olive oil and canola oil: 10 cents and 50 cents

A clear one of these (they’re hard to find!): $1.00

For flowers because it’s so cute: $3

Another clear hanging thing: $1

I’m psyched with all my finds. When I yard sale I don’t buy things just to buy, I make sure I have a use for or needed everything. I’ll share with you how I used these things in the next few weeks! Oh, and another score I found that’s not pictured, a brand new North Face jacket for FIVE BUCKS. That’s like stealing right there.

Have you guys found any fun yard sale items lately?

reusing shoe boxes

I love to organize. That’s nothing new and nothing you didn’t already know. What I don’t like is spending money on pricey bins, baskets and containers. If I’m going to spend money on them I try to only buy them if they’re going to be seen or they have some functionality that is convenient to us.

Pretty much though, behind closed doors, I try to reuse shoe boxes for most organizing. They’re the perfect size and are typically pretty sturdy cardboard.

I use them in the freezer to organize foods. Vegetables in one, fruits in the other. I use them in the bathroom cabinet.

First aid supplies in one, medicines and miscellaneous items in the other.

I use them in closets to corral extra toiletries and travel sizes items.

Shoe boxes are also great sized boxes to wrap gifts in. Of course, take out the paper and that stay fresh packet thing first. I’ve also found a great Pinterest Project, that involves shoe boxes, that I hope to work on soon.

Overall they’re great for a lot of things other than storing shoes. I’d love to know if you use shoe boxes for anything. Storage? Organizing? Wrapping?

over the door closet storage

This is quite possibly the simplest, yet one of the most effective ways, to organize things.

Step 1: Get an over the door hanging shoe organizer.

Step 2: Fill it with things!!!

Though, I’ll tell you. I searched high and low, literally because at Bed Bath and Beyond the shoe organizers were practically at the ceiling, for an organizer that had the clear, plastic pockets. I could only find the canvas ones so I was about to order one online.

Enter my friend the thrift store. That’s right, I was perusing, looking for curtains or something and I eye spied a shoe organizer, still in it’s packaging, under a massive pile of yarn in a huge bin.

It didn’t have plastic pockets but it had mesh, netting ones which would do just fine. I found it for $2.99 which makes me a whole lot happier than the 20 or so bucks I was going to spend online.

This particular organizer is hanging in my closet. I have scarves and belts stored in it. I even have a few empty pockets for me to add more scarves and belts.

I’m thrilled with it. Because, honestly, before this I never wore my scarves. It was a hassle to reach to the top of the closet, pull the bin down and rummage through this massive wrinkly pile. Now, I can see them all and plan my outfits while looking at them.

I’m on the hunt for another organizer to use in our only other closet in the house. I’d like one so I can organize some of the stock pile items we have, mostly the travel sized items. The pockets in the organizer would be a perfect option to corral them all and still be able to see them!

easy and inexpensive built-in closet shelves

A few weekends ago I showed you guys our spare room looking like a disaster. We were in the process of maximizing the very little closet space we have. For the past 10 months we’ve literally been shoving as much stuff as possible into this one tiny closet. There was no order, no organization, nothing. It was a disaster whenever I went to look for something.

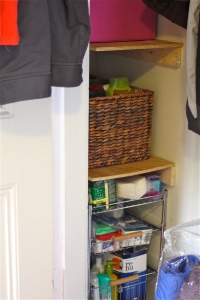
We decided to build shelves deep inside the closet to maximize the awkward depth as well as the height. We built similar shelves in our last apartment. The total for the wood was less than $10 because we bought scrap wood from Home Depot. None of the wood matched but we didn’t care. We were looking for cheap and functional. Here’s what we looked like mid-project:

My initial plans were to make these really nice built-in shelves and get all matching bins for storage. And then I remembered that I rent this place and want to make shelves for less than $10. Al cut some 2×4’s to fit in the closet as brackets for the shelves. We had all the shelves cut at Home Depot but when we got home Al did have to adjust them just a tiny bit. He fit them all into place and I got to work putting everything back into the closet.

On the left side we have weekend bags and small suitcases at the top.

On the right side we have our picnic basket, extra office supplies and a basket with our air mattress and pump. Which is incredibly helpful because before this it was in the basement, in the camping bucket, and it was really annoying to go get it every time we had a guest.

Left side bottom is where we have our stock pile. Yes, we have a stock pile. No, we’re not hoarders! This is where I keep items that we use on a regular basis and will stock up on when I have coupons and get things for super cheap or even free.

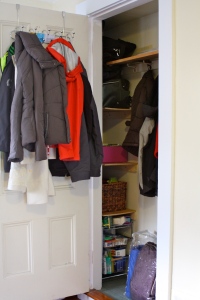
An over the door rack now holds coats as well as a few hooks inside the closet. On the bottom is where we keep extra blankets and our larger suitcase. The shelf at the top we found in the basement so we reused that. And although it doesn’t span the entire width of the closet, it was free.

What you can’t really tell from the before and after photos is that everything that was once shoved in the closet before is still in the closet. And, we were able to add a lot more stuff too. And, we have space to spare on that top shelf there. It’s amazing what some vertical space can do for ya.

All in all we came in under $20 for the whole closet. The coat hooks were $9.99 and I can’t recall the exact cost of the wood, but I think it was somewhere in the $7 range. Not half bad!

organized dresser drawers

Do you organize your clothes? Your drawers?

We’re doing the best we can to maximize any storage space we have whether it be for clothes, suitcases or rolls of toilet paper. Al has a self standing closet that we got at IKEA a few years ago where he keeps all of his clothing and I use the small closet in the bedroom and a dresser for mine.

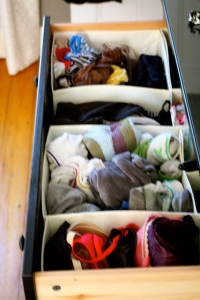
I wanted to make the best use of all the space in the dresser so I played around with a few different ways to organize the clothes. The one that worked best was this one:

You may be thinking that I’m nuts and that this takes way too much work to keep up with. But truthfully, it takes me maybe an extra minute when I put the clothes away and I love it for many reasons. The first being that I can see every item of clothing.

When they were just stacked before I would have to tear through everything to find what I’m looking for, resulting in a larger mess. This way also allows so much more space. I’ve never been able to keep sweaters in my dresser because of lack of space and now they all fit.

The only items that I still have stacked are yoga pants and workout bottoms. They were all just too flimsy to line up like this. I also don’t bother to fold socks, underwear or tights. They each have a bin in the top drawer and get tossed in there.

How do you organize your drawers/clothing? Do you have a routine? Do you care? Am I nuts?!

what we’ve been working on…

This massive disaster:

I have anxiety looking at these photos because normally you can actually SEE the floor! We’ve been working hard on maximizing the space in our incredibly, incredibly, incredibly small spare closet.

Hopefully we’ll have it done this weekend. Until then I’m keeping the door closed!

organized basement storage

I think it’s safe to say that I have some OCD tendencies when it comes to organizing. But, I always know where everything is in a snap. And I love that.

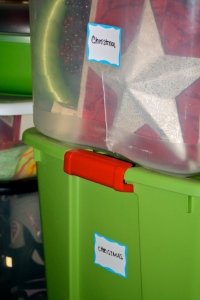
Since we have moved move so much we had to find a way to transport and store things easier. I found clear storage bins on Craigslist last spring for $3 each, much cheaper than buying them in stores and no added tax to pay! Those, added to bins we already had created quite a collection. I organized what needed to go in each bin and then clearly labeled them all in the same place.

I prefer clear bins so you can quickly see what’s in them, but not all of ours are clear. We try to only stack 3-4 so not to have to de-stack 10 bins if we need something in the bottom one.

We put the bins on the bottom that house things that we don’t need currently, such as school yearbooks and sports awards. It’s helped us tremendously during moves and for general basement storage. We love knowing that everything is safe from water and other basement grossness.

How do you store things or basement proof them? Any tips or tricks you want to share? Same goes for attic storage. It’s all the same, uncomfortable temperatures and lots of bugs.