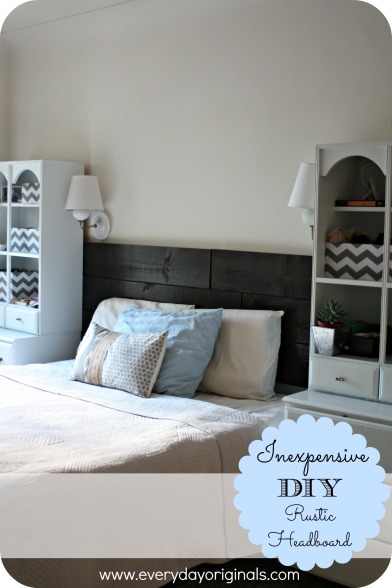
diy rustic headboard

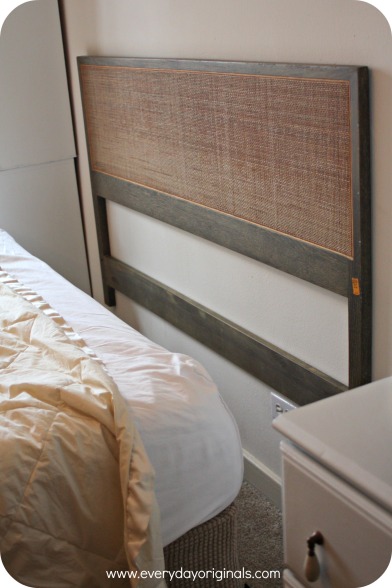
The headboard saga in our apartment has come to an end. Finally. But, let me back up. Way back in the winter I was doing my usual Sunday morning Craigslist perusing when I came across a cane headboard that was in perfect condition. I think it was 20 bucks or so and I needed to have it. So I convinced Al to get in the car and go get it now. It was the worst blizzard we’d had in Colorado thus far but it didn’t matter, we had all wheel drive. So we set out.

snow storm

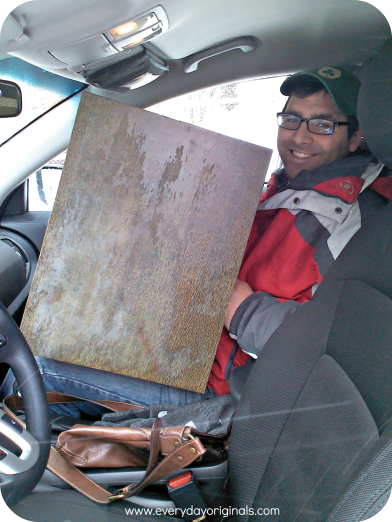
It took us over an hour to get 20 minutes away and when we got there it looked as pretty as it did in the photos. Perfect condition, clean straight lines, t’was perfect. When we got there the seller told us we could take the whole bedroom set for the same price of the headboard. Of course I jumped on it. We also got a great desk lamp thrown in (more on that later). Well, it wouldn’t all fit in the car and the driver seat had to be pushed all the way up to fit most of the pieces so I had to drive. So Al ended up like this:

2013-02-24 13.04.54

He’s such a champ. Love that kid. However, the headboard no longer lives in our apartment. Nor does the rest of the furniture. Yes, that’s right. It ended up being too small for our bed despite it being a queen sized headboard and the rest of the pieces were too large for our space. It was too tiny and quaint and it pained me to sell it but it just wasn’t working. So, with that we sold the whole set on Craigslist and were back to the drawing board.

IMG_4191

PicMonkey Collage1

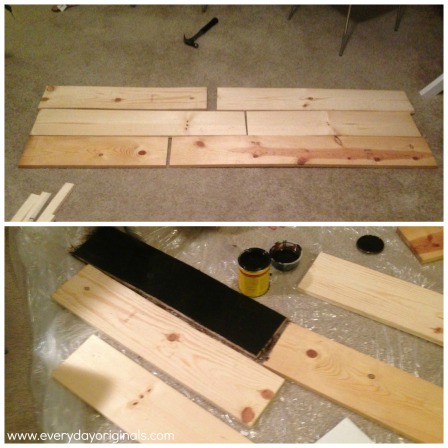
After searching for months for something that we liked and would work I gave up and made a plan to build one. The process of building this was so easy. We purchased three, 6’x6”x1” pieces of wood and had them cut right there at Home Depot. When I had each piece cut I had them all cut at different places so it would look like the pieces were askew.

PicMonkey Collage

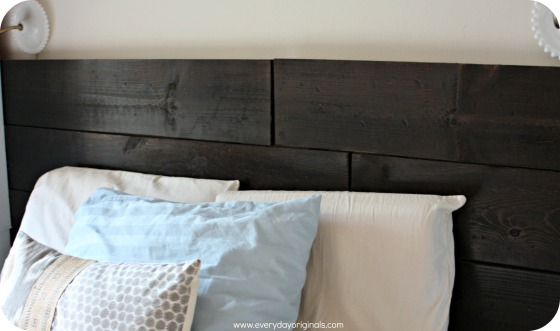
We also grabbed two, 4’x3”x1” pieces to use as stilts to hold the entire thing up. Kind of like we did way back when with our antique door headboard. I started by using a hammer, screwdriver and pry bar to ding up the wood and make it look worn out. We just went to town hitting it and marking it up. After that Al stained each piece of wood using Minwax Jacobean. The easiest way to stain pieces of wood like this is to use a rag. With a brush the stain goes on too thick and takes two weeks to dry. We learned that the hard way.

IMG_4644

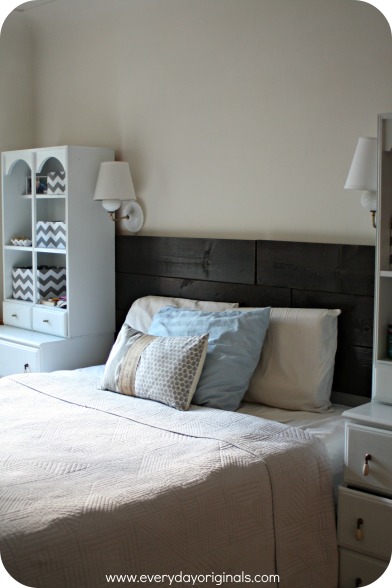
Once the wood was completely dry I placed all the pieces together to make each piece look misaligned. We flipped each piece over and Al hammered the slats into the wood using normal wood nails. Once complete we stood it up, placed it behind the bed, secured the slats to the wall with long screws and voila, had a lovely new headboard!

IMG_4642

I love the look of it and the way it brings the side pieces and bed altogether. It came out a bit darker than we’d hoped but as I said, it’s because we missed the part about using a rag. Even though it’s dark I still think the contrast with the crisp white pieces is fabulous. I need to get some colorful pillows and something to hang above the headboard and then we’ll be set.

IMG_4640

The total cost for the wood and the stain was right around $30, which really is a steal for a queen sized headboard!

bedroom furniture makeover

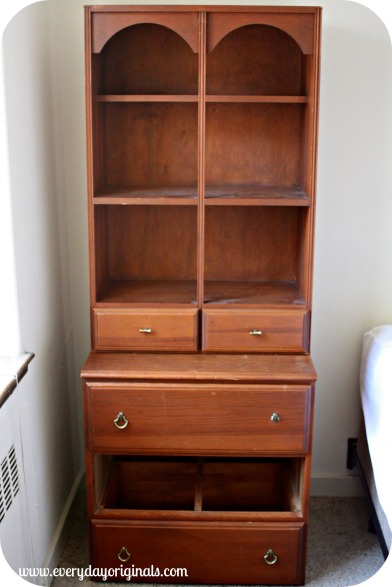
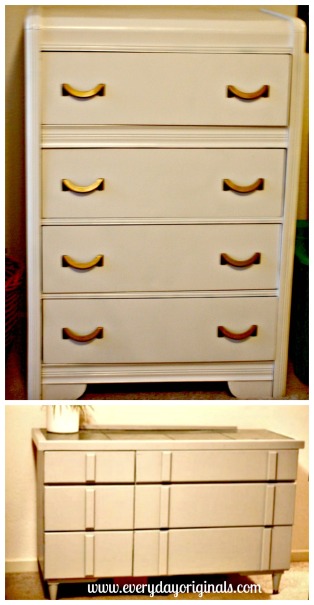
Last week I shared with you guys the great Craigslist find that we scored for our bedroom furniture. Well, like any furniture brought into our home it was about to get a makeover. I’ve been trying hard to go out on a limb and step outside of my comfort zone in this apartment like when we painted the coffee table emerald-green. But after this disastrous choice I’ve decided that there is nothing wrong with loving fresh crisp colors that brighten a room and make it seem larger, like grays and whites, and adding pops of color around it. We started here:

bedroom furniture

For our bedroom I wanted to bring in a nice coral-red color and mix it with teal/turquoises. So after spending about an hour in the paint section (it’s never a quick trip, I usually freeze up and Al needs to either make a decision for me or remove me from the situation only to return later and start it all over again) I decided on a soft red/coral color and a very light, almost white, gray color.

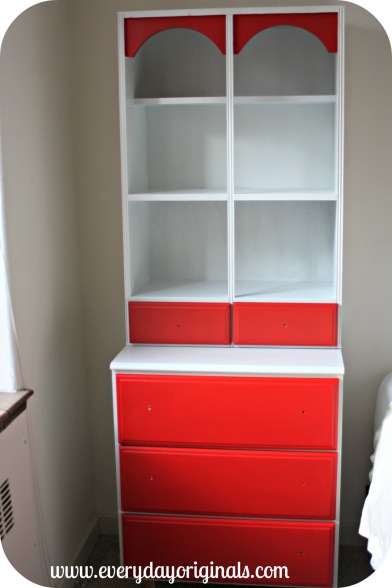
Beautiful paint job, but the result looked like something straight out of a 7-year-old boys’ room that had a baseball theme.

red and white

So in true form I decided that I wanted the whole thing fresh white so we ended up re-painting all of it in the neutral gray/white that we had bought.

shelves1

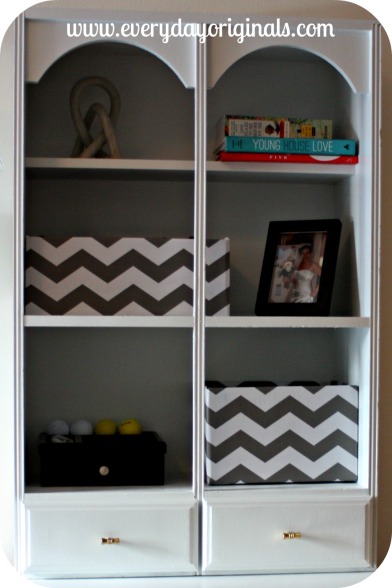
Al lightly sanded all the pieces. There was no finish or paint on them so it was a quick sand then a quick, thin coat of primer. He then got to work painting the rest. I was planning to wall paper the inside, back wall of the shelves but decided against it because I had my diy storage boxes and I thought all the pattern would be too much. So I painted the insides and figured down the road I can always add paper.

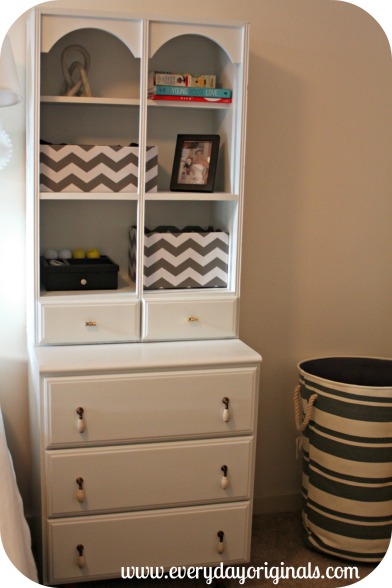
final

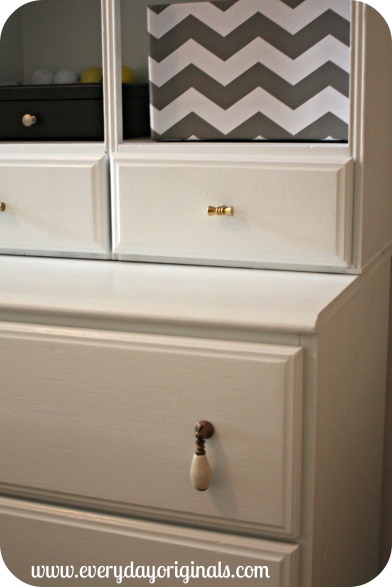
I picked up new drawer pulls at Hobby Lobby for $2 a piece for the lower drawers only. I plan to add colorful ones to the two small drawers but I want to wait until the whole room comes together before making a decision.

drawer pulls

We let the whole thing dry for 3-4 days before moving in. Once it had plenty of time to dry and set we added our storage boxes, our clothes and other small accessories.

I’m confident that these are the best option for bedroom furniture for our tiny bedroom. You know I love me some great vertical space! What type of bedroom storage do you guys use in small spaces?

our bedroom furniture find

We had been looking for a while for the perfect furniture/clothing storage to fit our small bedroom. It needed to be vertical, spacious, not bulky and, well, fit in our car. We had tried two earlier pieces. One was a horizontal  low dresser we found at a thrift store, the other was a vertical, tall dresser found on Craigslist. Neither worked out and both were re-sold on Craigslist (for more than we paid for them!!).

PicMonkey Collage

I kept looking and this time didn’t want to jump on anything because the whole purchase, cart home, hate, re-sell thing was a bit much. As I was searching for a desk one day I stumbled upon this entire desk unit. It was basically two small dressers with book cases that sat on top and then a desk that went in the middle. The seller wanted $30 for the whole thing, all five pieces. It was the perfect size and was pretty much exactly what I was looking for to go on each side of the bed.

Just to clarify there are no missing drawers, I have no clue where the middle drawer was when I was taking this picture!

bedroom furniture

With $30 cash in hand we headed to pick the pieces up. I let the seller keep the desk to re-sell because it wasn’t going to fit in the car, wasn’t the type of desk I wanted and I wasn’t about to make another 35 minute trip for something that I was just going to toss back on Craigslist.

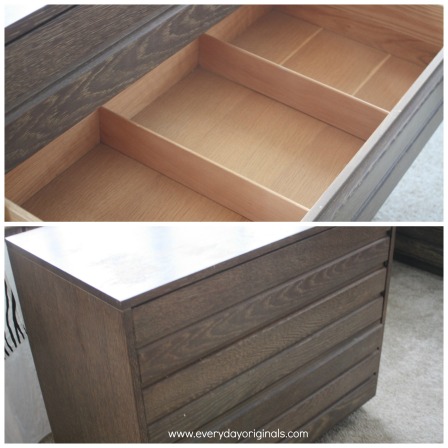
Everything fit well in the car and I was totally elated that we had just scored four pieces of the perfect sized furniture for $7.50 each! I love the rounded detail in the bookshelf and I love the style of the legs. Each has three main drawers, which combined with our closet space is enough for all of our clothing, and two small drawers which house lotion, lip balm, etc. We use those drawers as if they were a night stand since these units are doubling as bed side tables for us. And look at these adorable legs. This is a painting tip for furniture legs – poke them into a cardboard box to keep them upright!

furniture legs

I’m totally thrilled with them and can’t wait to share how we’ve painted, and re-painted (!) them. Stay tuned!

You guys score any good second-hand pieces lately? I have to say we have found a few great pieces, but Craigslist Denver is nothing like Craigslist Boston. There is not nearly the fabulous selection of goods out here!

bedside table organization

I have to give entire credit of this project idea to my Aunt Dianne. She told me about it long ago and I finally acted on it this summer!

It’s so simple, yet probably one of the most useful projects I’ve ever made/created/upcycled/re-purposed. Really the only thing you need is one of those outdoor, barbecue or cookout utensil baskets. The one with all the different sections.

I found mine at a yard sale for $1. It was a little beat up though, so naturally I gave it a coat of spray paint. I then added a small strip of ribbon to the front to cover some of the broken basket pieces. I also cut off the handles.

Before this I always had everything thrown on top of my nightstand; my book, lotion, chapstick, face cream, nail file and so on. Now, everything has a perfect spot. It’s amazing! The compartments are also the perfect size for a TV remote or to roll a magazine into.

It’s just so clever! I would have never thought of this, but I’m so glad my Aunt Di did. I love how neat, orderly and cute it looks. Do you have a certain way of organizing bedside clutter? If you say throw it in the drawer, I’m all for that. Our bedside table drawers barely fit a book though so I needed another option!

placemat art

Have you ever thought to create some inexpensive art with a placemat? I was perusing Bed, Bath & Beyond one day and stumbled upon this placemat that I just loved. I loved the colors and the detail but I really had no need for more placemats.

I thought a little more creatively and knew the colors would match perfectly in our bedroom. I already had the correct sized frame at home so I grabbed one placemat, on clearance for $1.50 and set off to make some cheap art.

I framed it and hung it above one of the antique wall lamps in our bedroom. I love the look of it and it adds a different touch of art from the wedding photos on one of the other walls.

Problem now is that we just got a new comforter. And while we’re trying to decide if we love the comforter I’m trying to find another place for my placemat art because it does nothing but clash with the new bedding. If I do have to move it I know it’ll be perfect in our bathroom as well, so I have options!

Also, random side note. Every time I went to type placemat art it came out placemart. I couldn’t control it, my fingers just automatically typed placemart…!

bedside wall lamps

After years of always having a lamp on my bedside table I decided it really annoyed me. The table is just too small for a lamp and the other things too. However, wall lamps aren’t cheap. I started shopping around sales, thrift stores, Craigslist, but I was having a hard time finding styles small enough for the wall space. Or, finding two that matched.

Over the summer I was at a street fair in Boston with my friend Kaitlin. We had a booth of our own, but we’d take breaks to go explore the other vendors. At the end of the street was one man with a huge set up of awesome antiques. I eye spied some wall lamps from a mile away. They were beautiful. Needed some updates on the shades and a good cleaning but I loved them. I had a feeling they were quite pricey though.

But see, when you shop like me you go 30 min before closing and get a great deal because they want a sale, not to have to pack it up and take it home. So, I got them for $20 total, $10 each! I was expecting them to be about $40 each or so.

I was ecstatic. They were the perfect size, I loved the detail and I loved that they were white. I tried so hard to salvage the beat up shades but it just wasn’t going to happen. There were holes, they were ripped and they actually allowed a lot less light to get out because they were so dark.

I found two perfect sized shades at Lowe’s for $6 each. I’ve yet to decide what I’m going to do with them…paint them, fabric them, leave them white?

For now though, it’s such an improvement from the dark, cardboard gold ones. And for a total of $16 per lamp I have no complaints at all! What’s your opinion on wall lamps, love em’? Hate em’?

antique door headboard

I’ve always loved doors that are turned into headboards. I love how they give a little antique charm but still have clean, smooth lines. I thought it’d be the best option for our small, kind of dark colored bedroom. We needed a headboard that wasn’t too large, but also didn’t look flimsy and misfit. Oh, and it had to fit up the stairs, which is a HUGE challenge in this house.

So, I started my Craigslist search for an antique door. There was a woman selling a bunch of them about 35 minutes away for only $20. So we headed that way to retrieve one. She had lots to choose from and all were original to the house. We selected one and were on our merry way.

It was a bit too long for a queen bed, would have fit a king perfectly. Al cut some of it off and removed the doorknob. He also secured some stilt like legs to it so we could secure the bed frame to it. He made sure that the hole from the doorknob was at the bottom so the mattress covers it.

He sanded the whole thing and painted it. I guess this was more of Al’s project, I just watched really.

I had a coupon for a free pint of paint so I decided to be a little wild and paint it bright yellow. Well, in my mind it was a nice warm yellow. On the door it was bright yellow.

I hated it and freaked out for like a week. But, then it started to grow on me. I started to enjoy the pop of color against the dark greyish walls. And now, it’s been bright yellow for 8 months and it’s staying that way.

I’m still toying with the idea of putting some sort of molding on the top. Our bedroom is still not done so this is really all I have to show you. We’re getting there though, soon it will be complete.

We ended up spending 20 bucks for the head board and less than 5 for the stilts. The paint was free. I’d say that’s a pretty great price for a queen headboard!