diy lacquer box

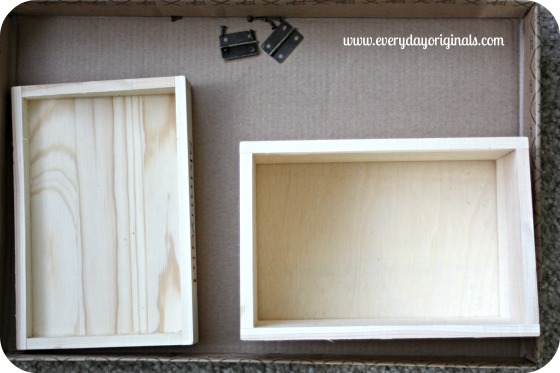
Wow it’s been one heck of a week. Between traveling, the events in Boston, work life and regular life I was beat last week. Back at it though! I had found this box way back when at a thrift store for a few bucks.

wood box

Originally I had plans for it to live on the desk in our apartment, but then I decided since I live in a grey box at work it would be nice to add a little color. So, I ditched the black plastic office supply holder thing and I use this now instead.

I started with two colors of high gloss Martha Stewart acrylic paint. I also picked up a bottle of the high gloss clear to give it a final coat. I removed the hardware and painted the entire box the teal color. It took three coats to get it fully and evenly covered.

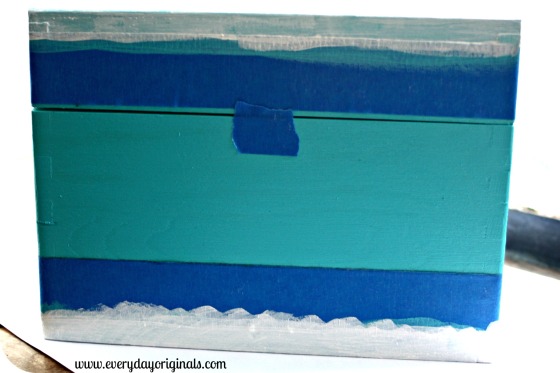
Then using my blue painters tape I taped off where I wanted the white lines to be. The trick to preventing the white paint from bleeding is to tape off the lines, and then paint over the edges with the main color. In my case that was the teal color. I let that dry fully and then with a fine tipped brush I painted on the white. I don’t remember exactly but it took me somewhere around 4-5 coats of the white to fully cover the teal.

tape lines

I let dry fully in between every coat of paint. Because of that this project actually took a good part of two days. But it was so easy to do and simple to paint a coat and do something else. Some of the coats of paint dried for 20 minutes, some dried for 2 hours. I would just add another coat when I thought of it.

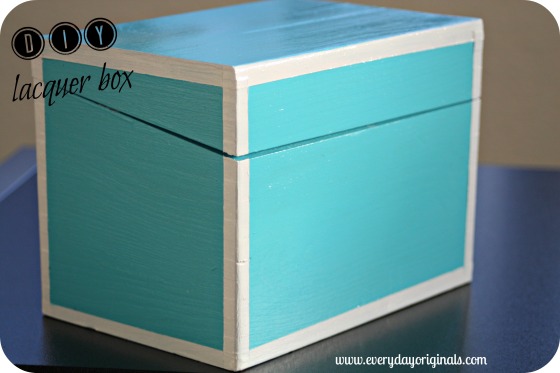
diy lacquer box

After the entire thing was dry, I carefully peeled back the tape. There were definitely a few spots I needed to touch up. I did so with a very fine tip brush so I could be very precise. After that I added three coasts of the high gloss clear paint.

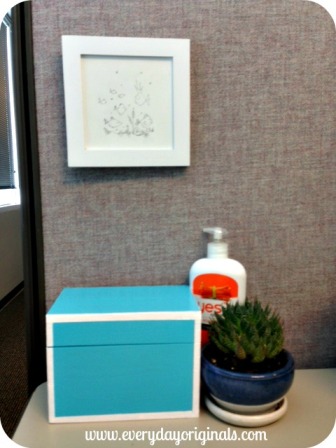
desk

And that was it! It now houses my post it notes, pens, etc. and keeps my desk area clutter free.

recent thrift store finds


We’ve been doing lots of thrifting since we moved out to CO. We had nearly an entire apartment that needed a lot of things. Today I thought I’d share some recent finds with you, both practical and whimsical.

Wooden Box, 99 cents. The lid is removed because I was starting a project that I’ll share next week!

wood box

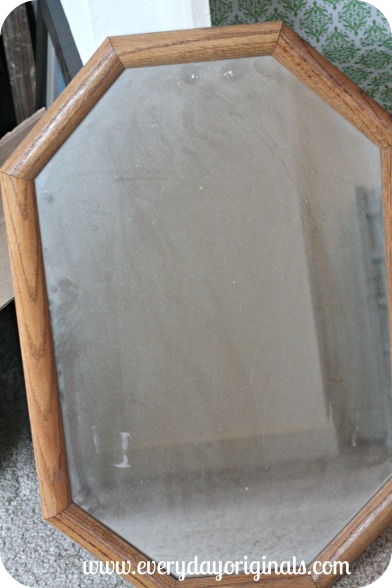
Very dusty mirror, $4.99. I loved the shape and clean edges of it and can’t wait to toss some paint on it. 

mirror

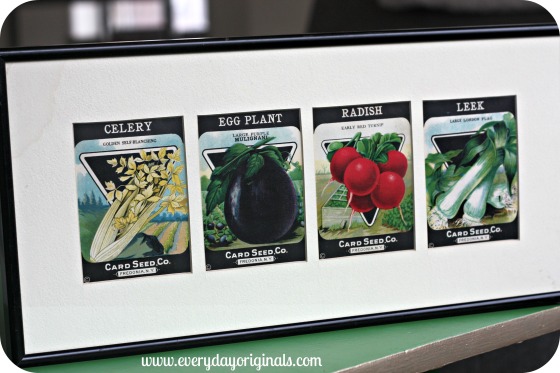
Vintage vegetable seed art, $6.00. This art was professionally matted and framed which costs big bucks!

vintage vegetables

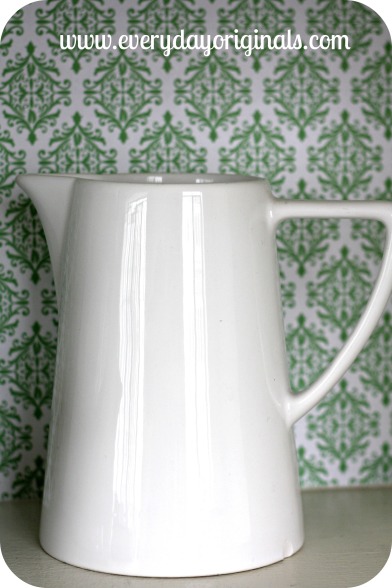
White pitcher, $2.99. So many uses and so clean and fresh and crispy white!

pitcher

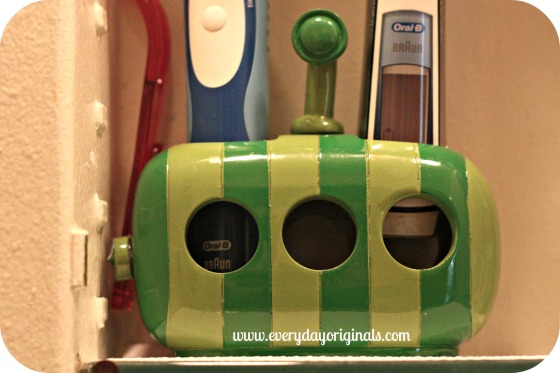
Submarine, $3. Can you guess which of us chose this?  It was Al. However, it’s the perfect holder for our toothbrushes in the medicine cabinet. 

submarine

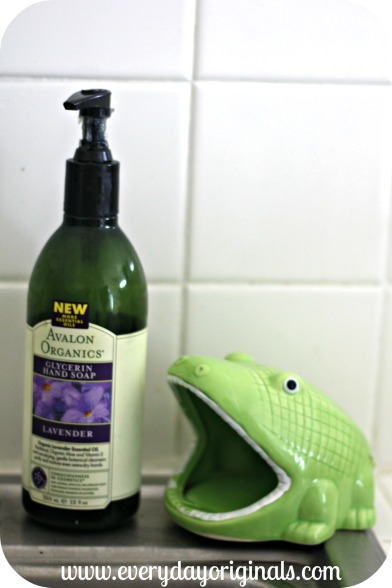
Alligator, $1. Great little contraption to toss the dish brush in.
frog

How about you guys? Any grand finds lately? I obviously have a whole heck of a lot more but lots are projects I’m working on so I’m not sharing them just yet!

gold and emerald coffee table

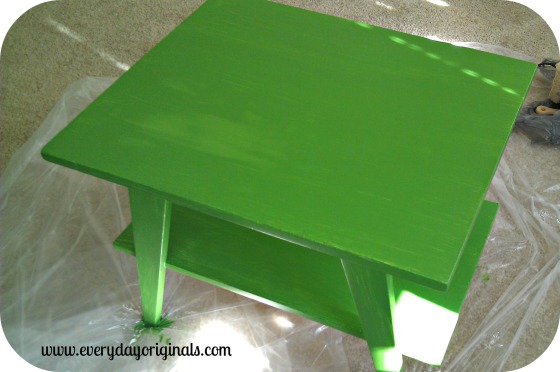
We found this great, small coffee table at a thrift store shortly after we moved here. We paid a whopping $5 for it and it’s solid wood, which I love. We went back and forth on color to paint it, I wanted more of a red-orange color but then Al suggested this emerald green color and I thought, why not try something new. So he got to work on it. When we moved here I started work four days after we got here and his start date was four weeks out so he did a lot of the projects around the house during the day.

first coat

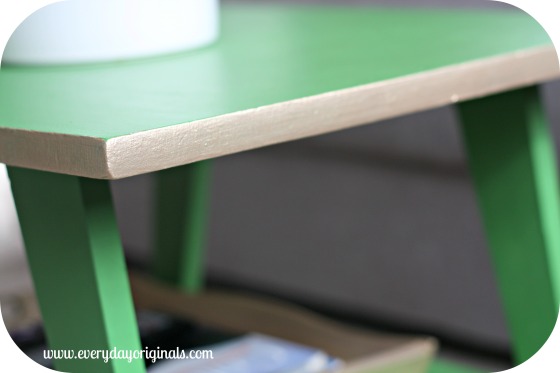
He gave it a light sanding to rough it up a little. He didn’t prime it and instead just got right to painting it, which after two coats seemed perfectly fine. It was the perfect pop of color in this white and grey apartment. I wanted to add a little more to it though so with a small, fine tip brush I painted around the edge in gold.

gold edge

This took about 100 coats because I didn’t prime it, so see, something need priming, some don’t. I didn’t mind though, I would just paint a coat of gold on each time I walked by or in between doing other things.

table

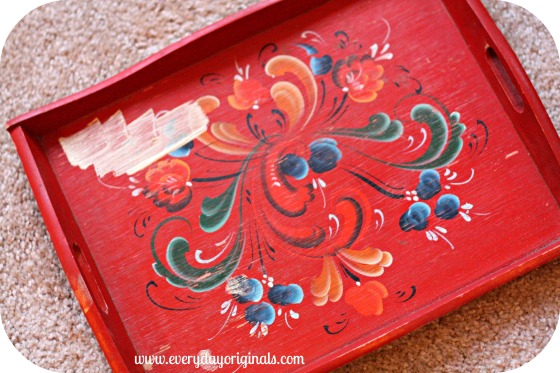
I had also found this perfect sized tray with a horrific painting on it for the lower part of the table.

tray

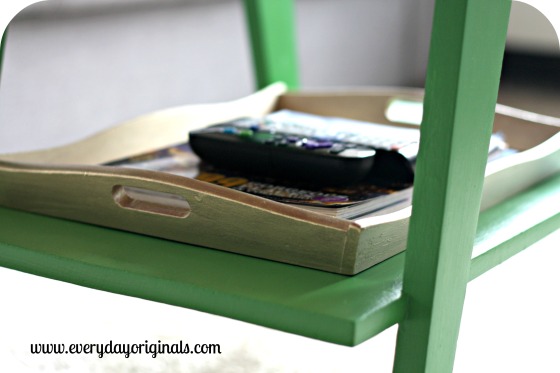
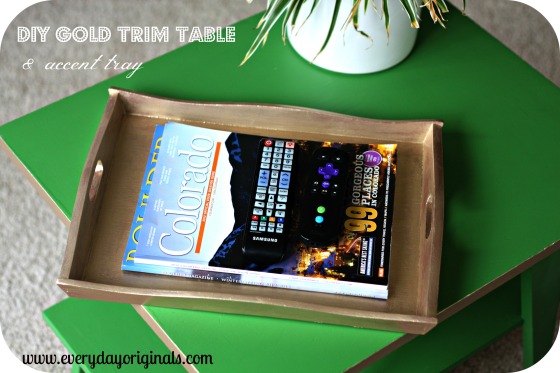
I painted that gold as well and that also needed I’d say four coats of the gold. It actually could still use one more coat I just keep forgetting!

gold tray

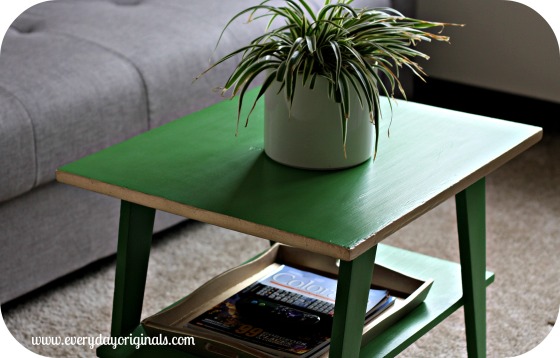
I love the look of the table and tray together. It’s the perfect size table for our space and I like have the tray to corral rowdy things like the remotes, magazines and coasters.

final

Turns out Pantone was right on with emerald being their color of the year for 2013. Have you guys brought any emerald into your lives through your home or closet?

a peek into the archives: cane chair makeover

To celebrate EO’s 3rd Blogiversary we’re taking a peek back into the archives. There are lots of great posts and information in the archives so I thought I’d re-visit some this week. Enjoy!

It’s finally done. Thank goodness. Am I in love? No. Do I enjoy it for now in the room we have? Yes.

I started the cane chair makeover way back when…

It took me months to decide on a fabric and honestly, I don’t love the one we chose. I like it and it coordinates with the other colors in the room that we can’t change (like the walls) so it works for me.

After carefully taking apart the entire chair I was left with this:

The best way I found to redo the chair was to save every piece I removed and just replicate them with the new fabric. I did things like, use giant rubber bands to keep the fabric in place so that I could really see where the pattern was going to lay on the chair, before stapling it down.

While I worked on getting the fabric in place Al worked on painting the chair. I was going to buy new paint but then we decided to use some left over spray paint we had first to see how it looked. We used the rest of the oil rubbed bronze can we had and we actually loved it.

It’s tough to tell in this terrible night-time photo, but it gives the chair a little bit of a shimmer when the sun hits it which is fun instead of a plain flat black.

Once I had the fabric patterns where I wanted them, all lined up, I started stapling it into place. This is where my efforts stalled. My staple gun wasn’t heavy-duty enough. So Al grabbed one to borrow from his dad. But then the staples weren’t long enough. So we went and bought longer staples. But they still wouldn’t staple through the fabric and padding and piping. So I had to change up my plan of attack.

We ended up stapling everything we could, again we followed it completely to how it was when we took it apart, so all chairs will be different.

Once everything was secure, I actually hand sewed the piping on. There are about two spots where you can see some thread but really only if you’re looking for it. My fingers were raw and burning and it took me forever but I think it was worth it because it looked pretty good in the end.

The final result left me very happy with our work.

One last before and after:

The final cost breakdown was:

$6.99 for the chair, $12 for fabric and piping, $3 for staples. A total of $21.99 plus some tax.

Not too bad. What do you think?!

a peek into the archives: small space photo collages

To celebrate EO’s 3rd Blogiversary we’re taking a peek back into the archives. There are lots of great posts and information in the archives so I thought I’d re-visit some this week. Enjoy!

Even though our living room has such little wall space I wanted to be sure to still hang some photos of family and friends. However, I knew I wasn’t going to be able to pull off a large photo wall like I did in our last two apartments. So, instead I created two photo collages. I picked up two 11×14 frames at the thrift store.

I think I paid $2.99 each, or somewhere around there. We spray painted them black, which we already had on hand. I gathered together all the photos that I wanted to include in the frames, but I ended up having too many so I had to pick and choose.

Using my cutting mat, rotary cutter and yard stick I started trimming and sizing each photo. I decided to do this first instead of figuring out a layout first. Many of the photos had plenty of space to be chopped off, which made it was easier for me to trim them to size and then arrange.

I used a light colored linen fabric to cover the photo mats that came with the frame. I simply wrapped the mat like it was a present and taped the back side of it. Once the mats were covered and the photos were all cut I arranged and re-arranged one hundred times until I found the perfect setup where they all fit.

I went ahead and washed the glass on both sides and reassembled the entire collages.

Don’t mind the crazy flower petals and leaves overlapping the collages. I’ll share the whole wall when it’s complete! I’m entirely satisfied with how they turned out though. I love the smooth lines and the mix of color and black and white’s. It’s hard to capture the color and texture of the linen background here, but it’s such a lovely backdrop to the photos.

I’d love to know how you all hang/share photos? Picture frames? Collages? Does anyone have one of those digital frames? I love the idea of the digital frames but I’ve heard they use a lot of energy. Thoughts?!

completed corner office space

I finalllllly have a completed office corner! Though, nothing is ever really complete around here because I’m always changing things. I’m psyched that it’s functional and organized and all mine.

We have two bedrooms, we sleep in one, obviously, and the other we’ve made into an office and workout room. Al has one corner with a desk and I have one corner and the rest is the workout space. I’ve been slowly putting my space together with the cork board, lamp makeover, clock and wall baskets.

Here it is!

Yes, I do sit on a ball chair so I left it in the photos. I know the whole thing would look so much cuter with a nice chair but the ball is comfy and helps my posture and core strength!

There are a lot of different colors going on, but I love the mix of colors with the loads of whites and neutrals. I used a bookshelf that we already owned and filled it with photo storage boxes. They’re filled with office supplies, paints, manuals, ribbon, etc., not photos.

My wall bins are perfect for my file folders and notebooks that I use on a regular basis.

Under the desk I used two small hooks to corral the wires. I screwed them into the wall up near the edge of the desk so you can’t see them at all, unless of course you’re under the desk photographing them.

I had everything in the photo below except the light teal colored trays. Those are from the Martha Stewart line for Avery from Staples. I love everything in her Avery line. The trays were the perfect things to collect the odds and ends on the desk.

The desk is two Ikea tables that we cornered together. I had one for the longest time, bought on Craigslist, and it just wasn’t enough space. So for Christmas Al trekked down to Ikea to get me another table. He lucked out big time and got one in the AS IS section for super cheap. It allows me a lot more space to work, write, do projects or crafts. I can easily slide the table against the window out further to provide more space too.

I’m completely pleased with the space. It’s simple, organized, clean lines, no clutter, neutral and colorful. The only things purchased new were the wall baskets, picture frame, photos boxes, one table and teal trays. I bought used, the other table, lamp, clock and bulletin board. Everything else I already had. I love coming up here to work now because it’s a cozy place where I can be productive. Have you guys been working on any office spaces lately?

desk lamp makeover

I finally got around to finishing up my thrift store lamp and lampshade that I stumbled upon a few months ago. The lamp sits on my desk and there are a lot of colors and patterns in the vicinity, so I wanted to keep this pretty neutral. However, it ended up a little too neutral!

Here’s the before again… most definitely a lamp from an 11-year-old boys baseball themed bedroom. At least that’s where I’d envisioned it.

It didn’t have a shade when I bought it but I found a clearance one at Target for $5.08. You’d think they could just make it five bucks, that eight cents really makes a difference.

I bought the shade knowing that I wouldn’t use it as navy blue, it was the most inexpensive so that’s why I grabbed it. I went through my leftover fabric stash at home and found a great off white linen that I had leftover. I cut it to fit the shade, with a little left to make a smooth seam in the back and a little longer on each end to make a smooth seam at the top and bottom. To start I wrapped the shade in the fabric and hot glued it down.

I left the extra fabric on the top and bottom so that I could I fold it over to make a smooth seam without any fraying, etc. I used a dab of glue to hold it in place against the other side of the fabric.

I then hot glued around the very edge of the shade, in small 3-4 inch increments, and tightly pressed the fabric over the edge until it was secure.

The shade came out pretty good, especially since I haven’t covered a shade in about three years. I wanted to paint the actual lamp a light gray color. It was a Krylon spray paint called Pewter Gray and it looked like a very light, soft gray. Well, the can lied. It came out a very light, soft blue color.

I was super bummed, especially because I used the same paint for something else that I wanted to be light gray, which is now light blue. For now it’s staying the way it is. Maybe it’ll grow on me?

I love the overall look of the lamp much better, the color just wasn’t exactly what I was going for. And I think the neutral linen shade would look better with a darker (not lighter) lamp color. So, there may be some tweaks in the future.

I also think I might want to experiment with jazzing up the linen shade a bit more. I used the linen because it was what I had but maybe adding some stripes or zigzags or something?

Not sure yet. For now though, I’m happy it’s not straight out of a child’s room! The final cost for the project was:

$6.00 – lamp

$5.08 – shade

$3.99 – paint

Free – fabric

For a total of $15.07. Not bad for a new desk lamp!

cane chair makeover

It’s finally done. Thank goodness. Am I in love? No. Do I enjoy it for now in the room we have? Yes.

I started the cane chair makeover way back when…

It took me months to decide on a fabric and honestly, I don’t love the one we chose. I like it and it coordinates with the other colors in the room that we can’t change (like the walls) so it works for me.

After carefully taking apart the entire chair I was left with this:

The best way I found to redo the chair was to save every piece I removed and just replicate them with the new fabric. I did things like, use giant rubber bands to keep the fabric in place so that I could really see where the pattern was going to lay on the chair, before stapling it down.

While I worked on getting the fabric in place Al worked on painting the chair. I was going to buy new paint but then we decided to use some left over spray paint we had first to see how it looked. We used the rest of the oil rubbed bronze can we had and we actually loved it.

It’s tough to tell in this terrible night-time photo, but it gives the chair a little bit of a shimmer when the sun hits it which is fun instead of a plain flat black.

Once I had the fabric patterns where I wanted them, all lined up, I started stapling it into place. This is where my efforts stalled. My staple gun wasn’t heavy-duty enough. So Al grabbed one to borrow from his dad. But then the staples weren’t long enough. So we went and bought longer staples. But they still wouldn’t staple through the fabric and padding and piping. So I had to change up my plan of attack.

We ended up stapling everything we could, again we followed it completely to how it was when we took it apart, so all chairs will be different.

Once everything was secure, I actually hand sewed the piping on. There are about two spots where you can see some thread but really only if you’re looking for it. My fingers were raw and burning and it took me forever but I think it was worth it because it looked pretty good in the end.

The final result left me very happy with our work.

One last before and after:

The final cost breakdown was:

$6.99 for the chair, $12 for fabric and piping, $3 for staples. A total of $21.99 plus some tax.

Not too bad. What do you think?!

recent finds and projects…

I’ve been in the middle of working on a few random, small projects here and there. Many of them involve paint though, so my operation was halted this weekend when it was 20 degrees and way too cold to paint outside. When it’s too cold or too hot outside you risk the paint not drying properly and evenly. So, I’m hoping today or tomorrow is a little warmer so I can get some painting done.

In the meantime though, thought I’d share what I’m working on. First, my favorite is this $6 lamp I picked up at the thrift store.

I’ve been hunting for a lamp for my desk for a while now and this one was perfect. I loved the detail and the curves of the base. Though, I think it was most definitely straight out of an 8-year-old boys room and it had a baseball themed lampshade or something. So I’ll be making that over with a nice coat of paint. It came shadeless so I set out to find one. I eye spied this one in Target and it was on clearance for just $5.08. (Forgot to take the plastic off the shade. It won’t normally reflect/shine like that!)

I think it was on clearance because the base was missing from it. It was the exact shape and size I was looking for. I haven’t decided yet if I’m going to keep it navy blue or jazz it up.

I’ve also been back working on this chair. We went back and forth on fabric and colors for the longest time and finally found something that works great with the rest of the living room. Here’s a sneak peek of what we chose…

Not my typical choice of fabric but I’m loving how it’s looking on the chair.

And in other fun find news, we scored this amazing antique side table at Goodwill for $6.99!

Al spotted it and it was perfect for right next to our new couch…!

We decided to sell the other couch we had (for more money than we bought it for!) because it just fell too large in the room. We picked this one up at the Jordan’s Clearance center. It’s so much more comfortable, fits better in the space and allows room for a side table, which we couldn’t fit with the other couch.

So, that’s my weekend update. Hopefully I can get some painting in soon!

a few household helpers

I wanted to share with you guys a few household helpers that I’ve been using lately. Well, one is a car helper, but same idea. All three things I found at the thrift store and each was less than $3.

The first is my beloved hanging fruit produce baskets. I’ve always loved these things. They’re so practical and it was exactly what we needed in our tiny house to hold fresh produce without cluttering up the counters.

I’ve also been so annoyed lately that small items in our dishwasher don’t stay put. Things like reuseable container lids, measuring spoons, water bottle tops, etc. They always end up on the bottom of the dishwasher and we had one item nearly start a fire once. I picked up a dishwasher basket that’s intended for baby bottles. It holds every thing in place and we no longer have issues of small items falling.

I’ve always kept some sort of bin in the trunk of the car. The last one I had was about 8 years old and barely stood up anymore. I’ve been way to cheap to buy a trunk organizer (they’re usually $15 and up) but I wanted it to have the velcro on the bottom so it wouldn’t tip over. I stumbled upon this kids organizer for a few bucks. It had the velcro on it and I knew it would work perfectly. It was even smaller than a standard trunk organizer which I loved because I really don’t have that much stuff to corral back there.

What about you guys? Have you found any great household helpers lately? Or have any random tips and suggestions of things you use around your own homes?