hanging mason jar vase

This was a project that I’ve seen on Pinterest in a few different styles. I thought we had the perfect space for it and it seemed fairly easy to make so I decided to try it out. The process was easy and inexpensive. I used the following:

  • 1 sheet of scrapbook paper (may need more depending on your wood size)
  • Piece of wood (could use any scrap wood you have lying around. I didn’t have any so grabbed a scrap from Home Depot)
  • Hose clamp (bring your jar with to make sure you get the right size)
  • Mason jar
  • Mod Podge

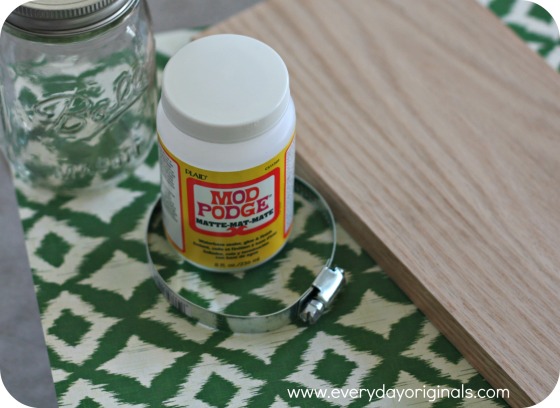
supplies

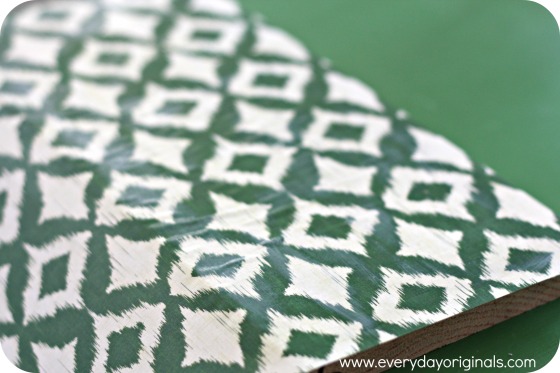
I roughed up the piece of wood by lightly sanding, then I cut the paper to fit the size of the wood. I painted a light coat of mod podge onto the wood. Carefully, I placed the sheet of paper on and smoothed it out so there were no bubbles. I then painted another very thin coat of mod podge over the paper.

bubbles

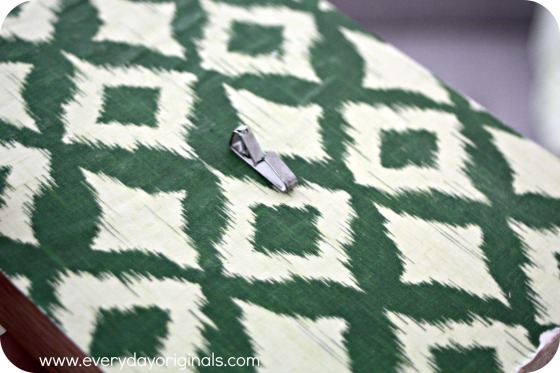
I let dry for a few hours until it wasn’t tacky to touch. I used a picture hanger to hang the hose clamp, as you can see in the photo. Once I secured that the hose clamp hung right off of it.

hook

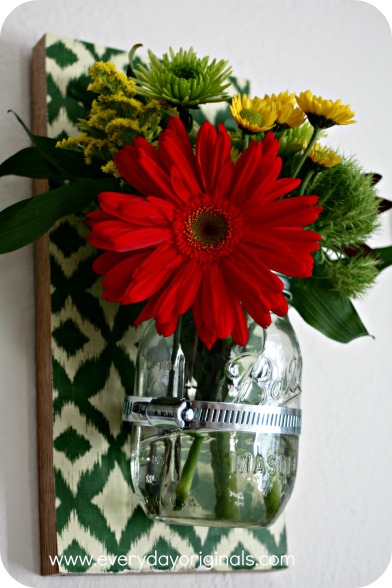
Once it was attached I secured the Mason jar. The hose clamp is adjustable so I loosened it to insert the mason jar and then tightened it until the jar wouldn’t slip through. I tested it out by filling half full with water before hanging and adding water and flowers to ensure the jar didn’t slide out. It didn’t!

flowers

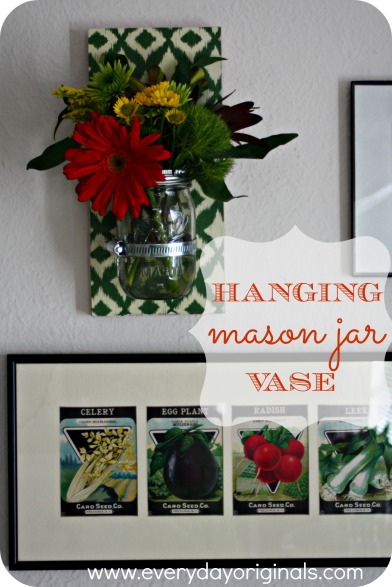
Since we have these insane walls that are near impossible to nail into I used a 3M strip to hang it. I grabbed the ones that hold up to twelve pounds, followed the instructions on the package and hung.

final

Such a simple, inexpensive, wall hanging. The total cost break down was:

  • Wood: $0.50
  • Paper: $0.29
  • Hose clamp: $2.00
  • 3M strips: $3.00
  • Mod Podge, scrap-book paper: already had

Love $6 projects! We hung it in our kitchen/dining area but I’m thinking I might make a few more with different paper and larger mason jars to hang in the living area. I also love the idea of making them with wine bottles. Hmm maybe I’ll do that instead!

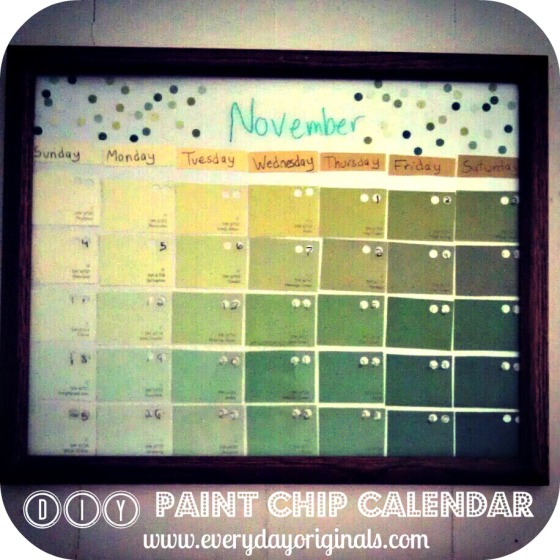
reader project: paint chip calendar

I love this idea for a calendar. It’s great because you can choose whatever colors you’d like, match any decor you want, and it’s super easy because you just wipe off each month and start fresh the next. I love that.

I saw a friend post this on Facebook and I loved it. She said I could share it with you guys. Maybe you’ll get some inspiration to make one yourselves. I’m definitely going to make one once I figure out the decor and colors of our kitchen area. It’s really simple.

You choose the paint chips you want and a picture frame large enough to hold them all. I would look for a thrifted frame and paint it or use a craft store coupon (you can find them on all of their websites…never shop at a craft store without one!) to get a good deal on a new one, or maybe you have one lying around already.

paint chip calendar

You can simply tape or glue the paint chips in whatever order you’d like. In this particular one Katie also hole punched each paint chip and then used the punched out hole pieces to look like confetti at the top. So cute!

You can design it however you’d like to personalize it to your taste. Then, using a dry erase marker you simply write in the days of the week at the top and the dates on each square. At the end of the month, wipe it clean and start over!

I can’t wait to make one for our apartment. Have any of you guys made paint chip calendars? Maybe thought about it? Still like your flip-the-page-calendar-with-random-cats-or-dogs-or-landscape? Whatever you fancy!

a peek into the archives: small space photo collages

To celebrate EO’s 3rd Blogiversary we’re taking a peek back into the archives. There are lots of great posts and information in the archives so I thought I’d re-visit some this week. Enjoy!

Even though our living room has such little wall space I wanted to be sure to still hang some photos of family and friends. However, I knew I wasn’t going to be able to pull off a large photo wall like I did in our last two apartments. So, instead I created two photo collages. I picked up two 11×14 frames at the thrift store.

I think I paid $2.99 each, or somewhere around there. We spray painted them black, which we already had on hand. I gathered together all the photos that I wanted to include in the frames, but I ended up having too many so I had to pick and choose.

Using my cutting mat, rotary cutter and yard stick I started trimming and sizing each photo. I decided to do this first instead of figuring out a layout first. Many of the photos had plenty of space to be chopped off, which made it was easier for me to trim them to size and then arrange.

I used a light colored linen fabric to cover the photo mats that came with the frame. I simply wrapped the mat like it was a present and taped the back side of it. Once the mats were covered and the photos were all cut I arranged and re-arranged one hundred times until I found the perfect setup where they all fit.

I went ahead and washed the glass on both sides and reassembled the entire collages.

Don’t mind the crazy flower petals and leaves overlapping the collages. I’ll share the whole wall when it’s complete! I’m entirely satisfied with how they turned out though. I love the smooth lines and the mix of color and black and white’s. It’s hard to capture the color and texture of the linen background here, but it’s such a lovely backdrop to the photos.

I’d love to know how you all hang/share photos? Picture frames? Collages? Does anyone have one of those digital frames? I love the idea of the digital frames but I’ve heard they use a lot of energy. Thoughts?!

placemat art

Have you ever thought to create some inexpensive art with a placemat? I was perusing Bed, Bath & Beyond one day and stumbled upon this placemat that I just loved. I loved the colors and the detail but I really had no need for more placemats.

I thought a little more creatively and knew the colors would match perfectly in our bedroom. I already had the correct sized frame at home so I grabbed one placemat, on clearance for $1.50 and set off to make some cheap art.

I framed it and hung it above one of the antique wall lamps in our bedroom. I love the look of it and it adds a different touch of art from the wedding photos on one of the other walls.

Problem now is that we just got a new comforter. And while we’re trying to decide if we love the comforter I’m trying to find another place for my placemat art because it does nothing but clash with the new bedding. If I do have to move it I know it’ll be perfect in our bathroom as well, so I have options!

Also, random side note. Every time I went to type placemat art it came out placemart. I couldn’t control it, my fingers just automatically typed placemart…!

burlap bulletin board

I was off from work last week so I took some time to relax, see friends, do projects around the house and relax. I’m back with my burlap bulletin board that I’ve been wanting to make for quite some time.

Back in June I visited a friend in Barrington, RI and she took me to this fabulous consignment shop. I found this wooden frame for about $2 and I knew it’d be perfect for my bulletin board project. I already had burlap and found a cork board for $2 at a thrift store. Trimmed in such a lovely lace ribbon.

I decided on a Krylon spray paint called “Pimento” to accent my office space with. I gave the wood frame three even coats of spray paint and allowed it proper time to dry.

While it was drying I cut out the cork board from the metal frame.

I wrapped the cork board in burlap and then secured it into the wood frame.

Using both my hot glue gun and staple gun I got the whole thing rigged together.

I hung it on the wall above my desk and I love it. It’s the perfect size for my small desk and I LOVE the color of it. It’s pretty boring to just photograph a bulletin board on a bare wall, so there’s a close up of the color and detail below.

I’m slowly making progress on my office space so stay tuned for more small space organizing tips. Do you have any great office organizing tips to share? Something that works for you? Something that doesn’t?

window frame cork board

I’ve been wanting to try out a project using an old window and wine corks for awhile now. I just didn’t know I’d use them together. I found this window at an antique store in Onset, MA for $3. It was terribly filthy so I gave it a nice wash and sanded some spots that needed it.

I used leftover fabric I had and stapled it onto the back so that the yellow shows through.


Using wine corks that I’ve collected and that my sister and parents have, I started playing around with some layouts. Once I found the one I liked best I got to work hot gluing them into place.

This was a really easy project and is perfect for our kitchen. We use the glass panes as a white board for notes and shopping lists. I didn’t have enough corks to complete the middle glass pane at the top but I’ve heard mixed reviews from people. Some say they like it glass, some say cover it with corks. Thoughts?

In due time, when I finish decorating the bare wall it’s hanging on, I’ll share photos of the complete display. For now though, it’s successfully serving it’s purpose!

an easy fix for old art

A few months back I was out poking through antique stores with my mom when I came across this old fashioned silhouette framed art. I got it for about $6 and thought it would be a cute added touch to my nightstand.

It was still in the original frame, and though it was cool, it was very worn down and had lots of sharp hardware on it.

An easy fix was to just re-frame it. I was able to pull the backside off the frame, but then I realized that the image was actually painted directly on the glass and was backed with a silvery fabric.

It was easy to frame and the glass from the original fit right into the updated frame. Not bad for some $6 art.

delightful doilies

My mom has a ton of these antique doilies lying around and so I started to think up some things you could do with them. Here I framed them two different ways, one as a coffee table tray and the other as a little added decoration on top of a dresser. I simply used some old scrap fabric that I had, placed the doily on top and framed them.

They’re easy to use around the house too, as table runners or under a centerpiece. Super easy and super fast, but I totally understand that this has to be your style, not everyone will like them. For those of you who do like the vintage feel of hand-made doilies let us know what you use them for or if you have any other suggestions!