diy custom name art with photographs

Name art are all the rage right now and really I don’t mind it. I think they’re cute, artistic, abstract and can be really cool depending on the chosen art. You know what I’m talking about, right? The artwork you can buy that spells out a name in photographs of found letters in everyday life.

Well my sister and her husband wanted to use exactly that as their guest book at their wedding. I know, I’m still talking about their wedding nearly eight months later. But I love them and I loved their wedding and I loved being able to help plan it. They put me on the job and I’d have to say that I think their name came out pretty good.

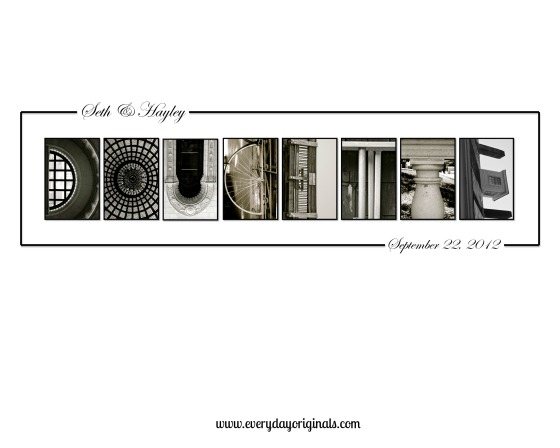
I want to share with you guys how easy it is to create this on your own instead of paying top dollar to buy it. For months and months before hand I was sure to bring my camera with me on outings just in case I ran into “letters.” You find them in strange places! Once I had all the photos I created a word document. Yes, no special software or program, a simple word document. I edited each photograph first using iPhoto on my Mac, but another option is the free photo editing site PicMonkey. Once I cropped and edited the colors to make sure all the blacks, whites and grays were alike I think simply opened my word doc, set the page to the size we wanted the final print to be and dragged in each letter.

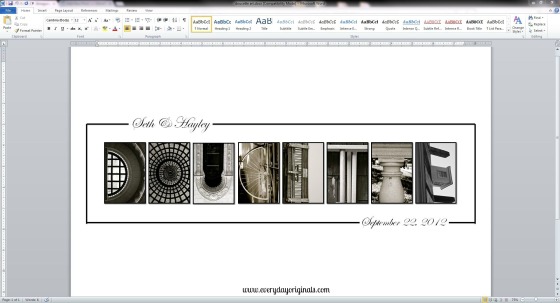
word doucette art

I put each letter into the doc and then sized each one to be the exact same and lined them up in order. Using the options in Word I created a border around all the letters. Then using a text box I added their names and wedding date.  If you place the text box over the border lines it’ll cover the line and make it disappear. Adjust the text box to whatever size you want.

Done! It was complete, very simple. We had it printed at Staples on one of their fancy printers in the size of our choice. I think it cost us around $15. So between that and the frame it was a whole lot cheaper than custom ordering the same thing.

doucette art final

We framed it up and they used it as their guest book at the wedding and had everyone sign it and write notes around it. This is totally where my mom would be all like “Wait, Lindsey you spelled it wrong.” And I would flip a lid and she’d be all, “Just kidding!” Yeah, she still does that and it still gets me every time.

I’m bummed that I don’t have a photo of the final result, with all the notes around it, but it looked really cool and it was a great alternative to a guest book. Something you can actually hang and read every time you walk by it hanging in your house.

Did you guys do anything other than a traditional guest book at your own wedding?

P.S. I didn’t do a great job of showing how I made this because I did it so long ago and didn’t take screenshots. However, if it’s something you’re interested in please feel free to reach out to me and I’m happy to work with you to help create a similar project!

a peek into the archives: small space photo collages

To celebrate EO’s 3rd Blogiversary we’re taking a peek back into the archives. There are lots of great posts and information in the archives so I thought I’d re-visit some this week. Enjoy!

Even though our living room has such little wall space I wanted to be sure to still hang some photos of family and friends. However, I knew I wasn’t going to be able to pull off a large photo wall like I did in our last two apartments. So, instead I created two photo collages. I picked up two 11×14 frames at the thrift store.

I think I paid $2.99 each, or somewhere around there. We spray painted them black, which we already had on hand. I gathered together all the photos that I wanted to include in the frames, but I ended up having too many so I had to pick and choose.

Using my cutting mat, rotary cutter and yard stick I started trimming and sizing each photo. I decided to do this first instead of figuring out a layout first. Many of the photos had plenty of space to be chopped off, which made it was easier for me to trim them to size and then arrange.

I used a light colored linen fabric to cover the photo mats that came with the frame. I simply wrapped the mat like it was a present and taped the back side of it. Once the mats were covered and the photos were all cut I arranged and re-arranged one hundred times until I found the perfect setup where they all fit.

I went ahead and washed the glass on both sides and reassembled the entire collages.

Don’t mind the crazy flower petals and leaves overlapping the collages. I’ll share the whole wall when it’s complete! I’m entirely satisfied with how they turned out though. I love the smooth lines and the mix of color and black and white’s. It’s hard to capture the color and texture of the linen background here, but it’s such a lovely backdrop to the photos.

I’d love to know how you all hang/share photos? Picture frames? Collages? Does anyone have one of those digital frames? I love the idea of the digital frames but I’ve heard they use a lot of energy. Thoughts?!

photo collage wall

Earlier in the Fall I showed you guys the photo collages I made in efforts to still display photos but with fewer photo frames. Hanging around those two collage frames were a few other frames that I had around the house. It’s not my perfect collage wall, if I had more space it would definitely be different. But, I like the way it looks for now in the living room that we have.

I’m planning to replace the wall vases with other things. They were hanging because we were having a party and I didn’t have table space for flowers. They’re a little unruly with those crazy green branches.

Before I started to put holes in the wall I laid out the collage on the floor and re-arranged it a few times. That way it was easier to see how everything fit together.

I’ve also given up attempting to take semi-nice photos inside our house. It just doesn’t happen. The yellow walls reflect terribly, and mix that with the yellow lighting. It’s nasty.

To the right of the collage wall is our massive television so that’s why I only had space for a small collage wall.

Hopefully now I can attempt to show you guys the entire living room. Let’s hope it doesn’t take me a year to figure out how to photograph that. How do you guys display photos? Table frames? Collage walls?

photo collages for small spaces

Even though our living room has such little wall space I wanted to be sure to still hang some photos of family and friends. However, I knew I wasn’t going to be able to pull off a large photo wall like I did in our last two apartments. So, instead I created two photo collages. I picked up two 11×14 frames at the thrift store.

I think I paid $2.99 each, or somewhere around there. We spray painted them black, which we already had on hand. I gathered together all the photos that I wanted to include in the frames, but I ended up having too many so I had to pick and choose.

Using my cutting mat, rotary cutter and yard stick I started trimming and sizing each photo. I decided to do this first instead of figuring out a layout first. Many of the photos had plenty of space to be chopped off, which made it was easier for me to trim them to size and then arrange.

I used a light colored linen fabric to cover the photo mats that came with the frame. I simply wrapped the mat like it was a present and taped the back side of it. Once the mats were covered and the photos were all cut I arranged and re-arranged one hundred times until I found the perfect setup where they all fit.

I went ahead and washed the glass on both sides and reassembled the entire collages.

Don’t mind the crazy flower petals and leaves overlapping the collages. I’ll share the whole wall when it’s complete! I’m entirely satisfied with how they turned out though. I love the smooth lines and the mix of color and black and white’s. It’s hard to capture the color and texture of the linen background here, but it’s such a lovely backdrop to the photos.

I’d love to know how you all hang/share photos? Picture frames? Collages? Does anyone have one of those digital frames? I love the idea of the digital frames but I’ve heard they use a lot of energy. Thoughts?!

one perfectly functional camera bag

These and these are both really cute, really expensive camera bags. Tons of different styles on both sites and they’re all great. But, it’s not in the budget right now for me to get a new camera bag just for the heck of it. I have two perfectly good ones, but I love the idea of being able to use this as my camera and my purse.

For weeks I had been scouring through consignment and thrift stores. And then I found this:

And it cost me:

It was the perfect size and the straps were long enough that they would be comfortable on my shoulder with all the weight in it.

The first thing I needed to do was figure out a way to cushion the inside so that my camera had a nice soft surrounding. After I chose the fabric that I wanted it lined with I started looking around for what else I could use as cushion before resorting to buying something. Turns out we had about two extra yards of orange fabric from Al’s 2009 Halloween costume that I have been dying to either use or get rid of.

The orange fabric was a heavy-duty, soft lined cotton, and clearly, was just what I needed.

Inside the bag I measured the height, width and depth of each side and cut pieces to size of the pretty fabric and the solid orange.

I had 4 layers of the orange fabric and one of the decorative. I sewed all of the pieces together to make a cushion that fit perfectly into the bag. I also sewed two strips of velcro onto the decorative fabric on each of the long sides of the bag.

I then hand sewed the insert to the lining of the bag. You can see how the zipper pocket that was already in the bag is still usable.

I removed the camera dividers from one of my other camera bags. Since they already had the velcro on them I simply had to place them into the bag and arrange them how I wanted against the velcro I sewed in on the sides. Final product: a functional, camera bag that holds all of my regular purse items too. Items that are in the bag: wallet, cell phone, small makeup bag, camera with lens, telephoto lens, battery charger, lens cleaner, small notebook, pen, small point and shoot camera and USB cord.

Here it is all closed up and ready to go:

All for a grand total of $5.49. I love it. Love, love, love it. I used it last weekend for my brother-in-laws graduation celebration in Boston and it was perfect. Not too big, not too small. You can also see in the photo that I have an extra divider in there, just in case I ever need to rearrange. It’s perfect, and for the time being makes me feel great about not spending a whole lot more on it!