giving new life to clothing with dye!

I’ve shared my dyed jeans before (which I still get SO many compliments on) and I’m still loving the idea of dyeing clothes. Especially if it gives new life to items. My mom gave me this Land’s End jacket in the spring. I really love it and it’s been a great light jacket for Colorado. However, it was white and I took it backpacking this summer. It poured, I threw it in the truck and muddy dogs and gear were all over it. I just figured it would come clean and it didn’t.

stains

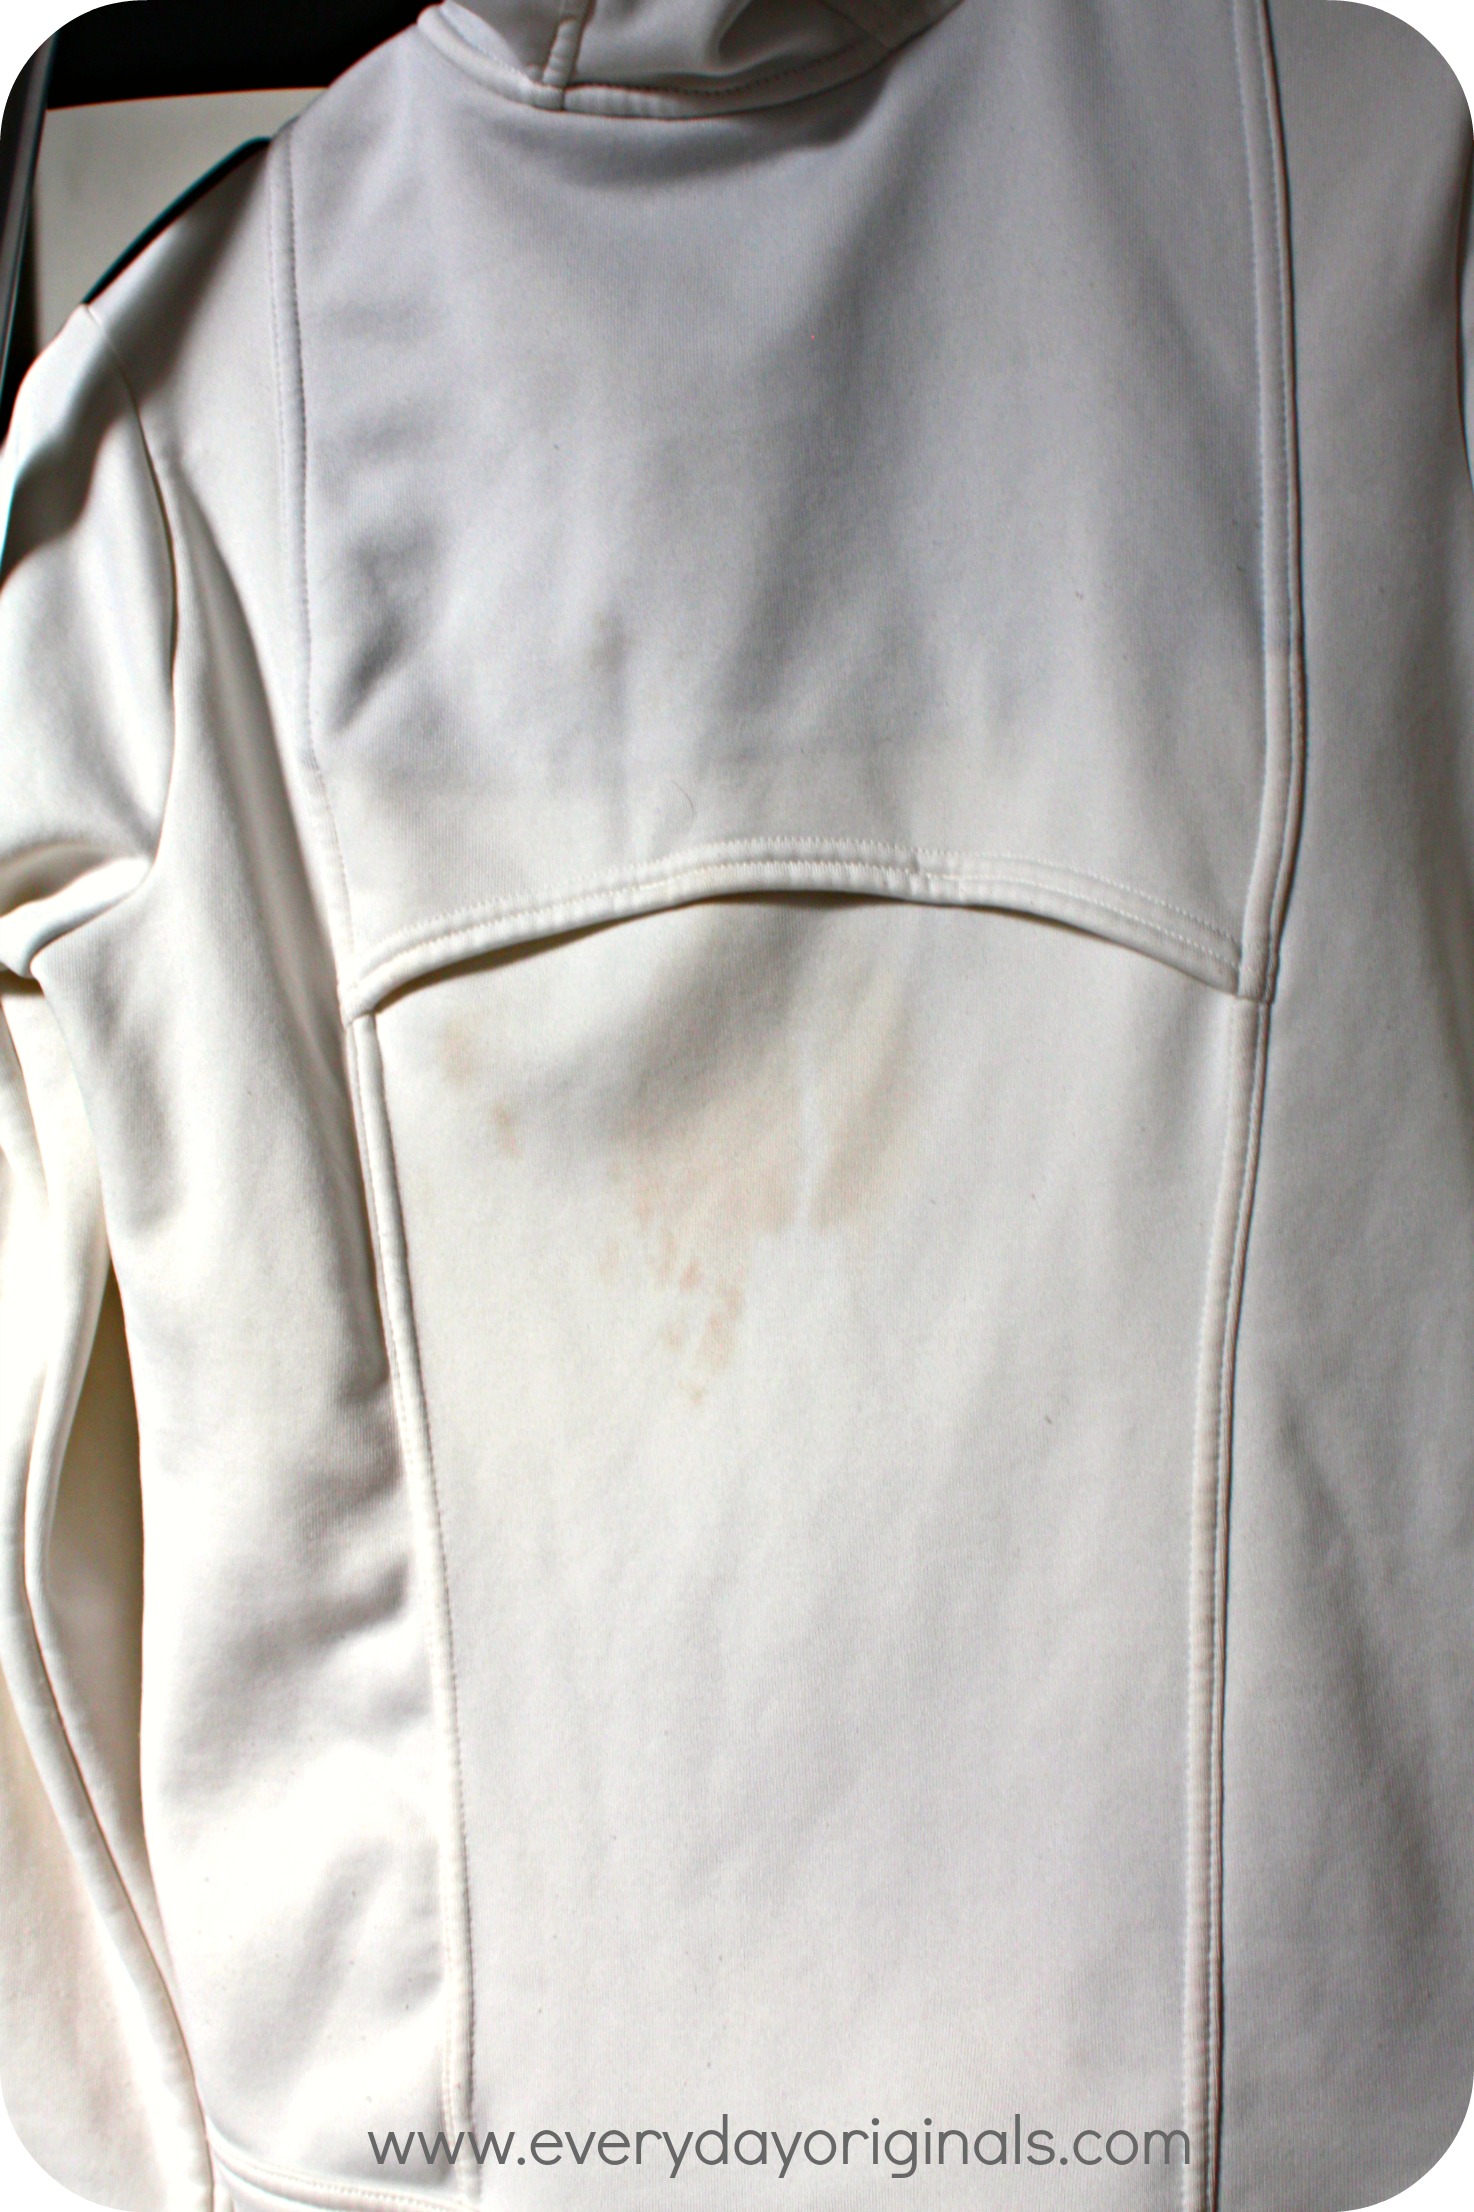
I washed it, stain treated it, oxy cleaned it and nothing would take out the stains. But it was still a perfectly fine jacket except for the stains. Not wanting to toss it I decided to try dyeing it. The worst that could happen was that it didn’t work and I had to toss it anyway.

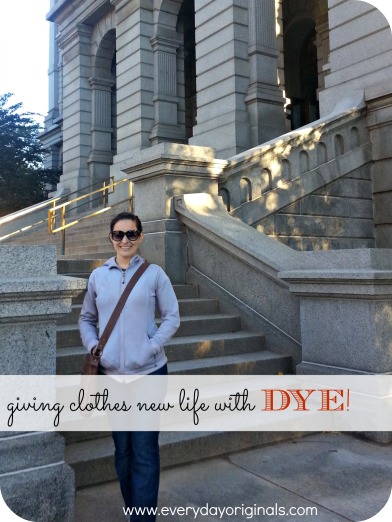
I grabbed a box of black Rit Dye for two bucks or so. Following the instructions on the package I dyed my jacket. Some fabrics don’t hold the dye as well and this was one of those fabrics, so it turned out light grey. However, it stilled covered all the mud stains and looks like a perfectly fine jacket. You can’t even tell the stains were there. I’m just psyched to still be able to wear the jacket. I might try dyeing it again to see if I can get it a bit darker, but for now it’s fine. Enter awkward, touristy photo.

jacket

I have another great dye project up my sleeve that I can’t wait to try. Will share afterwards!

fabric painting a “free gift” overnight bag

Earlier this spring I had ordered a bunch of swim suits from Victoria’s Secret. With purchase I received this great duffel bag that was free. Well, when none of the suits fit I called up VS to see if I should also send back the free gift. They said nope, mine to keep. I won’t lie, I was a tad psyched because it was the perfect size bag for 1-2 overnights.

But, I hate advertising brands so I couldn’t stand that in giant capital letters it said “Victoria’s Secret” straight across it. Then I got to thinking about this library book bag I made with the three-year old I nanny for (the middle says her name). We used some fabric paint that we picked up at the craft store.

There was still leftover paint from it so using painters tape I taped off the words on my free bag and started painting.

I think it took three coats of paint and you can still see the silhouette a tad of the letters. For a quick fix though, it was perfectly fine. I could have stuffed the bag to prevent the wrinkles, but let’s keep it real here. You know this bag is shoved in a closet when not in use.

This project was totally free (well, except for the 5 bucks in return shipping I paid to VS to return the suits). If I have time in the next few weeks I’m might grab a darker color fabric paint and paint it again to see if it covers a little better. Not bad for a free overnight bag!

april pinterest project: t-shirt shag rug

I’m loving doing my Pinterest projects! This month I made a t-shirt rug using old white t-shirts of Al’s. For awhile I’ve been wanting a small roundish rug at the top of the stairs between each bedroom. It’s a tiny landing and I thought it would look better with a little rug and it would be nice and cozy on cold toes just waking up.

I started with a large pile of t-shirts, collected over a while. Every time one would be worn out and grungy I’d take it from Al and put it in my pile. I wanted all white but you could do all different colors (like in the tutorial I followed). I followed this tutorial that I had pinned on Pinterest.

I started by cutting one t-shirt in half and then cutting out an oval shape for the base of my rug.

Then I cut two entire t-shirts worth of 6 inch long, 1 inch wide strips.

I then made vertical and horizontal snip-its in the oval shape. I alternated doing one row horizontal, one vertical and so on. When I was done I had a big oval with lots of holes.

I started to thread the strips through the holes. I’d pull it through the hole and then loop it around back and pull the other end of the strip through another hole close by. Then I’d start with another strip and thread it through one of the same holes that there’s already a strip in and loop it through to another empty hole. Is this making sense? The tutorial probably explains it better!

And then I get really excited and on a roll and forget to take photos of anything during the process. Check here for photos during the process.

I did this for a long while, easy but time-consuming and a bit tedious. I sat and watched the Bruins game while I did it. Definitely a mindless, in front of the TV project.

Once all the holes were filled I went through and made a few extra, random snip it’s where there were open spaces. I threaded more strips through until it looked fuller.

I was really pleased with the outcome! It’s just a tiny rug, I’m not sure I would have had patience for much more than that, but it’s the perfect size, texture and dimensions that the top of the stairs needed.

For cleaning purposes I figure since it’s not a high traffic shoe area, I’ll probably shake it outside gently pretty often. When washing is needed I’ll put it in a mesh bag to wash so that all the pieces stay together.

What about you guys? Have you been working on any Pinterest projects lately? I’ve been working on them a lot more now because I’m just loving the inspiration and ideas!

pillowcase shoe bags

I’m currently training for the Boston Marathon, which means a whole lot of running, working out and gym going. Dirty shoes gross me out, especially if they’re touching other clean things. I’ve been wanting to make a few shoe bags for a while and I found a great tutorial on Betz White’s blog that was super easy.

I found the pillow case at a thrift store for $1.99. At checkout though, it rang up at 50% off, which made me the happiest person in the world. I picked up some rope to use for the drawstring and I was able to make myself two shoe bags for a total of $2.83.

It took me about 20 minutes to complete each of them and I’m totally thrilled with the outcome. Who knew you could be so excited about shoe bags? I’m planning to make more, some larger for Al’s shoes and some out of different fabrics for some of my fancier shoes. They’re great for travel, as gifts, and even just to have and use for other items as well.

I can’t wait to make more. I’m also going to experiment with different string/ropes as the drawstring. The one I used is a bit too thick, but still works fine. Definitely a better, reusable option compared to a plastic bag!

holiday table dressing

There are many simple ways to dress up your dining table for the holidays. Though, some can become large, intrusive and overall gaudy. Ours is very simple mostly because our kitchen table is so, so tiny, but using what we’ve done you can definitely add to it if you have a larger table.

I draped a red scarf I had as a table runner and placed a glass bowl from our wedding in the center. I found the two green glasses at the thrift store for $0.50 each and the ornament balls were ours. I filled the bowl with the ornaments and added tea lights to the glasses.

I love the added touch of the colored balls versus neutral silver, white or gold ones. This dressing allows us enough space to still eat dinner without having to move it. If you have a larger table I suggest the same thing, with the addition of: more ornament balls, pine cones or branches of fresh greens scattered down the table runner, or you could do an assortment of other candles and candle sticks.

Do you have a special table dressing for the holidays? If so I’d love to hear about it or even see a photo. Share, share, share!

kaitlin’s trendy flower pins

Kaitlin is our guest blogger today, and not only is she a fabulous writer she’s bringing us an awesome project while still being frugal and re-purposing a few items. Check out her post below:


As a trendy girl of twenty-five, I find that most of my paycheck regrettably still goes to fashion. I love clothes, especially expensive clothes, but because of today’s recession, I’ve had to cut back…A LOT! That’s why it was so unfortunate when I discovered a spring jacket at my all-time favorite store, Anthropologie, for $118. I almost found the justification to buy the thing, when I realized that the only reason I liked the jacket was for the cute fabric flower pin that came attached. Needless to say, $118 for a jacket that I might wear for two or three months out of the year is ludicrous. I decided to seek a cheaper alternative for my need to be fashion forward.

A few weeks later, I stumbled upon a jacket at Forever 21 in a different color, but a similar style for, wait for it, $22.50! What a steal! I was so proud of myself for finding such a bargain! The only downside to the jacket was the missing flower pin. That’s when I thought of making one. It couldn’t be that hard, right? Turns out, it was the easiest craft I have ever tried to make (and I don’t even know how to sew!)

Using these directions I created the flowers, but I encourage you to use any template or even create your own! I used scrap fabric and felt that I had from other projects for the flowers. For the center, I used old beads that and antique buttons I bought on eBay for $1. Another great idea is to use the extra buttons you get from new clothing and coats. I always save them, but never end up needing them. The pin backs I had to buy at a local craft store for $.29, but you could easily take them off of an old pin you didn’t wear anymore. Also, instead of sewing the felt backing, I just used a hot glue gun. Since I don’t really know how to sew, the glue has a better chance of holding everything together. It sure beats spending $118, and now it’s even better because I created it myself!

I just love, love, love these fabric flowers. Kaitlin made me three flowers and each one is unique and beautiful.

Not only can they be used on all kinds of jackets, but they are also great on tank tops, t-shirts, bags, scarfs, etc. So many things to do with them and you can easily change them up often. Thanks Kaitlin!

sweater made coffee cup sleeves

We’re back with some re-purposed sweater projects! My sister Hayley handed over a great sweater to me when a hole bust in it. She knew I could use it for something so she saved it for me. I know I’ll find many ways to re-purpose it, but the first thing I did was make a reusable coffee cup sleeve. It was easy as anything to make. I cut three inches off the sleeve and slid it onto the cardboard cup.

A few notes here though. This sweater was a tight enough knit that it stays put on the cup. But, some knits may be loose on the cup and will slide around and you could risk dropping the cup all together. In that case, I recommend cutting a piece of crafting foam the same size and gluing the two together. This way the foam will grip the cup and it won’t slide around.

It was so easy to make and offers a nice environmentally conscious feel to your morning coffee when a travel mug is lacking!

shrunken sweater = new laptop sleeve

Ooooookay, we are back. Apologies for the lack of posts. That great vacation we were on…not so great. We were both brutally ill and are just now getting our energy back. Thanks for your patience though!

Anyway, what do you get when you have a new wool sweater for your husband and a wife who’s really bad a doing laundry? A very small new wool sweater and a brand new laptop case. That’s right, I have problems with our dryer and I shrunk his new sweater. So I got to work on re-purposing it. Using instructions from this website I created a great new laptop sleeve for our mac. Please note, mine should be straight across but I also have issues with doing things in a straight line (note the slanted velcro…), so mine is fancy and slanted.

Totally not perfect AT ALL, but it does the trick and I love it. The instructions call for a fabric to line it with as well as batting, however, I just lined it with fleece so I didn’t need an additional fabric. I had the fleece, but feel free to try it with the batting too. If anyone does decide to make one please share it along with any additional advice you might have!