spring cleaning!

I know that we’re a ways into spring now but it’s taken me longer than normal to get into my spring cleaning routine. Problem is there’s so many awesome, fun, adventurous thing to do here in CO that I just want to be out doing them. I know, I know, tough problem to have!

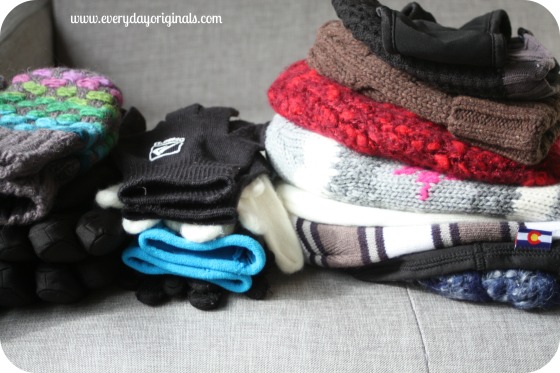
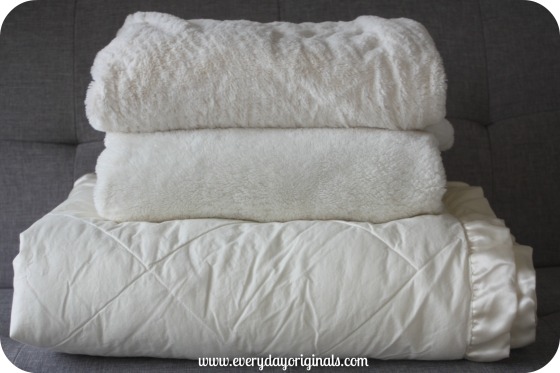
So while it may be taking me a little longer to get through everything, I’m still slowly working my way through. I’ve already washed all the warm blankets – the throws and the comforter. I’ve already washed all the winter gear – the hats, gloves, scarves. Though, of course as soon as I washed them all and packed them all up we had like 4 snow storms in April!

blankets

We’ve purged a lot, which I like to do seasonally. We have such a small amount of belongings now since we moved across country, so I’ve actually left a box in the back of the car and as it fills up I donate it. I just don’t have as much stuff to donate anymore because we have so little. This way I at least have a box full when I donate.

winter gear

I still have a list to get through though. Things like:

  • Wash all the winter jackets
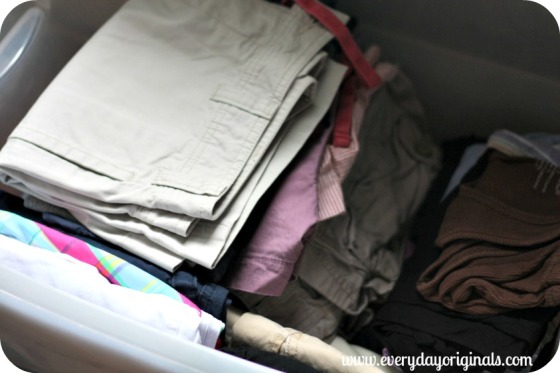
  • Put away the winter clothes, unpack the spring/summer clothes
  • Wipe down any salt/dirt from winter boots and pack away
  • Wash all the baseboards
  • Wash the windows and windowsills

summer clothes

I’m sure I’ll think of more things to do as well. But for now that’s what I’m focused on getting done in the next few weeks. It always feels so great to have a fresh clean house, doesn’t it?

Have you guys been up to any spring cleaning lately? What’s on your list that I missed here?

diy wrapped storage boxes

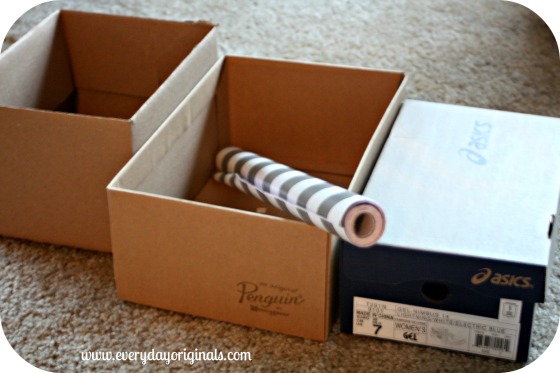
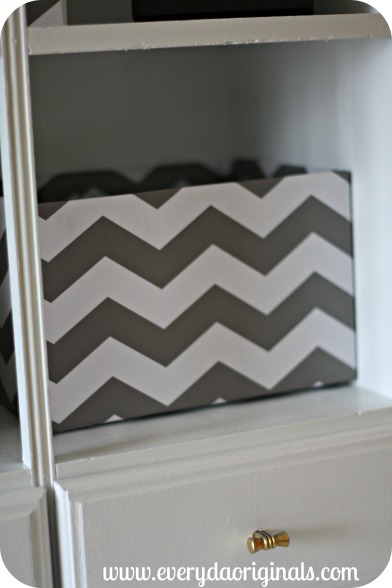
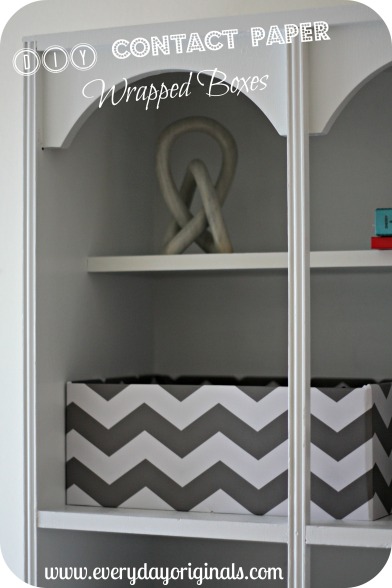
This project was so easy and was incredibly close to free. Win, win. We needed some storage bins for our bedroom furniture and as much as I would have liked to buy all new, matching baskets or wire bins it wasn’t in the budget. So I decided to use some boxes that I already had and picked up some contact paper at TJ Maxx. The boxes were free and the contact paper was $5.99 for a pack of two rolls which I’ve used in about three other places in our apartment. I’d say I got my money’s worth!

supplies

I gathered up my boxes and paper and then I very simply just wrapped the boxes with the contact paper. Kind of like I did way back when I used wrapping paper to make some storage boxes. Often times I think people are intimidated by contact paper because of the whole stick factor and not wanting to mess up. But, it’s actually quite easy to peel of and readjust as needed.

wrapping

The contact paper I purchased had a graph on the back so it made it much easier to measure and wrap. However, if you find a cute pattern that doesn’t have the graph on the back it’s no biggie, because like I said this was super easy. If you know how to wrap a present you can wrap a few boxes.

wrapped

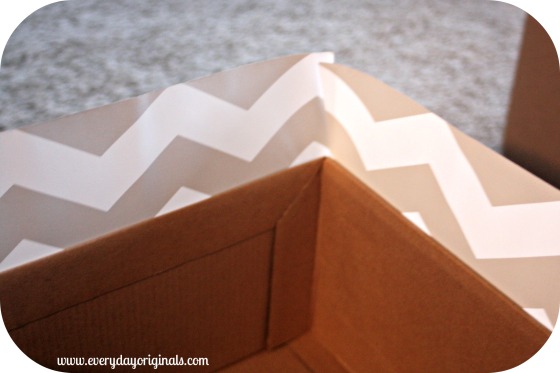
And even if you’re the worst present wrapper in the whole world you can still do this, I swear, because the contact paper will smooth right out. My favorite part about the whole project is how the chevron contact paper gives an added pop to boring storage.

final

You guys been up to any projects lately? Any great, inexpensive storage ideas?

reader project: paint chip calendar

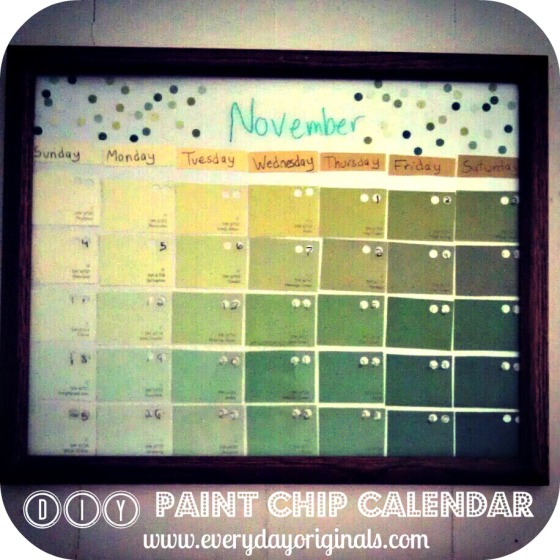
I love this idea for a calendar. It’s great because you can choose whatever colors you’d like, match any decor you want, and it’s super easy because you just wipe off each month and start fresh the next. I love that.

I saw a friend post this on Facebook and I loved it. She said I could share it with you guys. Maybe you’ll get some inspiration to make one yourselves. I’m definitely going to make one once I figure out the decor and colors of our kitchen area. It’s really simple.

You choose the paint chips you want and a picture frame large enough to hold them all. I would look for a thrifted frame and paint it or use a craft store coupon (you can find them on all of their websites…never shop at a craft store without one!) to get a good deal on a new one, or maybe you have one lying around already.

paint chip calendar

You can simply tape or glue the paint chips in whatever order you’d like. In this particular one Katie also hole punched each paint chip and then used the punched out hole pieces to look like confetti at the top. So cute!

You can design it however you’d like to personalize it to your taste. Then, using a dry erase marker you simply write in the days of the week at the top and the dates on each square. At the end of the month, wipe it clean and start over!

I can’t wait to make one for our apartment. Have any of you guys made paint chip calendars? Maybe thought about it? Still like your flip-the-page-calendar-with-random-cats-or-dogs-or-landscape? Whatever you fancy!

a peek into the archives: craigslist 101

To celebrate EO’s 3rd Blogiversary we’re taking a peek back into the archives. There are lots of great posts and information in the archives so I thought I’d re-visit some this week. Enjoy!

It’s no secret that I have a love for Craigslist. You can find almost anything you’re looking for. I use it to buy and sell. Before I buy anything I always check Craigslist first to see if there’s any postings for what I’m looking for. Navigating Craigslist can be overwhelming though, so I wanted to share some buying and selling tips with you.

Selling

1. Price to sell – think about what you’re selling and where you’re selling. Craigslist buyers are looking to pay as little as possible. I always search similar items, to what I’m selling, to see the going price. From there I price competitively. I’m also always willing to negotiate price if it’ll move something faster from my home that’s taking up space. I’ll often write “willing to negotiate” or “looking for a quick sale.”

2. Include specific details – always include measurements (if applicable), colors, condition and any other important details you think a buyer would like or need to know. Buyers are just going to ask those details in an email or call to you, so simply include them in the first place.

3. Honesty – don’t say your couch is in perfect condition when in reality your cat has clawed up one whole side of it. Always specify if you have pets of smokers in your home. Buyers want to know this information for allergies and other reasons.

4. Excellent photos – photos are key to selling. In the past I’ve received no responses to a photo-less post. Minutes after uploading a photo to the same posting I had numerous responses. Buyers like a visual. Make sure the photos are decent too. Not blurry, not too many shadows or highlights. You don’t need a fancy camera, I often use my cell phone camera.

5. Communicate appropriately – I never give out unnecessary information too soon. I actually pick and choose who I respond too and I always check the email address coming in. There’s a lot of spam out there and I’m not willing to risk it. If I think it’s shady or spam like then I don’t respond.

6. Be smart and safe – I always make sure Al is home with me when someone is coming to pick up. In college I used to make sure I had a friend or roommate with me. Always safer to have another person than to be alone. Craigslist is not supposed to frighten people, but you still have to be smart and safe.

Buying:

1. Peruse the site – search around for what you’re looking for, and do it often. Search a few different phrases and even misspell the item you’re looking for. You’d be surprised at how many postings are misspelled…but it could be just that thing you were looking for!

2. Reach out – when you find what you’re looking for, email (or call if a phone number is provided) the seller. In your email be sure to include the URL to the post. Often sellers post numerous items at the same time, so be sure to specify. Tell them you’re interested and could come by/take a look. Ask lots of questions if you have them.

3. Be responsive – if the seller gets back to you, respond quickly, if you’re really that interested. Sellers often have a few buyers lined up, so you wouldn’t want to lose your chance.

4. Don’t get discouraged – Craigslist finds will come and go, but keep searching. You may find that perfect item and by the time you reach out it’s gone. Keep looking, chances are something similar is going to turn up again.

5. Be smart and safe – Don’t meet someone in a secluded place and always go with another person. If it makes you more comfortable talk to the person on the phone before hand. Always bring cash and bring the exact amount. I can’t tell you how many times I’ve made MORE money on selling something because I didn’t have change for the buyer and they didn’t have the exact amount. My gain, their loss, but I’d hate to have it happen to you! Don’t ever mail money to anyone, cash a check for anyone, agree to have something shipped to you..these are all scams.

Hopefully this was helpful. I love Craigslist and I love finding unique things. Selling is so easy too, I’ve sold everything from business suits to rice cookers to sofas. I always throw things on Craigslist, that I was otherwise going to donate. Why not try to get a couple bucks for something?! Feel free to ask me any questions you might have. I have a whole lot more Craigslist knowledge that I didn’t share!

Fun CL fact: When we moved from our last apartment we sold enough things on CL (that weren’t going to make the move with us anyway) to cover the cost of our movers. Not bad!

a peek into the archives: maximizing vertical closet space

To celebrate EO’s 3rd Blogiversary we’re taking a peek back into the archives. There are lots of great posts and information in the archives so I thought I’d re-visit some this week. Enjoy!

We are definitely lacking closet space these days. I’m actually not too sure it’s that we’re lacking, it’s more that our last place had about four too many closets and I found the need to fill them. In efforts to maximize every inch of space in our living room closet I put Al to work.

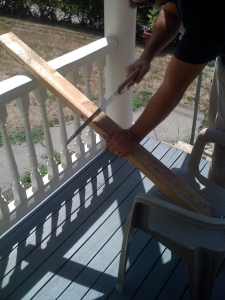
After we were robbed in our last apartment my dad cut these wood slats to secure the windows. I’m going to digress here for a minute. If you cut slats to the size of your windows and insert them right along the edges there’s no way to get the window open. Very helpful for a little extra security in your home.

Back to the closet. We don’t have nearly as many windows in this place so we had a bunch left over. Al got to work cutting them in half and securing them to the inside of the closet.

In a search through the basement we then found some 2×4′s that he also cut to fit in the closet. Three pieces of wood were what made up each shelf. It now houses mostly office supplies and crafting things that we didn’t have another space for.

You’ll notice the last shelf is a bit shorter. We had this one Rubbermaid bin that didn’t have a top with it so we spaced the shelves so that topless bin could fit under the bottom one. Al then made that shelf a little shorter so we can see what’s in the bin and easily toss things into it when needed, with out having to pull it out every time.

Truly a great use of space because we would have otherwise just stacked everything up and it would not have been accessible at all. Building up and using vertical space can make such a difference. Do you have any great closet storage tips and techniques? Definitely share them here, I’m always looking for more!

tips for a successful yard sale

Yard sale’s are a LOT of work. The prep time, planning time, day of time and clean up adds up. There are a lot of ways to make it easier on you though. Most importantly are planning and organization. If you plan well and organize as you go it’ll be a lot easier on you on the day of.

A few weeks ago we had a huge yard sale at our house. It was up to just the two of us to plan, sort, advertise, prepare and organize. On the day of my dear friend Kaitlin kindly helped us. And it’s a good thing she did because there are some characters out there! Here are some of my tips for helping you to plan a successful yard sale.

PREPARATION

1. Start With Your Supplies: I started by re-using a take out food container to house all my supplies. In there I kept scissors, string, labels, tape and price stickers that I picked up for $1. I used larger labels when I need to write on them or explain the item.

2. Purge Room by Room: We started in the basement and slowly went room by room. Went through every box, bin, closet, cabinet, etc. This way everything stayed a bit more organized when contained to its own room. In the end we did a final walk through of every room again and pulled out a few more things.

{we ran out of boxes, doesn’t look it but it’s still organized. I could tell you where everything is!}

3. Price as You Go & Reasonably: As we purged room by room we stuck price stickers on everything. This way we knew everything was getting priced. It was much easier than going back, digging through boxes and trying to price each item. I hate going to a yard sale when things aren’t priced. I really believe people who price things do better overall. Mostly because customers don’t want to have to ask you a million times how much something costs. And price reasonably. I got a lot of grief about this from family (ahem, Hayley, Al, my Father in Law!!!). I probably priced things lower than needed but in my mind I just want the stuff gone. It worked in my favor, the stuff was gone!

4. Categorize & Box as You Go: We made sure to have empty boxes and bins in each room as we filtered through things. Each box had a category too. For example: sporting goods, office supplies, home decor, crafting, etc. This way when it was time to put everything out on the driveway we could easily keep like items together to make it easier for the buyer.

5. Advertise Appropriately: Signage is very important. When you make signs be sure the writing is large enough and clear so drivers can see it from across an intersection. Check with your town to make sure there are no permits needed to host a yard sale or post signs. Always, always take the signs down immediately after the sale. Craigslist is one of your best bets for advertising. It’s free and so many people scour it and plan out their yard sale route. Also check your local newspaper for ads. They might be inexpensive and another added touch for exposure.

6. Get Change: The day before make sure to go to the bank and get a bunch of small bills. I went a little overboard with the change. You probably need 1-2 rolls of quarters, $50 in singles and $50 in 5’s and 10’s. Even that is probably a lot. You’ll need other change too depending on how you priced things. We made sure to only price in quarter increments so we only had quarters to give back. It made the change situation a lot easier. People paid in dimes and nickles too so we had smaller change if needed.

7. Know Where You’ll Donate Everything: Know ahead of time where you’ll be donating all the yard sale leftovers. This way you can pack up the car and head right there.

DAY OF THE SALE

1. Tag Team: Have one person carting all the stuff out to the driveway, yard or garage and have the other unpacking boxes and setting things up. It takes a while to pull everything out and people often start showing up about 30 minutes before your start time. This is where categorizing things ahead of time works in your favor. You can quickly unload the boxes on to the tables and have all like items already together.

2. Enlist Help: We were so thankful that my friend Kaitlin came to help us. Just having another body there was huge even just for bathroom breaks, food runs, etc. My sister and brother-in-law came half way through too which was great.

3. Have One Money Person: I wore an apron and was the official money person. It was much easier having one of us in charge of the money rather than all of us. Not to say that Al and Kaitlin did sell and take money but it all filtered through my apron to make it easier. Don’t be jealous of my apron, outfit, or Al’s bathing suit that he wears even when he’s not swimming or intending to swim or our totally tired faces. We’d been up since 5am!

4. Have Paper & Bags: You should have these available for those who are purchasing breakables or many items. Makes it easier for them to take them home.

4. Be Happy: It’s overwhelming hosting a yard sale. Be happy though. People will show up early, people will be a little nutty…

{like this lady who made my sister try a bra on so she could see it…}

people will try to buy everything you have for $2. Take it all with a grain of salt. Hold your ground where needed and give in where you can. Remember, it’s stuff you were planning to get rid of anyway.

AFTER THE SALE

1. Count Your Cash! This is the most exciting part. Count up that cash and see how much you made. Hopefully you did well!

2. Pack Up Everything: Have the boxes ready to be filled. We never took anything back in the house, and you shouldn’t! We filled the boxes and loaded up the cars and drove right to the thrift store to donate them. Even the few boxes that didn’t fit, I left outside and brought the next day. Nothing comes back in!

3. Take the Signs Down: Go around and take down the signs you put up. Also delete any Craigslist postings you have up.

4. Have a BEER: Yes. You just worked your ass off. Kudos to you, now kick back and have a drink!

Hopefully this was helpful to you and will help you host a successful next yard sale. Ours was a huge success. We ended up making more than double what we had hoped to make. It was organized, ran smoothly and clean up was a cinch. The rain first thing in the morning freaked me out but it cleared up. Good luck!!

homemade laundry detergent

For a while I had been wanting to try making homemade laundry detergent. There was really no science to my method. I googled around until I found a recipe for it that included the fewest ingredients I had to purchase. I already had some things like washing soda, borax, etc. at home. I only had to buy soap and I was able to get it for free with a coupon I had.

I landed on this recipe and it has been the best detergent. I have no clue the source, I quickly printed it and there was no link on it.

– 2 cups borax

– 2 cups washing soda

– 1 bar of ivory soap

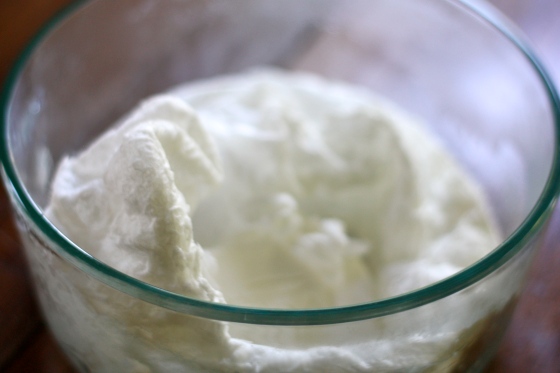
Place bar of soap in large microwave safe bowl. Microwave for 90 seconds. The result will be a dry, brittle, fluffy looking substance.

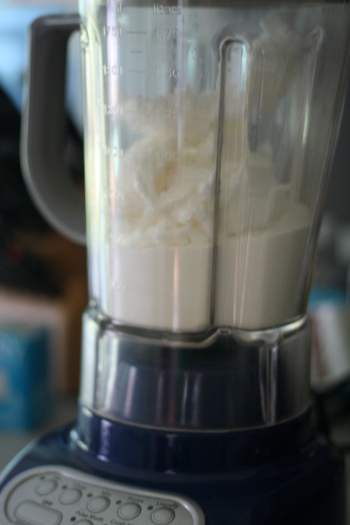
Add this plus 1 cup of borax and 1 cup of washing soda to a blender. Mix well until you have a powdery mixture. Slowly add the last cup of both borax and washing soda and continue mixing until blended well.

Pour the soap into a tight sealed container. Use 1 tablespoon per load. We have a high efficiency, front load washer and we just add a tablespoon to the detergent compartment. If you have a top-load machine I’d assume you just add the tablespoon into the barrel.

Numerous times my dear Al has said he’s not sure if the clothes are coming clean, I think that’s just because there’s no scent on the clothes from a typical detergent. We’re so used to clothing smelling so strongly from the detergent after it’s washed. I put his doubts to the test after we ran the color run.

I had one container of a natural, store bought detergent in the house still. At that moment I guess I doubted my homemade detergent and decided to wash the color run clothes in the store bought. After the wash was finished about 80% of the clothing was still colored. So then I decided to wash the load again with my homemade detergent. This time, the only color left in the load was on the sweatbands, which I just tossed.

I haven’t had any issue of things not coming clean with the homemade detergent. Also, I pre-treat nothing. Don’t use stain remover, stick stick or spray or anything. Everything just gets tossed in. And I’m a nanny so by the end of the day I have paint, dirt, slobber, mushed food and many other things on me. Nine times out of ten everything comes out.

This detergent has been awesome. I actually made this back in May and we still have at least two more months worth of it. That’s 5 months of detergent at no cost since I already had everything (obviously, I forgot to take a photo of the finished product). Out of pocket it would be less than $10, which is a steal for 5 months of detergent. Do you have a different homemade recipe you use? Share if you do!

bedside table organization

I have to give entire credit of this project idea to my Aunt Dianne. She told me about it long ago and I finally acted on it this summer!

It’s so simple, yet probably one of the most useful projects I’ve ever made/created/upcycled/re-purposed. Really the only thing you need is one of those outdoor, barbecue or cookout utensil baskets. The one with all the different sections.

I found mine at a yard sale for $1. It was a little beat up though, so naturally I gave it a coat of spray paint. I then added a small strip of ribbon to the front to cover some of the broken basket pieces. I also cut off the handles.

Before this I always had everything thrown on top of my nightstand; my book, lotion, chapstick, face cream, nail file and so on. Now, everything has a perfect spot. It’s amazing! The compartments are also the perfect size for a TV remote or to roll a magazine into.

It’s just so clever! I would have never thought of this, but I’m so glad my Aunt Di did. I love how neat, orderly and cute it looks. Do you have a certain way of organizing bedside clutter? If you say throw it in the drawer, I’m all for that. Our bedside table drawers barely fit a book though so I needed another option!

yard sale steals and deals

Yard Sale season is in full swing and I couldn’t be more excited. While my foot is just now starting to feel a bit better, I’m not doing any long distance walking, but I can hop out of the car for a quick scan over when needed!

This was my sister’s car packed FULL with finds all from just a few different yard sales. You can’t see the backseat, but let’s just say my mom barely had room to sit!

Here are some things I’ve stumbled upon…

A ceramic pot for our garden: $2

Silverware basket that I’ll be re-purposing: $1

Finally, a legit recycling bin: $1

Yes, I did buy this fan. The fan in our bedroom died like two days earlier: $3

Syrup dispenser and other dispenser for olive oil and canola oil: 10 cents and 50 cents

A clear one of these (they’re hard to find!): $1.00

For flowers because it’s so cute: $3

Another clear hanging thing: $1

I’m psyched with all my finds. When I yard sale I don’t buy things just to buy, I make sure I have a use for or needed everything. I’ll share with you how I used these things in the next few weeks! Oh, and another score I found that’s not pictured, a brand new North Face jacket for FIVE BUCKS. That’s like stealing right there.

Have you guys found any fun yard sale items lately?

indoor house plants

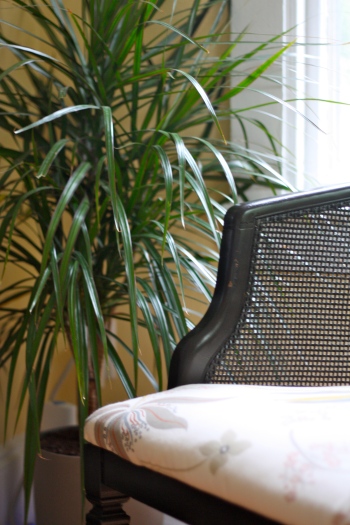
In the past few years I’ve been asked quite a few times about the plants we have in our house. I think I’ve never talked about them because I don’t really know a whole lot about them except for 1. they look pretty and I love the natural greenery indoors and 2. many of them are air purifying plants, meaning they improve the air quality in the house.

We have them scattered around in all the rooms including a few other flowering plants.

And every so often I have a bouquet of flowers in the house. I usually split up the bouquet into a few vases and put them in different rooms. This particular bouquet my dear Alton bought me last week because of what I’ve been going through with my foot.

Since I can’t move around very well I never got around to splitting it so it’s looking pretty nice and full in the kitchen…in a tall beer glass!

Many of the plants we adopted from my father-in-laws house and we grabbed a few at Home Depot.

Al definitely has way more of a green thumb than I do.

Any plants in the house that are dying are because of me, the thriving ones are because of him. This one for instance was my doing, we’re still trying to save it…

I love having plants around. They add such a nice green touch and they’re working hard on the air quality when you didn’t even know it. Do you guys have any particular plants in your homes? For more info on air purifying plants go here. They have no clue who I am, just have good info about the plants!