space saving makeup organization

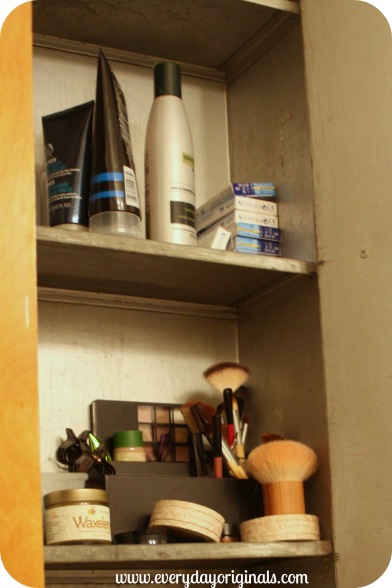
We have this built in cabinet thing in our bathroom. I’ve never seen anything like it and wouldn’t even know what to call it. But it’s fabulous with lots of storage so I’m not complaining. We each have a shelf and then there are two shared shelves with cotton balls, q-tips, etc. It’s incredibly challenging to photograph because of the angle so I couldn’t capture the whole cabinet!

makeup before

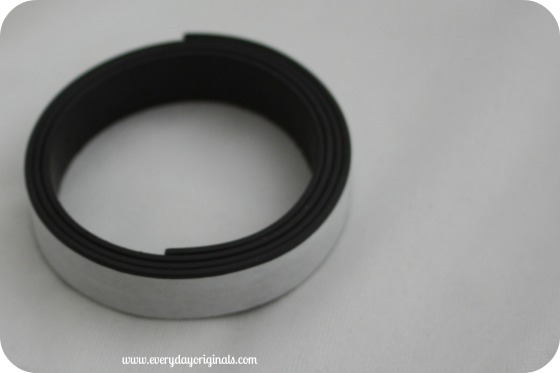
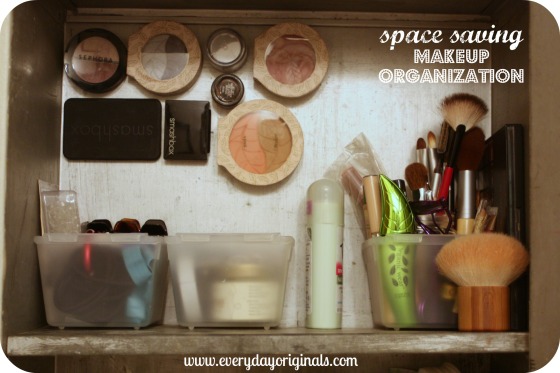
My shelf houses mostly my makeup but there was no organization to it. The simplest thing I could think of was adding magnets to the makeup and sticking them on the walls of the cabinet. So I did. I grabbed a roll of magnets at the craft store for a couple of bucks and cut them to size to fit each pieces of makeup.

magnet roll

I had a pack of three small containers from the dollar store that organized other items such as hair ties, bobby pins and other miscellaneous things. The makeup brushes are in a tiny glass jar that I had. It was the perfect size for the brushes.

final magnets

I gained so much more space and organization just by adding magnets to the pieces I could. So simple, inexpensive and beneficial!

organizing travel sized toiletries

Organizing travel-sized toiletries can be tricky sometimes if you don’t have the right space. They’re tiny and can get mixed in with other things and I feel like they always leak so I never want to just throw them into a container with other items.

When I found this $1 thingy at a yard sale I was psyched. I think it might be for jewelry? But it was the perfect thing for toiletries.

We have a ton of travel-sized items because I can get them for free with coupons. I’m also totally that girl who takes them from the hotel if we didn’t use them all. I mean hey, why not, they’re just going to get thrown out; at least we can use them!

So with my new organizer thing I got to work sorting them by product. Teeth items in one, shampoo, conditioner, lotion, etc.

On the backside were two huge pockets.

I used those to store some extra toothbrushes and paste and then some other miscellaneous extras that I had.

It’s so much easier to find things and the whole thing hangs neatly in a closet! I was also thinking about other uses for this particular hanging thing.

It would be great for: make up organization in the smaller pockets and hair brushes, dryer, straightener in the larger pockets; arts and crafts organization; belts or scarves; medicines and bathroom products. I could keep going, but you get the point. It’s a great way to organize just about anything!

lace painted glass plates

I’ve been wanting to try out this glass plate project for a while now. I’ve just been too much of a wimp to go outside and paint in the cold. But, since this weekend it was 45 degrees out I figured it was a good time to try it out.

I gathered my supplies:

Lace, two spray paint colors, spray adhesive and a glass plate…

And set up on an empty milk carton, on a tree stump. Professional, I know. I turned my plate over so that the bottom of it was facing up. Sprayed a light coat of adhesive and stuck the lace to it.

I let that set for about five minutes. Then, I took my gold spray paint and lightly sprayed a coat to cover the whole plate. Let that dry about 10 minutes.

I peeled off the lace and then sprayed a coat of black spray paint right onto the glass.

As you can see in the photo something funky happened with my black spray paint. It almost looked as if the plate was wet or something, though it wasn’t. I let it dry for about 10 minutes and then did another coat. But, the same thing happened. So, I just let the whole thing dry for about 40 minutes and called it a day.

When I flipped it over it wasn’t nearly as pretty as it was in my head. I realized that I should have sprayed the black first and then the gold. So I did that backwards. I also realized that my lace might have been too dainty. It needed to have more of a design in it. And I didn’t do a good job of getting close to the edges.

So, needless to say this plate was a bust. But, no worries, I have seven more to try it out on. I think they would be great to toss jewelry on to, or keys near an entry way. I just have to figure out how to get it right. I had all the supplies except the lace, which I got on clearance for $2 at Joann Fabrics and the plates I got at the thrift store, a set of eight for $2.99.

So I guess if I get one right out of eight it still wouldn’t have been a bank breaker…!

coat hook necklace hanger

I’ve had these antique swinging coat hooks for a few years now and they’ve come in great use. They’ve held everything from sunglasses to umbrellas to coats to keys. The list could go on.

In this house I had nowhere to hang it to allow it to hold coats and keys. I love it though, so I found a new place for it. I donated my old necklace holder and decided to use this instead.

It fits perfectly next to my dresser mirror and has plenty of space for all my necklaces and bracelets. It makes it a lot easier to look through the jewelry and grab what I need.

How do you guys hang your jewels? Any creative ideas out there? I still use this to organize my rings and earrings. Works perfectly and it was free!

multiple uses for a cake stand

Cake stands, both old and new, are beautiful. Modern ones are clean and chic and vintage ones have so much character. Not only can they be used to serve cakes, but they provide many other uses in the kitchen and can be used as art pieces and decor around the home…

Provide a dropping place for keys and spare change on a small table in the entryway.

Serve desserts (other than cake) and other finger foods or appetizers.

http://www.countryliving.com

Place often worn jewelry or makeup on it and display on your dresser.

Create a centerpiece for a small table using candles, flowers or fruit (fresh or artificial).

http://www.redbookmag.com

Use it in a bathroom to display bath products for use.

The options are endless. Would love to hear if you have any other uses for the cake stand. Cake stands can be purchased pretty much anywhere. I found my light blue one at an antique store in the burbs; got a great price on it because of a minor nick on the underside of the glass…I obviously put up a stink to get that price!

jewelry hanging bulletin board

A friend of a friend shared this great jewelry hanging idea using an old bulletin board and some craft supplies. Here’s the details that Eliza sent along to me:

Materials:
-Bulletin board
-Contact paper (or wrapping paper, scrapbook paper, wall paper, etc)
-Craft paint
-Push pins

I love collecting and wearing funky earrings and necklaces, but I find that if I put them away in jewelry boxes ‘out of sight is out of mind’ and I never think to put them on.  So, I thought of a way to remedy this problem and make a pretty room decoration at the same time!  I made a display board to hang my jewelry on so that I see it and remember to wear it, plus it makes for adorable decor.  This project is super easy, and all the materials I used were left over from other projects or places:

1. Take your bulletin board and paint the frame with your choice of craft paint color.

2. Cut your contact paper to cover the cork part of the bulletin board and attach it to the board.  The nice thing about contact paper is it’s sticky so it stays on the cork without any extra glue or mess, but it is easy to remove if you get tired of the pattern or it gets too beat up from the push pins.  If you wanted to instead, you could attach any kind of decorative paper with mod podge.

3. Insert push pins in your desired pattern and hang earrings and necklaces from them.  I used clear push pins so they mostly disappear when you’re looking at the finished product, but you could also used bright colors or metallics to coordinate with the background paper you used.

That’s it!  A super simple project that gives new life to your old jewelry and adds some personality to your space.

I love this project from Eliza. Such a perfect use for an old bulletin board and a cute way to keep your jewels organized. Thanks Eliza!

brushes galore

Check out this cute idea my sister thought up for storing makeup brushes neat and orderly. It’s perfect on a dresser, vanity, bathroom sink or even in a medicine cabinet. It works especially well for those OCD people like me who can’t stand the brushes thrown in a makeup bag and all smushed together.

Hayley’s is shown here both in the medicine cabinet and out on the sink. It fits perfect in the cabinet for when you want to clean up the bathroom quickly. Share some other great makeup storing tips if you have them!

egg carton catch all

Apologies for the major delay in posts. We’re back on track now. This is the fastest, most simple way to store your jewelry. I was getting irritated because I couldn’t find a simple, out of sight, way to store mine. So I took an empty cardboard egg carton, cut the top off and spray painted it gold. It’s adorable, and honestly doesn’t remind me of eggs every time I open the drawer.

I have a tiny vanity like drawer on top of my dresser, so I then cut the egg carton in half. It fit perfectly in the drawer. Whatever your space allows will work. I use mine for earrings and rings. You could also toss in some necklaces, bracelets, hair ties or pins, spare change, really, anything.

Enjoy, and tell us what you used your painted egg carton for!