washing reusable bags

Reusable bags. We all use them or at least most of us use them/have them. But do you ever wash them? There have been loads of studies and research about the bacteria and grossness that is living on reusable bags. Think about it. They house raw meat, they’re thrown in a dirty grocery cart, then in your car, then maybe the floor of your kitchen. Lots of strangers touch them such as cashiers and grocery baggers. I mean it’s clear that they would be filthy.

photo 2

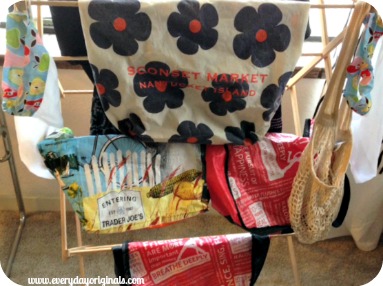
So, your PSA today from EO is to wash your reusable bags! I just washed mine over the weekend, I try to every few months, which in all honesty I should do so more often than that. You can google around and you’ll find loads of info on washing reusable bags. I think it’s bull. They’re bags, you don’t need to waste your time washing all the different types separately or hand washing them. Throw them in the wash with a tiny bit of detergent, wash on delicate cycle, remove and hang to dry.  Even better if you have the outdoor space to do so, hang them out in the sun. The sun is a natural disinfectant.

Other steps I take to prevent food spillage: I always put meat in a small paper bag before putting it in one of my bags. Too many instances of leaked meat, so this helps. I never put raw meats in the same bag as fresh produce. And while we’re on the topic of bagging things, I keep all cold items together in one bag, that way they keep each other cold. Do you guys wash your bags or have any specific way of loading groceries?

homemade deodorant recipe

Yes that’s right, homemade deodorant. I can only imagine the look on my mother and sisters’ faces right now. I did, I set out to find how I can make my own deodorant, if it would be effective and if it would be worth my time. It was actually so much easier than I had ever anticipated and I’m excited to share my findings with you.

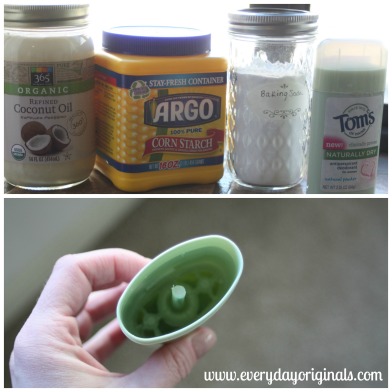
I started by using this recipe. It had four simple ingredients, three in my case:

  • 1/4 cup baking soda
  • 1/4 cup cornstarch
  • 5 tablespoons coconut oil
  • essential oils (optional, I didn’t use any)

After I had completed my currently in use deodorant I saved the container. I carefully took the entire thing apart and soaked it in soap and water. I then scrubbed it really well and let it air dry completely.

PicMonkey Collage2

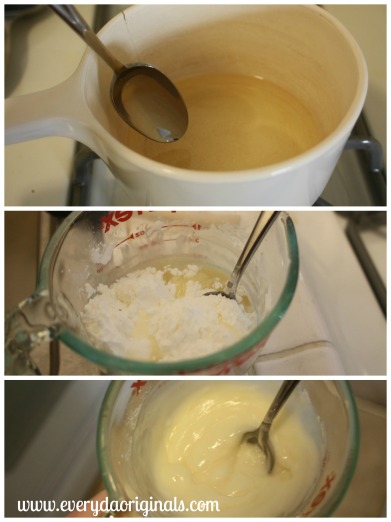
It’s a simple process of mixing the baking soda and cornstarch in a bowl. Add the coconut oil and continue to mix. If you chose, you can add essential oils. I didn’t because I didn’t have any on hand except tea tree oil and I didn’t want my pits smelling like that. Coconut oil’s melting point is 76 degrees so I had to warm ours on the stove before adding to the mixture; more effective than the microwave.

PicMonkey Collage

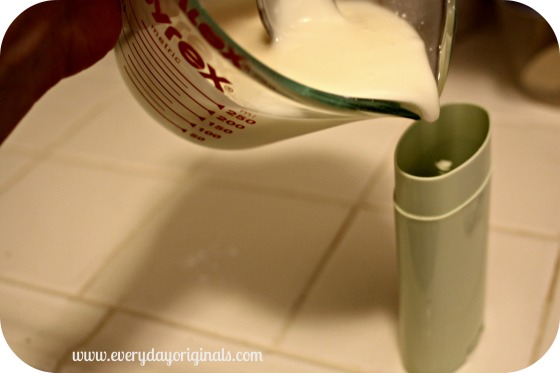
Don’t be confused, our house is hot as hell but for some reason I accidentally put the oil in the fridge so it was solid. I allowed the mixture to cool so not to melt the container. Once cooled I carefully poured it into the deodorant container.

IMG_4259

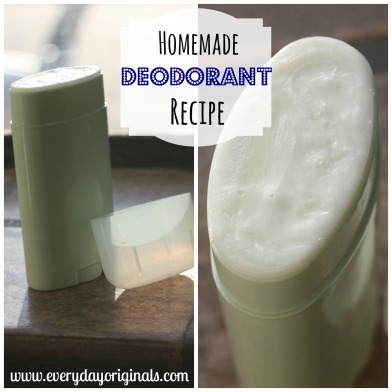
Here’s where my experiment takes a sad turn. First, it was the best product I’ve ever used as a deodorant. On really hot days I would still sweat a tad but nothing major. People weren’t running from me due to bad smells. It’s hot, your body is going to sweat. Here’s the thing. As mentioned above, our apartment is SO hot. As in I put a thermometer in the living room last week and it said 88 degrees. We have crank windows so a simple window unit won’t cut it.

Because of this the deodorant was melting due to the 76 degree melting point of the oil. However, if I put it in the fridge it was too cold and I couldn’t twist it up and it really wouldn’t stick to my skin. If I woke up, took it out of the fridge, let it warm and then put it on it was still too liquidy and not effective.

PicMonkey Collage3

So in the end I had to come to terms with the fact that in my personal living environment it wasn’t going to work. And we really couldn’t justify a $400 stand alone air conditioner just so I could have my homemade deodorant. Defeats the whole purpose of being frugal, ya know?

However, I know that I won’t live in this 88 degree apartment forever and I fully plan on making another batch come fall/winter. Though, the sad party about the oven of a home that we live in is that even in the winter it was probably 70-75 degrees in the place. No exaggeration. We can’t control the heat and apparently we live in a building full of newborns or 90 year olds. It’s insane.

So in the end, I will most definitely be making this again and I foresee it being my go to forever as soon as I can get the temperature in control. Also, it cost me $0 to make because I had everything on hand. Even if I didn’t have everything on hand it would have cost me about $10-12 for ingredients that would probably make 10 or so deodorants. Not half bad at all.

How about you guys, would you try this? Would you do it for the money savings or the lack of conventional ingredients or both?!

diy (free!) storage boxes

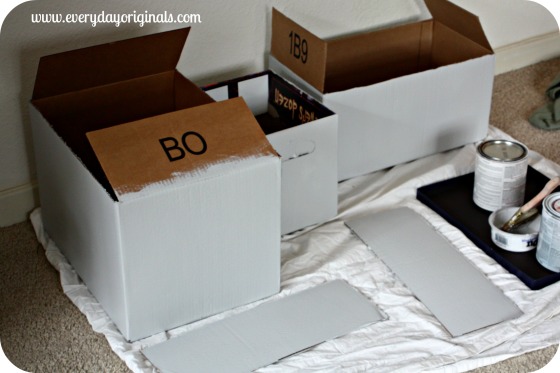
A while back we had some boxes lying around waiting to be recycled. They were all different sizes, large ones, narrow ones and even a few beer boxes. I decided to give a few of them a makeover and create some free storage boxes. This project was entirely free for me as I already had some paint and fabric scraps. However, if you don’t have those items it’ll only cost a few dollars and you could always get away without adding the fabric.

I started by mixing a blackish grey and white paint together that we had. It produced a light grey/bluish color. I painted two coats on all sides of the boxes. They dry pretty quickly but I let them really dry and set for about 8 hours.

painted boxes

I then cut off the flaps on the top of the box. Now, this is the part I kind of made up as I went. I used some scrap fabric I had to create what looks like a liner in the box. However, I only wrapped it around the top part, I didn’t actually line the whole box. I measured and cut the correct amount of fabric, leaving excess to fold into the box. Using my iron I ironed a half-inch seam so that the fabric wouldn’t be uneven and fray

Then, using my hot glue gun, I glued the fabric onto the box. I glued one edge then tightly wrapped the rest around the perimeter. Then I folded the extra into the box and glued it there.  Does that make sense?! I forgot to take pictures of the process, probably because I’m the messiest painter ever and there was paint and hot glue strings everywhere. It was really easy, just make it up as you go, no one will know.

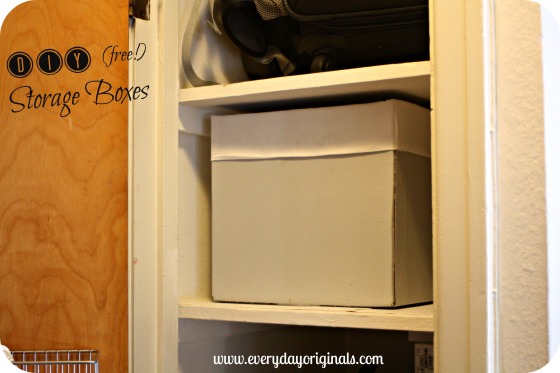
final box

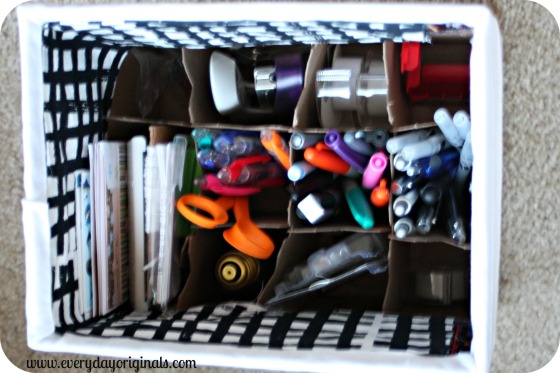
In the end I had some nice, sturdy, free storage boxes. I even left the bottle dividers in one of the beer boxes and used it to separate and organize office supplies. In that one I used some other scrap fabric (the black and white) and glued it to the inside since it was smaller and you could actually see the inside.

box inside

Free. I love me some good free projects. Some of the sizes fit perfectly in our linen closet, others work well on the book cases. How about you guys? Any free projects you’ve been making using what you have around the house?

better than a box: e-book recommendation

I had something different to post today, but instead I wanted to share this with you. I purchased this e-book yesterday and it’s at a discounted price of $1.99 until early Friday morning!

This woman’s blog, Kitchen Stewardship, has changed the way I cook and have looked at food in the past few years. I’ve taken a lot of tips and advice from her and have learned a ton. It’s been especially helpful to me because I’m able to easily see where I need to make substitutions in my cooking so that it fits my dietary needs as well as Al’s.

BTAB book 3d best

source

I’ve always considered myself a healthy, organic, whole foods type of cook. But there’s some recipes that I still turn to cans or boxes or store-bought dressings and she takes all of those foods and products and makes them right in the kitchen. A lot of store-bought products, even if organic, still have so much junk in them, which isn’t healthy for a normal person, but really can mess with me internally and the gastro issues I already have.

I’m psyched to get started with this book and learn more and start cooking and making even more things homemade. It’s making me excited to cook again (I really don’t cook that much any more, Al does most of it!) and explore new things.

If you love homemade cooking I recommend you grab this e-book. You can purchase it as a PDF and download to your computer or to your Kindle or Nook.

I’m an affiliate for KS and get a small portion of the proceeds if you buy the e-book. I only recommend things that I truly believe in here on the blog. And I highly recommend this one!

july pinterest project: diy colored jeans

I know, I know, July Pinterest project is 17 days late. Better late than never though, right? Colored jeans are all the rage these days and there’s been a lot of pinning of DIY colored jeans so I decided to try it out.

I had one pair of jeans that I was thisclose to donating. They were about 5 years old and the knees were so worn out that they were white (the picture makes them look better than they actually did!). It’s just really hard to find good jeans that fit when your short. So, I decided not to thrown them out and to bleach them and dye them.

But, I also had found a perfectly fitting pair of white jeans at a thrift store that I was gonna try it out on too. That was a once in a lifetime experience, finding a perfect fitting pair of jeans at a thrift store. Does. Not. Happen.

I got to work. Now, I hate bleach. This was the first time I had ever used it and it will probably be my last. I simply bleached the jeans in a 3:1 ratio of water and bleach. I think mine was 12 cups water and 4 cups bleach. After two hours nothing happened. So I poured about 3 more cups of bleach into the bucket and instantly started seeing results. This part is totally a trial and error depending on the darkness of the pants you’re bleaching.

Occasionally I stirred the whole mixture with a wooden spoon that I threw away (don’t use your stirring utensil again, trash it!) once I was done. Just to make sure it was bleaching nice and even.

Now, from here is where I started with the white jeans, because those didn’t need to be bleached. I tried out a few different brands/types of dye.

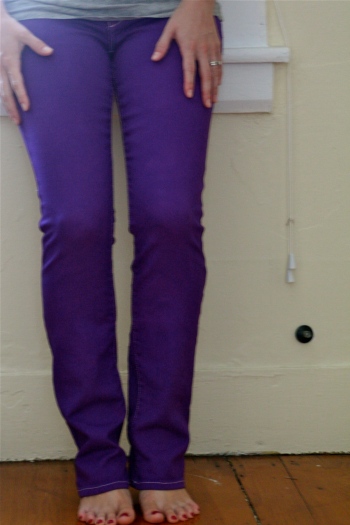
First, I tried dying the purple jeans with powdered Tulip Dye in a bucket and letting them soak. It came out totally uneven though. So the second time around, I used iDye (a new product on the market) in the washing machine. This worked perfectly. It was SO easy and they came out perfectly even and vibrant.

The wine colored ones I used liquid Rit Dye in the washing machine. The color came out very well but the process was too tedious for me. You had to boil water, soak the dye, add salt, let it sit and strategically pour it into the detergent drawer. Also, the color looks nothing like the sample below, it came out more pink.

For all dye jobs I simply followed the instructions on the packages.

I attempted a teal color with the jeans I bleached. Well, after I bleached them I guess I was a little excited.

I didn’t inspect them and just went ahead and dyed them. Turns out, there were dark magenta marks all over the back of the jeans. As if I marker went through the wash with them. You couldn’t see them when the jeans were dark blue but they were totally noticeable in the teal color. So that’s when I re-dyed them the wine color.

The end result was a nice rich purple color and a kind of blah pinkish color. And, as you’ll see in the photo, the pink ones totally lost their elasticity and the button burnt right off of them from the bleach.

So, in the end I donated the pink pair. Maybe they’ll fit someone else who knows how to replace the button? The purple though, I love them!
Maybe if I luck out and find another pair of white jeans I’ll dye them the teal color!

Here was the cost break down:

Jeans: $0 (had them)

White Jeans: $7.99 (thrift store)

Bleach: $2.49

Total cost of 4 packs of dye: $9.56 (I used coupons)

Total = $20.04/ $10.02 per pair of jeans. But I only really got one pair out of it, 20 bucks though, still a bargain. And if I had to do it again I’m a pro now so I wouldn’t bust through four packs of dye!

Good luck if you try it out. The best part (obviously) was the outcome, a little tedious playing the waiting game. I’ve never watched the washing machine so much in my life before!
our watering can rain barrel

This project is hilarious to me. This is what happens when you leave Al alone for a few hours! We’ve been needing a watering can (we usually use the blender container to water plants) and I’ve been wanting a rain barrel. I’ve been too cheap to purchase the rain barrel or to make one and frankly, I’ve been lazy and haven’t gotten around to getting a watering can.

On a recent weekend trip we had bought one of these jugs of water. There was about a quarter left of it so we took it home with us. Once we drank the water Al went to town. Using some screen that he found in the basement he created a watering can rain barrel.

It’s super simple. He cut out a few holes on the top and then cut the screen pieces to fit. He hot glued the screen pieces on and let them dry.

Now we just place it amongst our garden. When it rains it collects water, if it hasn’t rained we easily fill it up in the kitchen sink (we don’t have a spigot outside the house) and use the spout to go around and water the plants.

Is it the eyesore of the garden? Potentially. Was it free and serves the purpose it needs? Certainly does. That Al, I’ll tell ya, he solves all the problems around here!

this year’s garden

Our garden is starting to bloom now! We scaled back our garden this year, from last year’s awesome one. Mostly for one simple reason: we don’t have a spigot outside the house. So trekking water through the house, down the stairs and to the garden got to be a bit much with so many things growing and so much water needed. This year we focused more on the things that we really like and eat regularly.

We planted: mixed greens, cucumbers, yellow squash, tomatoes, cantaloupe, basil, cilantro and parsley.

We have this massive stump in the yard that serves no purpose. We toyed with turning it into a table but it’s not positioned correctly for that. Our outdoor table, that we got for free on Craigslist last summer, was pretty beat up and the base of it would no longer stay together. So we painted the tabletop, tossed the base and secured it on top of the stump. It was the perfect spot to raise the planters up a little and not have them take up precious yard space. It’s a jumble of random planters and looks a little funky, but hey, it’s a conversation piece!

I also planted one flower pot of pansy’s and tossed a few under some bushes at the front of the house (they’re behind the wagon). I didn’t actually think those ones would survive but they’re thriving!

The last thing I planted were these super colorful flowers (I have no clue what they’re called).

My yard sale find wagon was the perfect container for them. I bought the wagon specifically for planting flowers and I think they look perfect. These are placed right at the bottom of the staircase.

So for the most part our outdoor space has been colorful and thriving lately and we love it! Now if we could just find another free table on Craigslist we’d be set! Have you guys been planting anything lately? Have vegetable gardens? Flowers?

indoor house plants

In the past few years I’ve been asked quite a few times about the plants we have in our house. I think I’ve never talked about them because I don’t really know a whole lot about them except for 1. they look pretty and I love the natural greenery indoors and 2. many of them are air purifying plants, meaning they improve the air quality in the house.

We have them scattered around in all the rooms including a few other flowering plants.

And every so often I have a bouquet of flowers in the house. I usually split up the bouquet into a few vases and put them in different rooms. This particular bouquet my dear Alton bought me last week because of what I’ve been going through with my foot.

Since I can’t move around very well I never got around to splitting it so it’s looking pretty nice and full in the kitchen…in a tall beer glass!

Many of the plants we adopted from my father-in-laws house and we grabbed a few at Home Depot.

Al definitely has way more of a green thumb than I do.

Any plants in the house that are dying are because of me, the thriving ones are because of him. This one for instance was my doing, we’re still trying to save it…

I love having plants around. They add such a nice green touch and they’re working hard on the air quality when you didn’t even know it. Do you guys have any particular plants in your homes? For more info on air purifying plants go here. They have no clue who I am, just have good info about the plants!

reusing shoe boxes

I love to organize. That’s nothing new and nothing you didn’t already know. What I don’t like is spending money on pricey bins, baskets and containers. If I’m going to spend money on them I try to only buy them if they’re going to be seen or they have some functionality that is convenient to us.

Pretty much though, behind closed doors, I try to reuse shoe boxes for most organizing. They’re the perfect size and are typically pretty sturdy cardboard.

I use them in the freezer to organize foods. Vegetables in one, fruits in the other. I use them in the bathroom cabinet.

First aid supplies in one, medicines and miscellaneous items in the other.

I use them in closets to corral extra toiletries and travel sizes items.

Shoe boxes are also great sized boxes to wrap gifts in. Of course, take out the paper and that stay fresh packet thing first. I’ve also found a great Pinterest Project, that involves shoe boxes, that I hope to work on soon.

Overall they’re great for a lot of things other than storing shoes. I’d love to know if you use shoe boxes for anything. Storage? Organizing? Wrapping?